Working with Layers
Introduction to Layers and Objects
Using Layers to Organize Objects
Complex designs can consist of hundreds or thousands of elements. Even if you name all of them appropriately in the list of objects, it would still be difficult to manage them. Layers provide a way to organize objects into sets. A layer serves as a folder on your disk that contains some number of items in isolation from others.
A new document has only one layer. All objects appear in this layer by default. You can add more layers with meaningful names, and organize elements of your design into groups by type, color or other principle. You can also add sublayers inside a layer. This can be used to keep together identical items.
A layer lets you manipulate objects that are inside as a whole by switching the visibility on or off, locking them or adjusting their transparency.
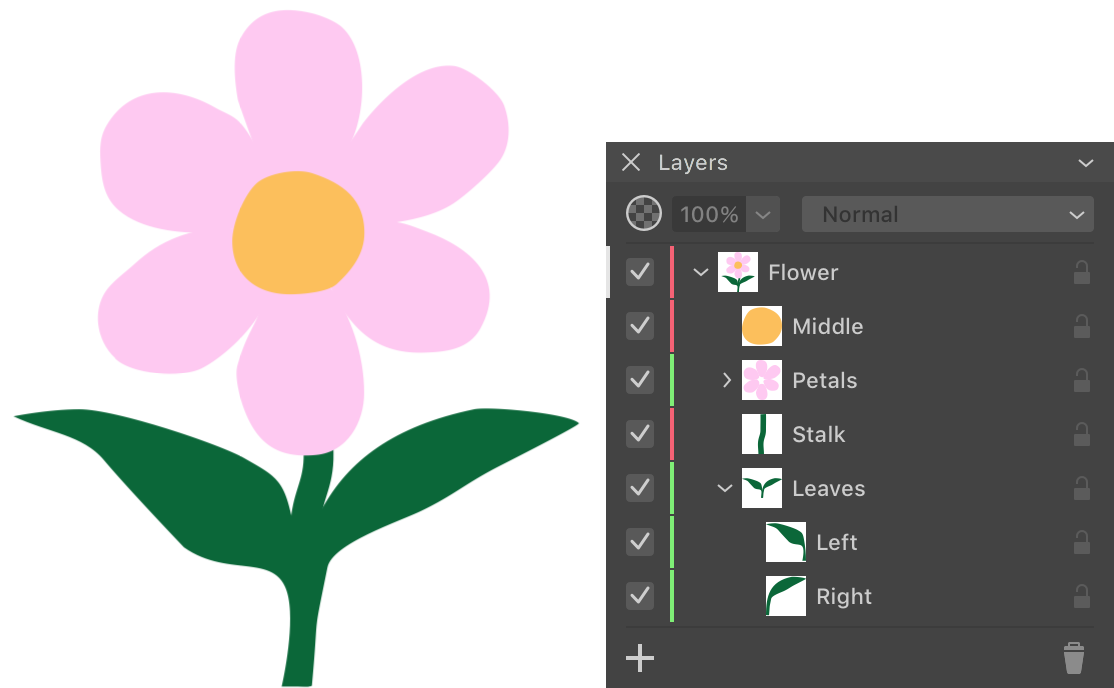
Let's see how we can use layers for a flower design. We can place all parts of the flower into a single layer. Also, we can add two sublayers for leaves and petals.

Any layer can include one or multiple objects or sublayers.
Objects are not bound to layers. You can relocate an object to another layer by a simple drag-and-drop in the Layers panel.
About the Layers Panel
The Layers panel is a complete list of layers and objects that you have in the document. This list is presented as a structure where layers appear as top level items. You can look inside of a layer and see objects and sublayers in it. The whole list from top to bottom represents exactly the same order in which objects appear in the document. If some object is behind others on the canvas, this object will be lower than others in the Layers panel.
In order to visually link objects on the canvas with layers, the object's boundary, when it is selected, has the same color as the color that marks the corresponding layer in the Layers panel. This works only if a single item is selected.
More details about the panel can be found in The Layers Panel section.