Working with Layers
The Layers Panel
The Layers panel helps you organize objects in your document. It displays objects as a list. The top-level items in this list can only be layers. Each layer serves as a folder that can store objects and sublayers. In complex designs, you can place related objects into the same layer to keep them together. A simple design can have a single layer.
To open the Layers panel, choose Window > Layers from the main menu.

1 - Opacity of a layer or object.
2 - The active layer is marked by a line near the panel's left side.
3 - Visibility option.
4 - Layer's color.
5 - Add a new layer.
6 - Reveal a selected object in the list. This button tries to make a selected object visible in the Layers panel and on the canvas. If necessary, it can scroll the object list in the panel and it can zoom and scroll the canvas.
7 - Blend mode of a layer or object.
8 - Lock option. You can lock an individual object, or a layer with everything inside it.
9 - Delete the active layer or selected object.
Each line in the list relates to one layer or one object (or compound object or group).
Items in the list have default names. To edit a name, double-click on it. Then press the Enter key to apply a new name.
Layers and objects in the list have the context menu with these commands:
- New Layer creates a new layer above the current one.
- New Sublayer creates a new sublayer.
- Duplicate creates a copy of a layer or object.
- Delete deletes a layer or object.
- Select All Layers selects all layers including hidden and locked ones.
- Select All on Layer selects the contents of the active layer including paths, groups and sublayers. If you select one object and then run the command, all the rest objects on the same layer will become selected. You can also select a layer directly. If several layers are selected, the command will select the contents of these layers.
- Hide hides a layer or object.
- Lock locks a layer or object.
- Unlock All unlocks all layers and objects.
- Make Non-Printable marks a layer as non-printable. All the contents of a non-printable layer will not be exported or printed. The Make Printable command makes the layer contents printable again.
- Merge Selected merges selected layers. The result is a single layer that contains objects of the original layers.
- Collapse All shows only the top layers' names in the list. The content of layers, including sublayers, will not be displayed. To show it again, click on the v-shaped icon of the corresponding layer.
- Isolate Active Layer isolates objects of the active layer. See Isolate Active Layer for details.
Autoscroll to the Selected Object
The Layers panel focus on selection checkbox in the Preferences defines two modes in which the panel can operate. If you select an object on the canvas when the checkbox is on, the panel will scroll the list of objects to make the selected object visible. If other layers are present in the panel, their contents will collapse. If you deselect the selected object, all of the layers become collapsed. When the checkbox is switched off, the Layers panel doesn't change its state when you select or deselect objects.
Active Layer
At any given time, one layer is active. If you add an object, the latter will be placed into the active layer. The currently active layer is indicated by a line on the left side of the Layers panel. Only one layer can be active.
Do not confuse the active and selected layer terms. You can select multiple layers, but only one of them will be active.
To activate a layer, click on its name or icon in the Layers panel. A layer also becomes active when you select any object in it.
Isolate Active Layer
The Isolate Active Layer mode defines how the app selects multiple objects. It differs from how the Isolation Mode works with objects and groups. When the Isolate Active Layer mode is activated, calling the Select All command, using the selection frame or clicking on objects on the canvas would select only objects in the active layer. However clicking in the Layers panel on any object or group located in any layer will select those whether the mode is on or off.
Visibility of Layers and Objects
Objects that you add to the design are visible by default. To hide an object or layer, deselect a checkbox near its name.
Hiding a layer is equivalent to hiding all objects in this layer.
Hidden objects do not appear on the canvas and are not visible in the exported or printed graphics. Invisible objects do not interact with other objects. For example, there will be no effect from an applied blend mode or a combine option.
Opacity of Layers and Objects
You can make an object or layer transparent or semi-transparent by changing the value in the top left corner of the panel.
Setting a certain level of opacity for a layer gives a result similar to setting the same level of opacity for all objects in this layer.
Locking Layers and Objects
You can lock an object or layer by clicking on its lock icon. A locked item cannot be selected on the canvas and therefore it is protected from editing by mistake.
By locking a layer you lock everything in it.
Notice that guide lines have another way to be locked or unlocked using the View > Guides menu.
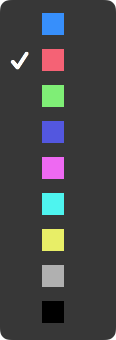
Layer's Color
Each layer has a color associated with it. It is used to establish the relationship between a layer and items in this layer. Once you select an object on the canvas, its boundary or path has the same color as the layer it belongs to. This color doesn't affect your design.
In the Layers panel, the color of each layer is shown as a vertical color bar to the right from the checkbox.
To change the color, click on the bar and choose a new color from the pop-up menu.
Find an Object on the Canvas
As soon as you zoom in to work with one object, the others may appear outside the editing area. So to get to another object, you may need to zoom out and then scroll. You can also jump to a particular object by double-clicking on its icon in the Layers panel. This function fits the object into the editing area and selects it. In a design with many elements, this way may be faster than scrolling and zooming.
Double-clicking on the layer's icon in the panel fits all objects of the layer into the editing area.