Layout
Layout Guides
Guide Lines
Guide lines (or guides) are used to align objects on the canvas. They can also be used to visually split a sheet into several parts.
To add a guide:
- Double-click on a ruler at the coordinate where a guide should appear. Use the horizontal ruler to add a vertical guide and vice versa.
- Place the cursor over the vertical or horizontal ruler. Press and hold the left mouse button. Move the cursor towards the canvas. Release the button where you want to place the guide.
- Use either View > Guides > Add Horizontal Guide or View > Guides > Add Vertical Guide menu command.
To move a guide, drag it with the mouse. It is possible to select a guide by clicking on it. Then you can move it using the arrow keys.
To input an exact coordinate, select a guide and then type the coordinate into the X or Y field in the Geometry panel.
To lock a guide, click on its lock icon in the Layers panel. To lock all guides, select View > Guides > Lock Guides in the menu. Locking guides prevents them from being accidentally moved. To unlock guides, use the View > Guides > Unlock Guides menu.
In order to hide or show all guides, use either View > Guides > Hide Guides or View > Guides > Show Guides menu. The Layers panel lets you make individual guides invisible and visible.
To delete a guide:
- Select it and hit the Delete key.
- Use the Layers panel.
In the Guides and Grid tab of the Preferences, you can change the color of guides.
Smart Guides
When you move or resize an object, the program helps you align it with others using smart guides.
A smart guide is a line that looks like a regular guide, but shorter. It appears in your document automatically when an object you manipulate becomes aligned with something in the design. The smart guide that is displayed at that moment visually links the object with the point it is aligned to. If you move the object farther, the alignment will be broken, and the smart guide will disappear.
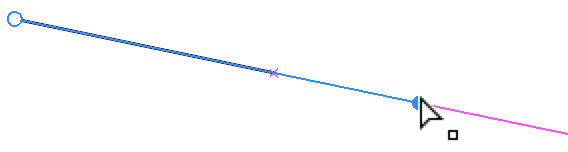
When you are moving one of the ends of a line, a smart guide can display the extension of the line helping you snap to the same angle. A small cross indicates the original location of line's end.
Create a Guide from a Path
You can create a guide from a path. This may be helpful if you need a guide with unique properties. For example, a customized guide can have an angle other than 0 or 90 degrees. Customized guides can be much shorter than the standard ones. This enables you to have a guide only in the area where it is needed. A new guide can be created from a non-straight path as well.
To turn a path into a guide, use the View > Guides > Make Guides menu command.
You can also convert a guide into a path by using View > Guides > Release Guides.