Selecting and Arranging Objects
The Geometry Panel
The Geometry panel lets you adjust an object's size and coordinates, and change its other properties. To open the panel, choose Window > Geometry from the main menu.

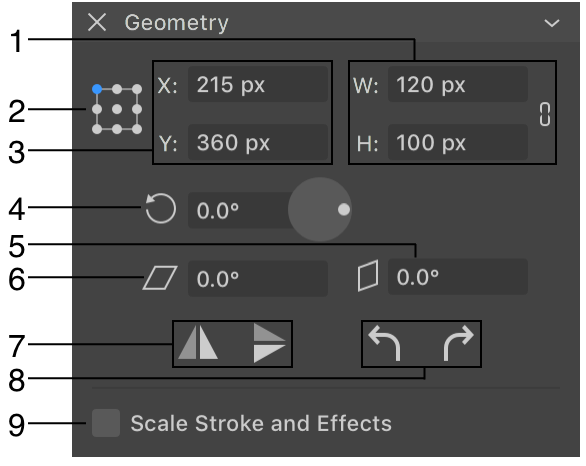
1 - The object's width and height. The Maintain Aspect Ratio option can prevent an object's deformation when you change one of its dimensions. The Maintain Aspect Ratio icon is located to the right of the text fields.
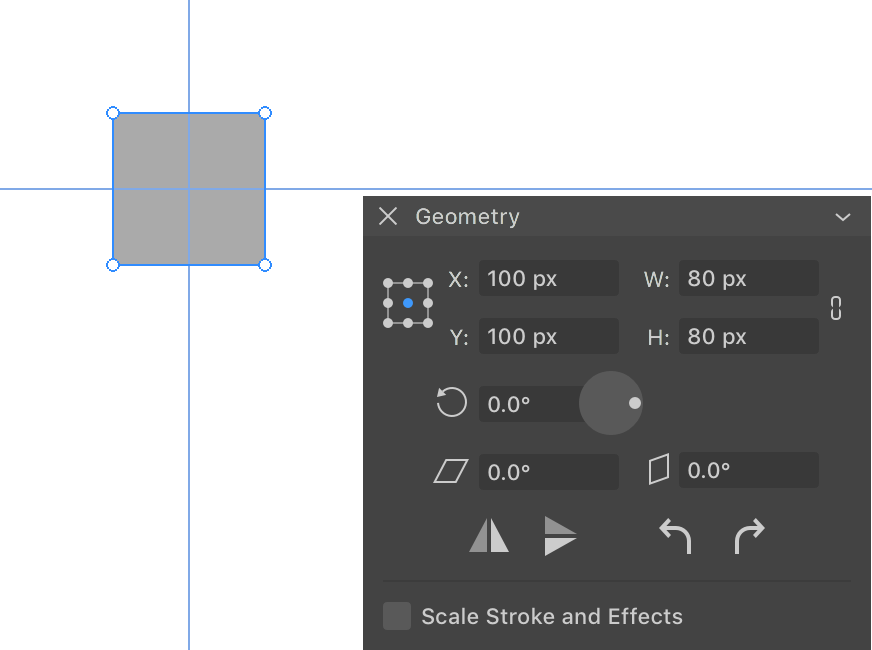
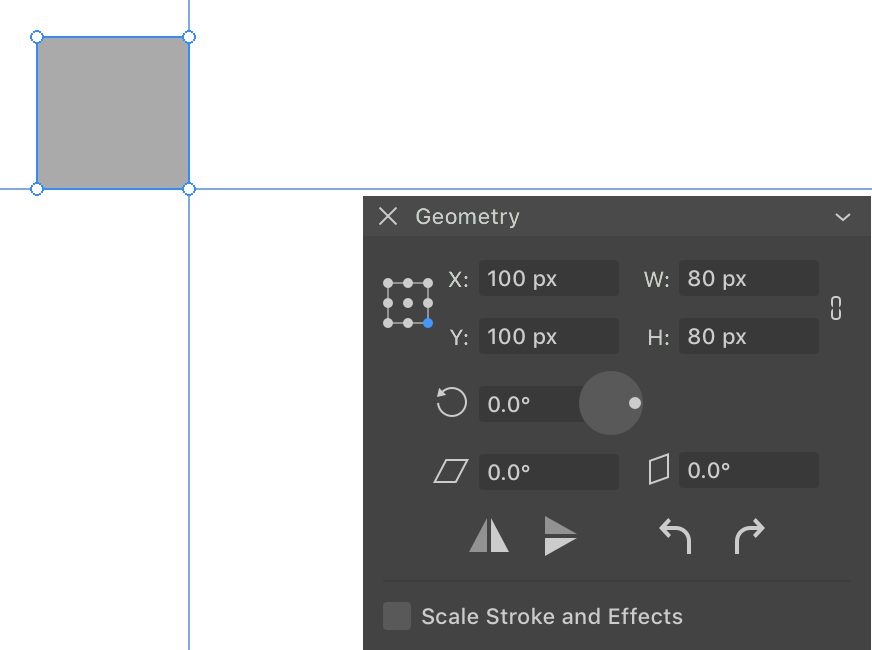
2 - Reference point selector. The coordinate defined by X and Y is the location of the reference point. The 9-point selector lets you choose a corner, the middle of any side or the center.
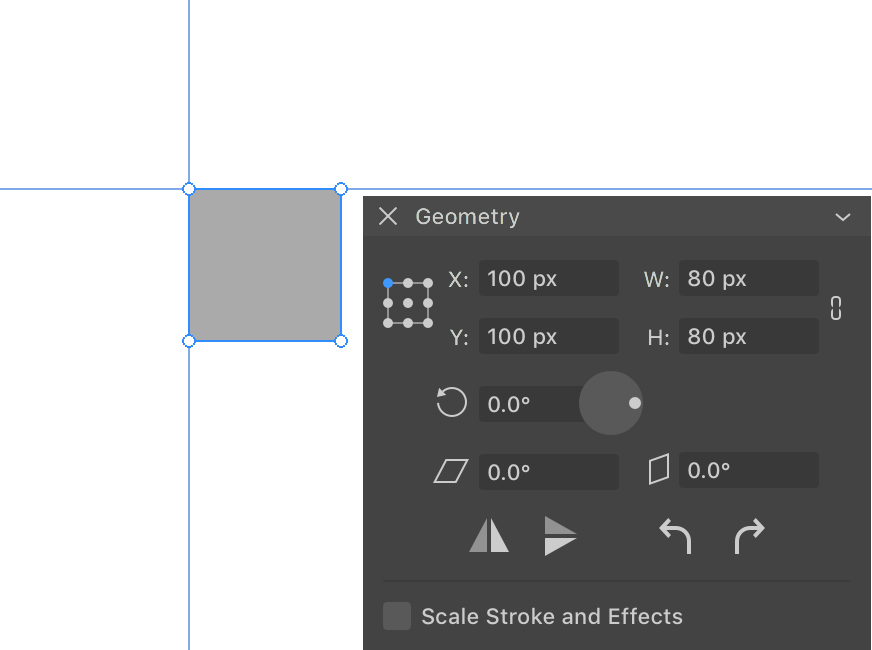
With the same coordinates but different reference points, an object will have different locations.


3 - The object's coordinates.
4 - The rotation tool. You can either input the angle into the text field or rotate the circular control.
5 - The vertical Shear tool.
6 - The horizontal Shear tool.
7 - Flip horizontally or vertically.
8 - Rotate an object 90 degrees left or right.
9 - Scale stroke and other effects when the object is resized. For example, making an object twice as big, you can expect that its stroke and shadow will be two times wider.
Move and Rotate an Object with the Geometry Panel
To move an object to a new location, change its X, Y or both coordinates. Notice that, by default, X and Y coordinates define the location of the top left corner of the object's boundary. You can choose one of nine points using the Reference point selector.
In order to resize an object, change the W and H properties. Use the Maintain Aspect Ratio button to preserve the object's aspect ratio while you are modifying either the width or height.
To rotate an object, input a new value into the angle field, or drag the handle on the circular rotation tool.
In order to rotate an object with 90 degree steps to the left or right, click the corresponding bent arrow icon.
Apart from rotation, you can also mirror objects using the vertical and horizontal flip buttons.