Selecting and Arranging Objects
Align and Distribute Objects
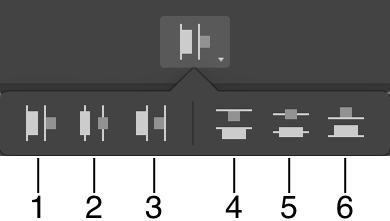
In order to access the Align, Distribute or Spacing tools, select objects. Each of the three buttons that will appear in the Control panel opens the corresponding set of tools.
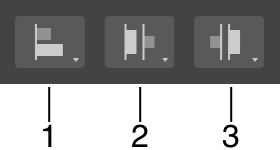
1 - Align tools.
2 - Distribute tools.
3 - Spacing tools.
Align Objects
This section explains how to align objects to one other. If you want to align an object to the grid or guide line, go to the corresponding page.
To align objects, select two or more of them. If only one object is selected, it will be aligned to one of the edges or center of the active sheet.
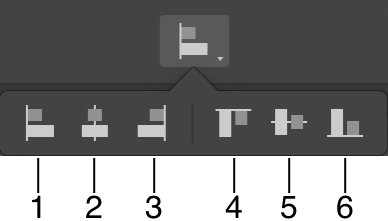
1 - Align to the leftmost object.
2 - Align objects' centers horizontally.
3 - Align to the rightmost object.
4 - Align to the upper object.
5 - Align objects' centers vertically.
6 - Align to the lower object.
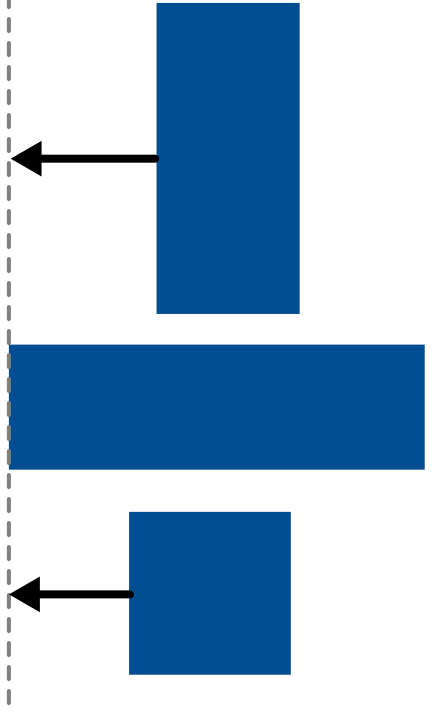
Let's take the first tool to explain the alignment principle. The program finds an object whose left side or a single point is the most far to the left compared to other objects. We can call this object a key object. Then the rest of the objects are moved to the left until they reach the leftmost point of the key object. The key object always retains its position. Notice that the program considers only the path. Strokes, shadows or other properties that may visually affect the objects' dimensions are not taken into account.
When you choose to align objects' centers, the centers take the same horizontal or vertical coordinate. This coordinate is calculated as the center of the boundary of all currently selected objects.

Distribute Objects
The Distribute tools equalize the distance between sides or centers of selected objects. You should select three or more objects in order to distribute them.
To distribute objects, the program finds two key objects. These are the rightmost and leftmost objects to distribute horizontally, or the upper and lower objects to distribute vertically. The key objects retain their positions. All the remaining objects will be relocated in order to comply with the selected Distribute command.
Make equal distances between:
1 - Left sides of objects.
2 - Centers of objects horizontally.
3 - Right sides of objects.
4 - Tops of objects.
5 - Centers of objects vertically.
6 - Bottoms of objects.
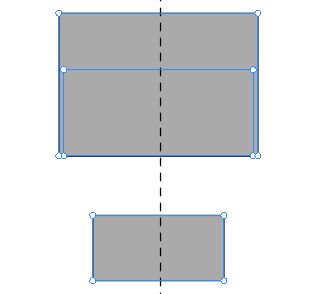
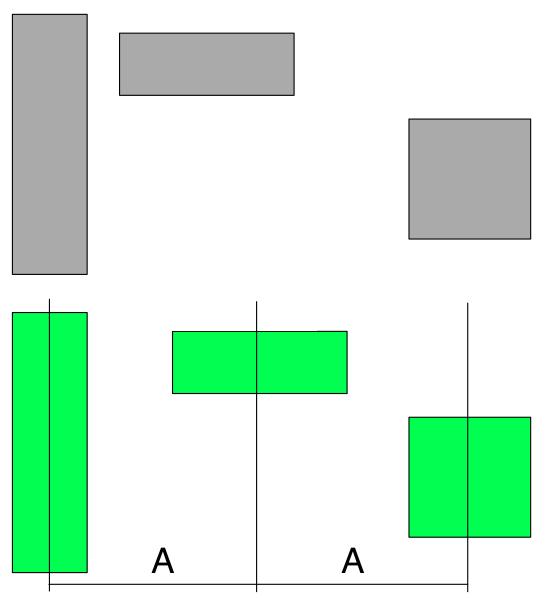
The image below demonstrates the original location of the objects at the top, and the result of the Distribute centers of objects horizontally tool.
Set Up Spacing
The Spacing tools are used to set up an exact distance between objects. You should select two or more objects in order to set up spacing between them.
In order to set new spacing, the program defines a key object (e.g., the leftmost for horizontal spacing). The position of this object will be fixed. All the remaining objects can be moved in order to make spaces between them equal to the value you set.
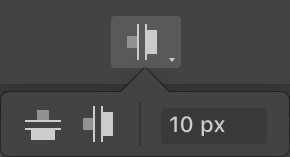
The image below shows what happens with the objects' locations when you set the horizontal spaces between them to a particular value.

Align and Distribute Anchor Points
The Align, Distribute and Spacing tools can also work with individual anchor points including those that belong to different paths. The Select Anchor Points subsection describes how you can select anchor points.