Drawing
Edit a Path
Choose the View Mode
Objects in your document can be displayed with all their features or as wireframes.
In many cases, the regular view mode is convenient for editing a path. If you prefer a clear view when no strokes, fills or other effects are visible, you can activate the Outline Preview mode by selecting View > Outline Mode in the main menu.
Select a Path
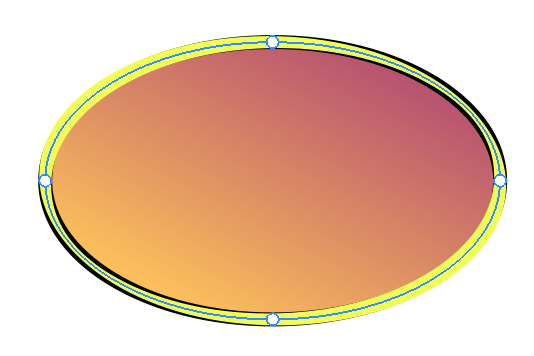
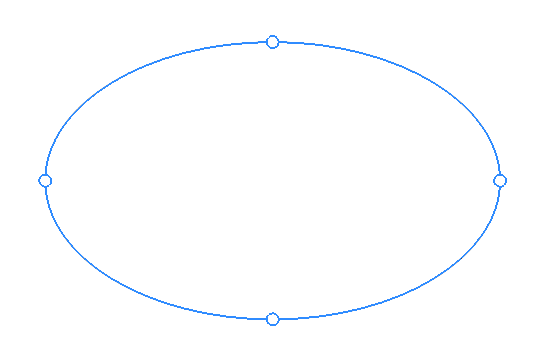
To work with a path or anchor point, you should select it. You can select either the entire path, individual anchor points or all anchor points.
To select the entire path, click on it with the Selection tool ![]() . You can also click on the object's stroke, or even filled area, depending on what is visible and easier to reach.
. You can also click on the object's stroke, or even filled area, depending on what is visible and easier to reach.
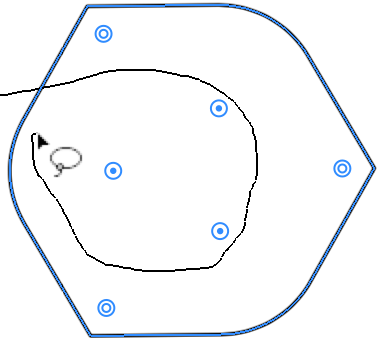
The Selection tool lets you select a path by drawing a selection frame around it. To do this, place the mouse pointer over an empty space. Press the left button and move the mouse toward the object. Once the selection frame touches the path, the latter becomes selected. Notice that you can select several paths in this way. Also notice that this method selects all anchor points that you outline.
Select Anchor Points
In order to select an anchor point, select the path first. Then click on the anchor point with the Selection tool. To select several anchor points Shift-click on each of them.
You can select multiple anchor points using the selection frame as explained above.
Sometimes it may be difficult to select certain anchor points using the selection frame because anchor points that shouldn't be selected also appear inside the frame. If there are only a few of those that were selected unintentionally, you can deselect those anchor points by Shift-clicking on them.
Selecting Points Using the Lasso Tool
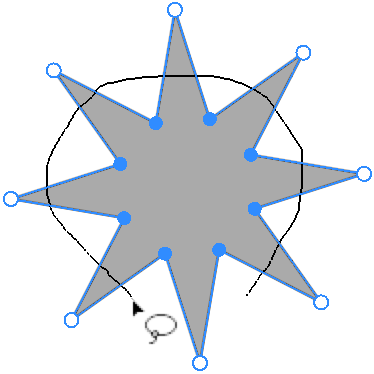
The Lasso tool ![]() can help you select anchor points when the selection frame is not effective. Outline one or more anchor points that you want to select with Lasso. This tool lets you select extra points in addition to those that are already selected. To do this, press and hold the Shift key before using the Lasso tool. An opposite technique is also supported. You can select all of the object's anchor points and then deselect those that you don't need. This can be done by selecting a range of anchor points with any suitable tool. After that, holding down the Option key, outline points that you want to deselect with the Lasso tool.
can help you select anchor points when the selection frame is not effective. Outline one or more anchor points that you want to select with Lasso. This tool lets you select extra points in addition to those that are already selected. To do this, press and hold the Shift key before using the Lasso tool. An opposite technique is also supported. You can select all of the object's anchor points and then deselect those that you don't need. This can be done by selecting a range of anchor points with any suitable tool. After that, holding down the Option key, outline points that you want to deselect with the Lasso tool.
With the Lasso tool, you can also select handles that are used for rounding corners.
Controls of the Selection Tool
The Control panel displays the following options when the Selection tool is activated.
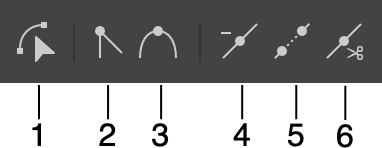
1 - Edit a segment by dragging. You can grab and bend the segment at any point. The ends of the segment will preserve their locations.
2 - Convert a selected anchor point to the corner point type.
3 - Convert a selected anchor point to the smooth point type.
4 - Delete a selected anchor point.
5 - Link two ends of a path with a straight segment. If you select an open path, the command will close this path. The command can also join two open paths if you select one end point of a first path and another end point of a second path.
6 - Cut the path at a selected anchor point(s). The tool does not create any visible gap because the ends of the created paths will coincide at the cut points.
Add an Anchor Point
- Activate the Pen tool
 .
. - Click on a path where you want to add a new anchor point. Adding an anchor point will not change the shape of the path.
The same can be done in the Add Point mode ![]() selected in the Control panel.
selected in the Control panel.
Move an Anchor Point
To move an anchor point to a new location, drag it with the Selection tool or Pen tool (main mode).
You can set the coordinates of a point in the Geometry panel. If several points are selected, they will move together by the same distance in relation to the rest of the points. The new X and Y will define the coordinate of a bound that includes the selected points.
When multiple anchor points are selected, the Rotation tool rotates these points around the common center. In case only one point was selected, you can rotate the direction lines of the point.
Delete an Anchor Point
You can use either the Pen or Selection tool to delete anchor points.
Delete an Anchor Point Using the Selection Tool
- Activate the Selection tool
 .
. - Select an anchor point.
- Click on the Remove Point button
 in the Control panel in order to delete the selected anchor point.
You can select multiple anchor points using the Selection or Lasso tool in order to delete them together.
Delete an Anchor Point Using the Pen Tool
- Activate the Pen tool .
- Click on the Remove Point button
 in the Control panel.
 - Click on an anchor point that should be deleted.
To preserve the shape of the path, as far as possible, hold the Shift key while you are deleting points with the Pen tool.
Link Anchor Points
You can link end points of the same path or end points of two independent paths. In both cases, the points will be connected with a straight segment.
To close a path, select it with the Selection tool ![]() . Then click on the Join button
. Then click on the Join button ![]() .
.
To link two independent paths, make sure that none of them is closed. Using the Selection tool ![]() , select one end point of each path that should be linked. Then click on the Join button
, select one end point of each path that should be linked. Then click on the Join button ![]() .
.
Set the Type of an Anchor Point
Anchor points can be of smooth or corner type.
To set the type of an anchor point:
- Activate the Selection tool .
- Select an anchor point.
- Choose one of the Convert options in the Control panel.

You can also convert an anchor point to another type while the Pen is activated. It has the Convert buttons as well.
Another way to change the anchor point type is to double-click on it with the Selection or Pen tool.
Finally, you can turn a smooth point into a corner point by changing the angle between the direction lines from 180 degrees to any other angle. To do this, use the method described in the Adjust Direction Lines of a Corner Point subsection.
Change the Shape of a Corner
One more way to reshape a path is to change the shape of the corner created by this path. For example, you can turn a sharp corner into a rounded one.
How to do this is explained in the Rounding Corners section.
Manipulate Direction Lines
You can change the length and angle of direction lines using the Pen and Selection tools. To do this, drag the respective direction point to a new position. The difference between the two tools will be explained further.
You should select an anchor point in order to access its direction points. If a selected anchor point displays neither direction lines nor direction points, read the Show Direction Lines of a Corner Point subsection.
It is possible to move one or two direction points at the same time. By manipulating only one direction point, you can change the angle between direction lines attached to the same anchor point. In this way, you will convert the latter to a corner anchor point. By moving both direction points synchronously, you can keep the angle between the direction lines equal to 180 degrees. As a result, the anchor point will remain smooth. Note that the second case is possible only if the original anchor point is smooth.
Adjust Direction Lines of a Smooth Point
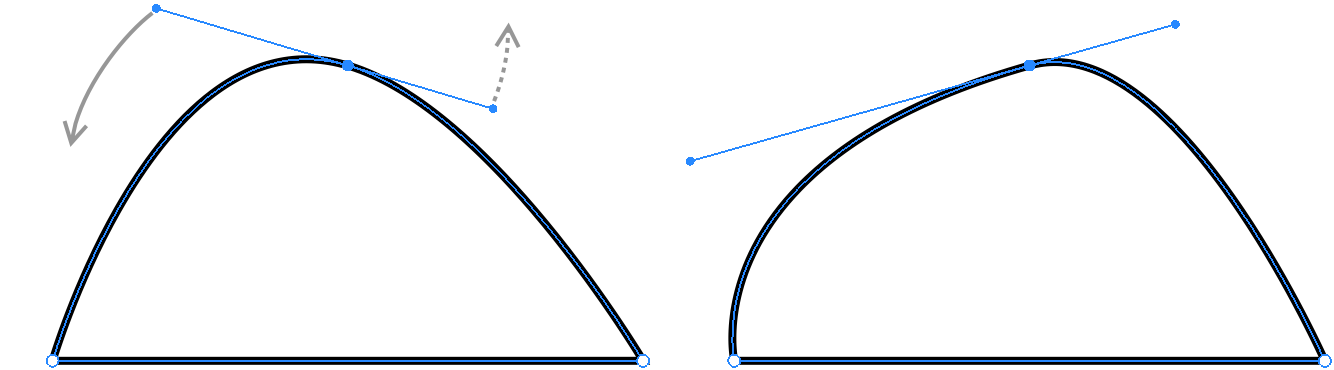
Activate the Selection tool ![]() . Select an anchor point. Place the cursor over one of the direction points, press the left mouse button and drag aside. In this way, you can adjust the length of the direction line whose point you are moving, and you can also change the angle of both direction lines. The anchor point will remain smooth.
. Select an anchor point. Place the cursor over one of the direction points, press the left mouse button and drag aside. In this way, you can adjust the length of the direction line whose point you are moving, and you can also change the angle of both direction lines. The anchor point will remain smooth.
Adjust Direction Lines of a Corner Point
Activate the Selection tool ![]() . Select an anchor point. Place the cursor over one of the direction points. Holding down the Option key, drag the point aside. In this way, you can adjust the length and angle of the direction line whose direction point you are moving. The other direction line will not be affected.
. Select an anchor point. Place the cursor over one of the direction points. Holding down the Option key, drag the point aside. In this way, you can adjust the length and angle of the direction line whose direction point you are moving. The other direction line will not be affected.
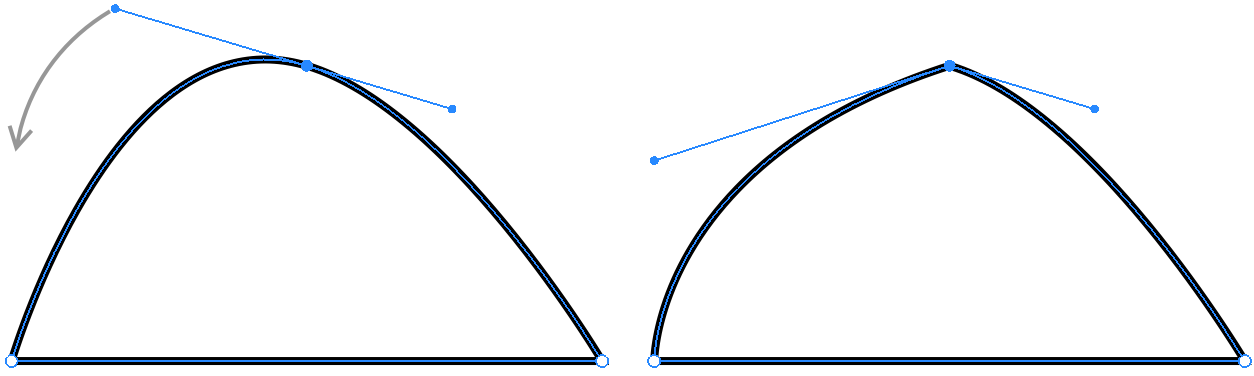
If you use this technique against a smooth anchor point, you will convert it into a corner point.
The same result can be achieved using the Pen tool ![]() . Just activate the tool and select the
. Just activate the tool and select the ![]() option. Drag a direction point in order to adjust the angle and length of its direction line.
option. Drag a direction point in order to adjust the angle and length of its direction line.
Rotate Direction Lines with the Rotation Tool
You can rotate the direction lines of either smooth or corner point using the Rotation tool located in the Geometry panel. It doesn't change the angle between the direction lines.
Show Direction Lines of a Corner Point
Direction lines become visible when you select an anchor point. However, direction lines may not be visible when the direction points are located exactly over the respective anchor point. This makes the length of the direction lines equal to zero. This is true for corners of a polygon.
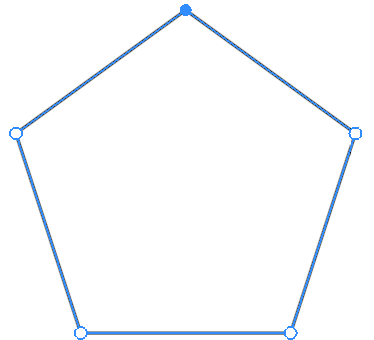
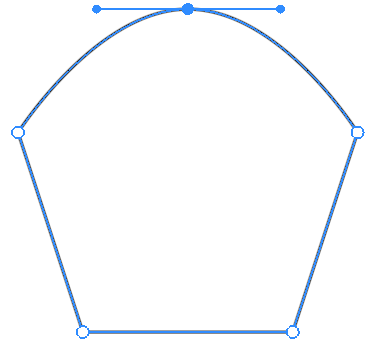
You can drag a direction point off its anchor point in order to work with direction lines. By doing this, you will set the length and angle of the direction lines.
Editing Path with the Draw Tool
The Draw tool can not only create but also edit paths. In order to use the Draw tool for editing, activate the Allow to redraw the path option in the Preferences.
To continue drawing a path from one of its ends, select the path, place the Draw tool over the end point and start drawing.
In order to modify a path in the middle, select it, place the Draw tool anywhere over the path and start drawing.
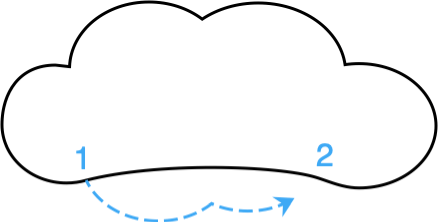
Finish drawing when the tool is over the path again. Part of the original path between points 1 and 2 will be replaced with a new path.

Once a compound path is selected and it contains open paths, you can connect ends of these paths using the Draw tool.
Note that the app replaces the smaller part of the original path.
Modifier Keys and Shortcut Summary
Shortcuts:
- A activates the Selection tool.
- L activates the Lasso tool.
Selection tool modifier keys:
- Space switches to the Pan mode.
- Command switches to the Move tool.
- Shift-clicking lets you select multiple anchor points.
Lasso tool modifier key:
- Space switches to the Pan mode.
- Shift lets you select more anchor points in addition to already selected ones.