Drawing With the Pen Tool
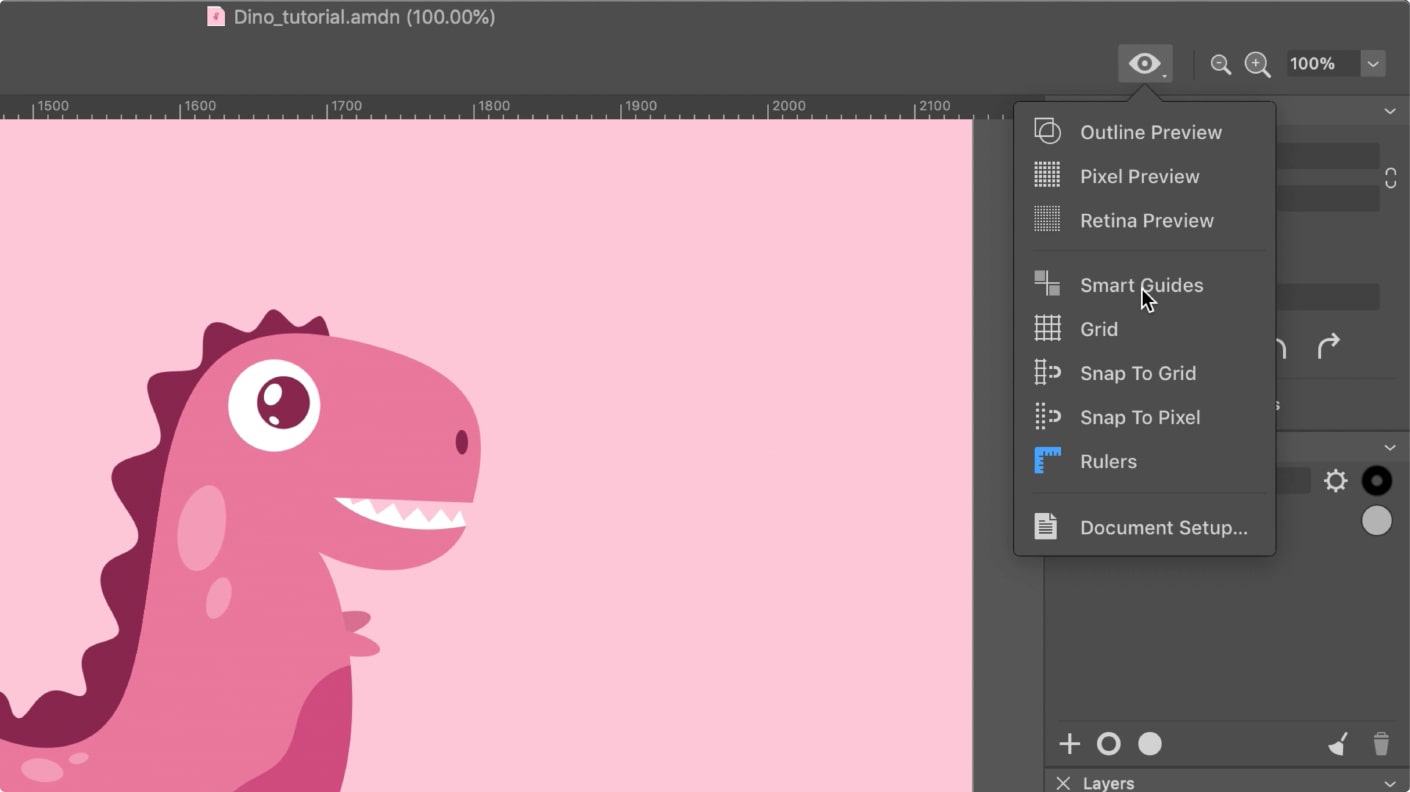
In this tutorial we will explain the basics of drawing more complicated art using the Pen tool. Before we start, let’s download and open sample document accompanying the lesson, then disable the Smart Guides in the Control bar. They are not necessary for us in this lesson.
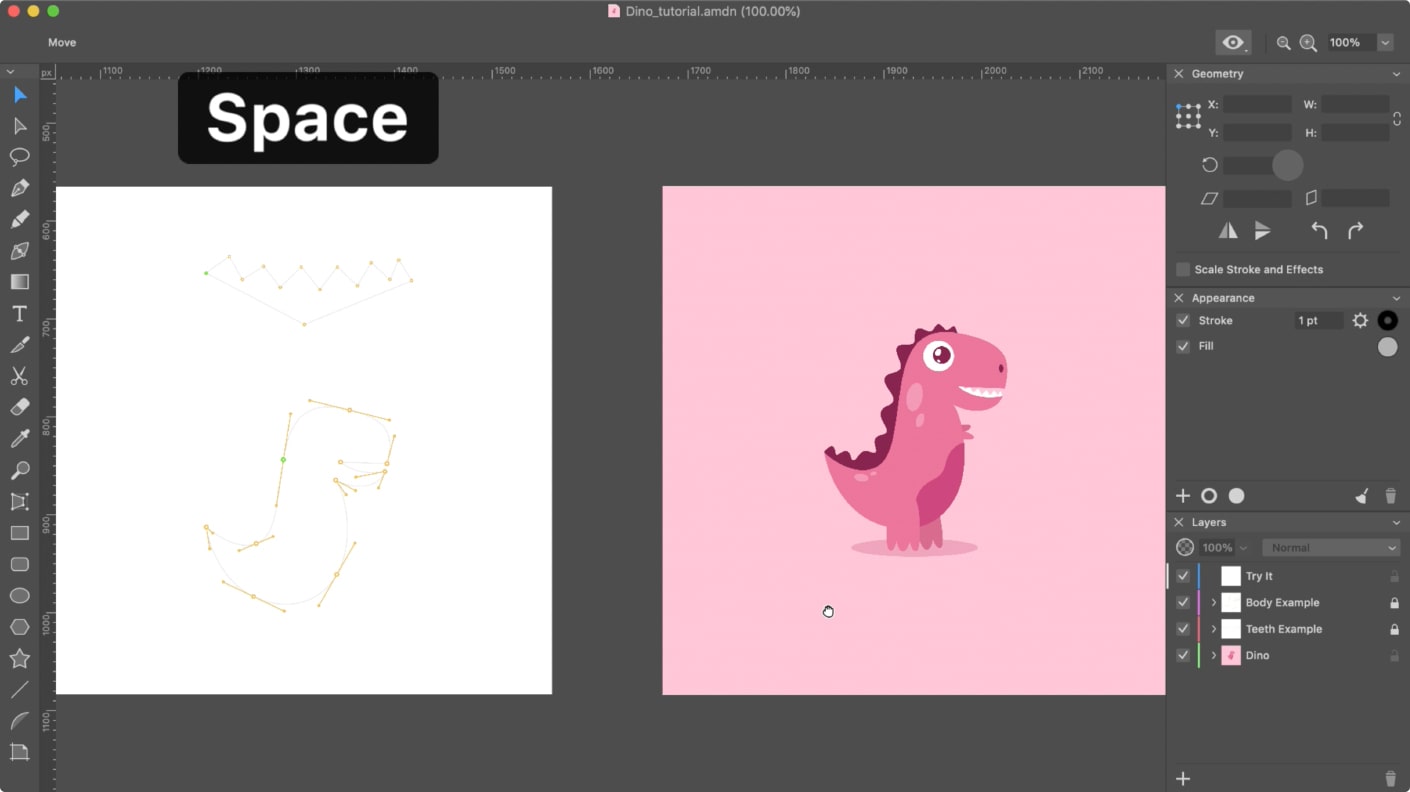
Sample document is the drawing of a little dinosaur. As you can see, it consists of various paths and anchor points. All of these paths were created with the Pen tool. Let’s see how it works.
We will begin with the first Sheet where we can trace some parts of the dinosaur. Press and hold the Spacebar key to switch temporarily to Pen tool, then drag the canvas until you reach the first sheet, and release the Spacebar.
How to Draw a Straight Line—Dinosaur’s Teeth
Activate the Pen tool by clicking on the little pen icon in the Tools panel or by tapping “P” on the keyboard. View of the cursor immediately changes from arrow to pen.
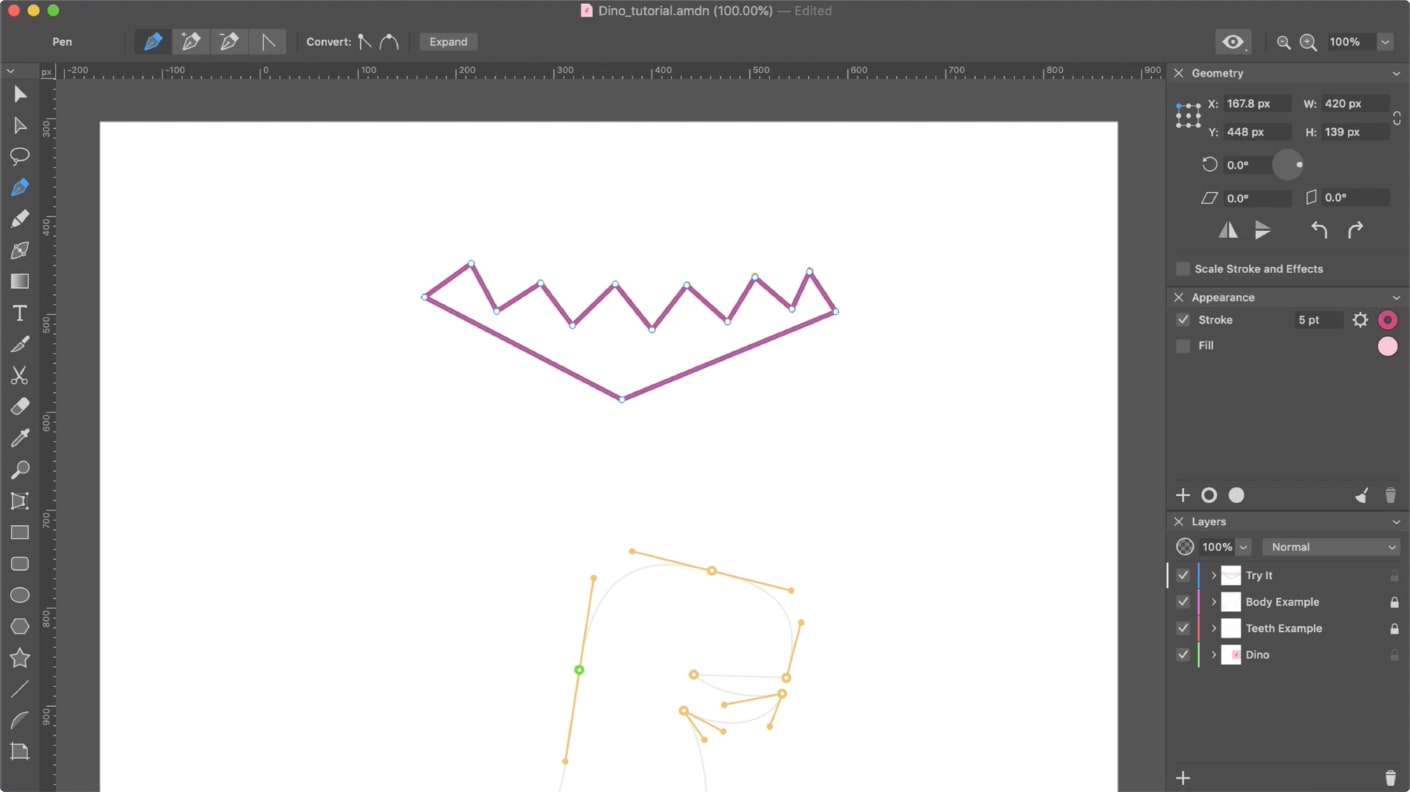
Let’s begin drawing the sharp teeth of our tiny creature. Feel free to draw atop the sample. The template is locked on the background, so you won't break it. The path consists of the straight segments and it is quite easy to reproduce them. What we do now is, click on the canvas to create the first point (we marked it green), release the mouse button, then move the cursor to another point and click again. Note that you can hold the Shift key while drawing lines to constrain lines or make them horizontal or vertical.
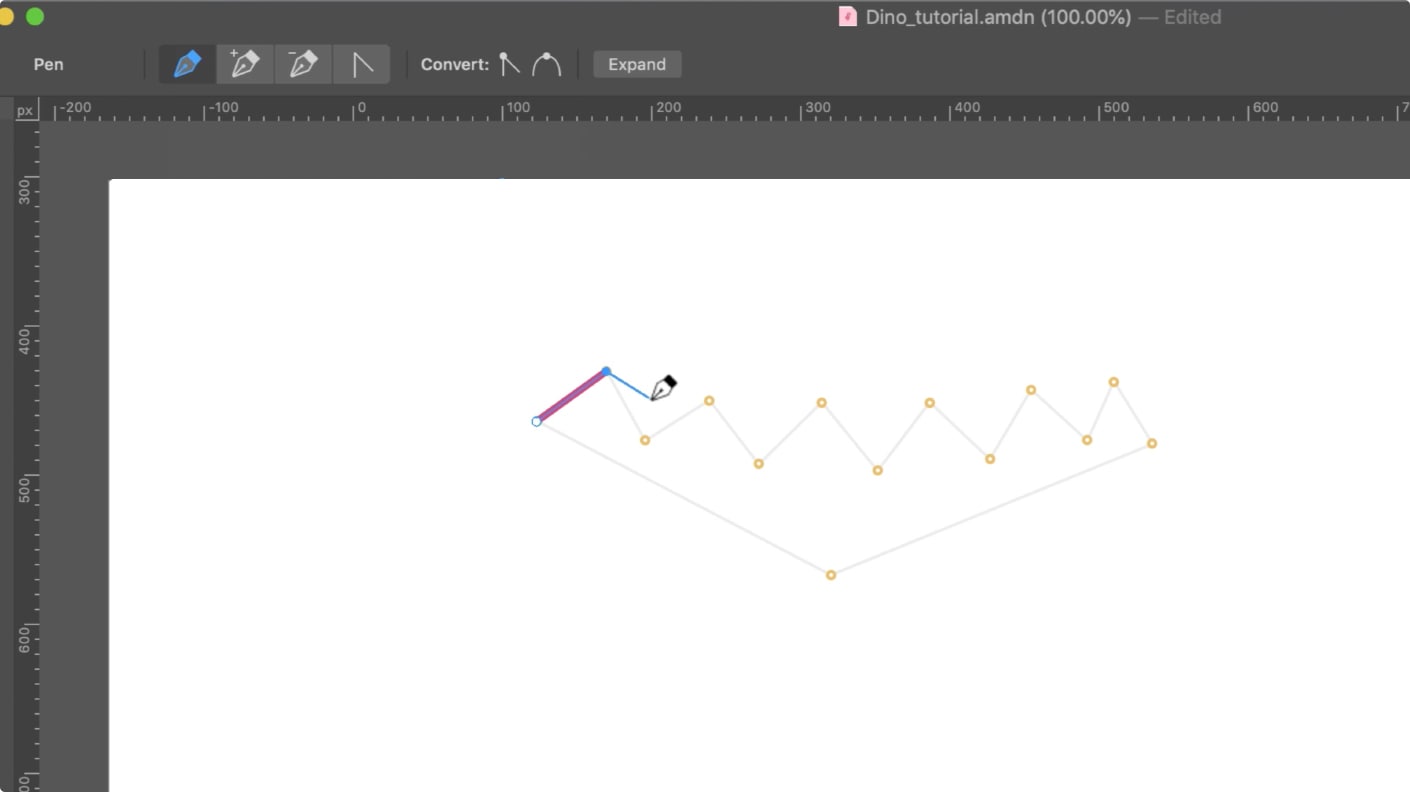
If you made a mistake and added a point to a wrong position, roll back by pressing Cmd + Z or use the Edit / Undo menu. Add new points until you reach the penultimate point. To close the path we need to connect this point with the first one. When the cursor approaches the original anchor point, a little circle appears near it. Make a click on the point to close the path.
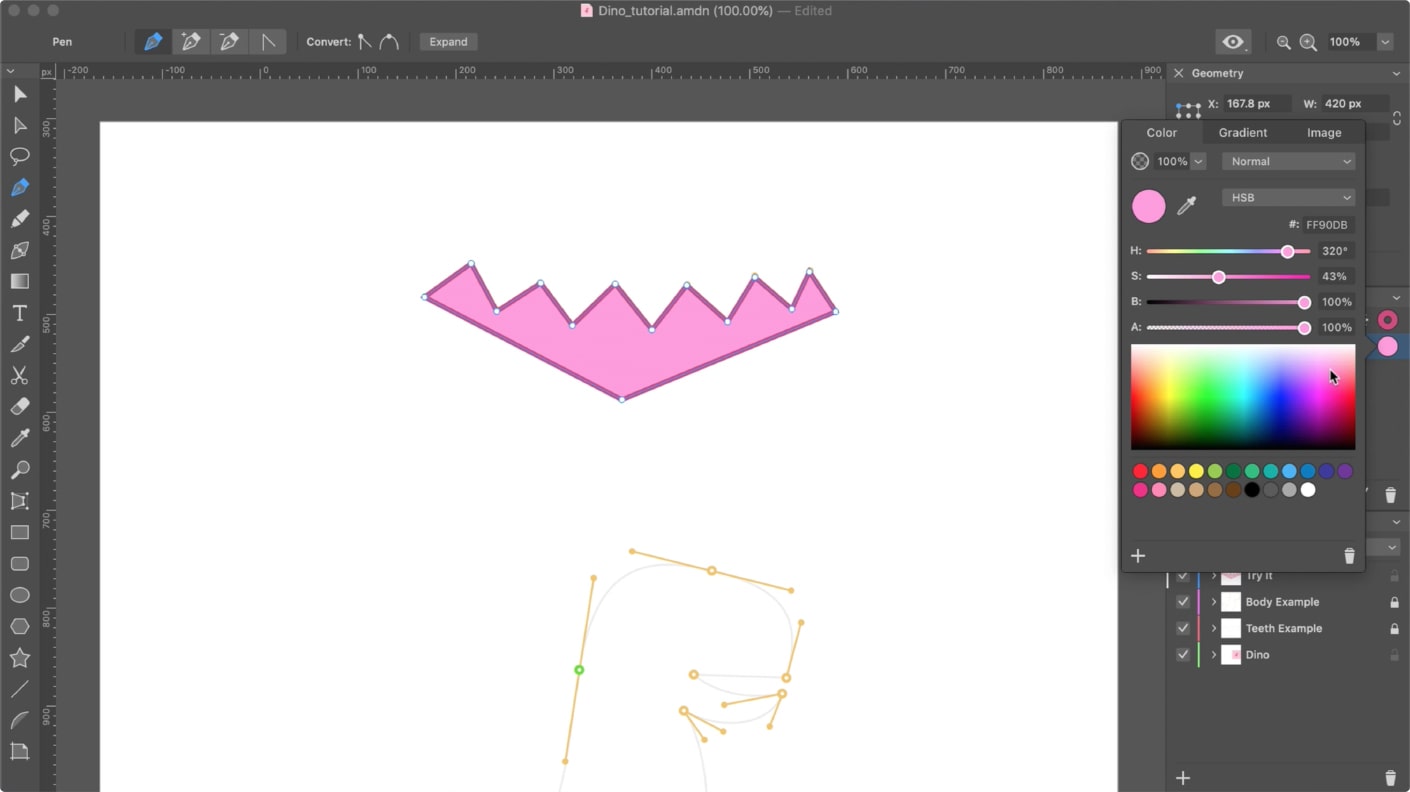
Closed path is, in essence, a shape of a free form. The color of it’s filling can be easily changed in the Appearance panel. For this, make sure the shape remains selected, activate the fill and then choose the necessary color in the Color panel.
How to Draw a Curved Path—Dinosaur’s Body
Let’s get back to the document and try to draw something more complicated. In our second exercise we will trace the dinosaur’s body.
The path that forms it consists of a number of smooth and corner points. We added several auxiliary lines to the drawing so that you can understand the process more easily.
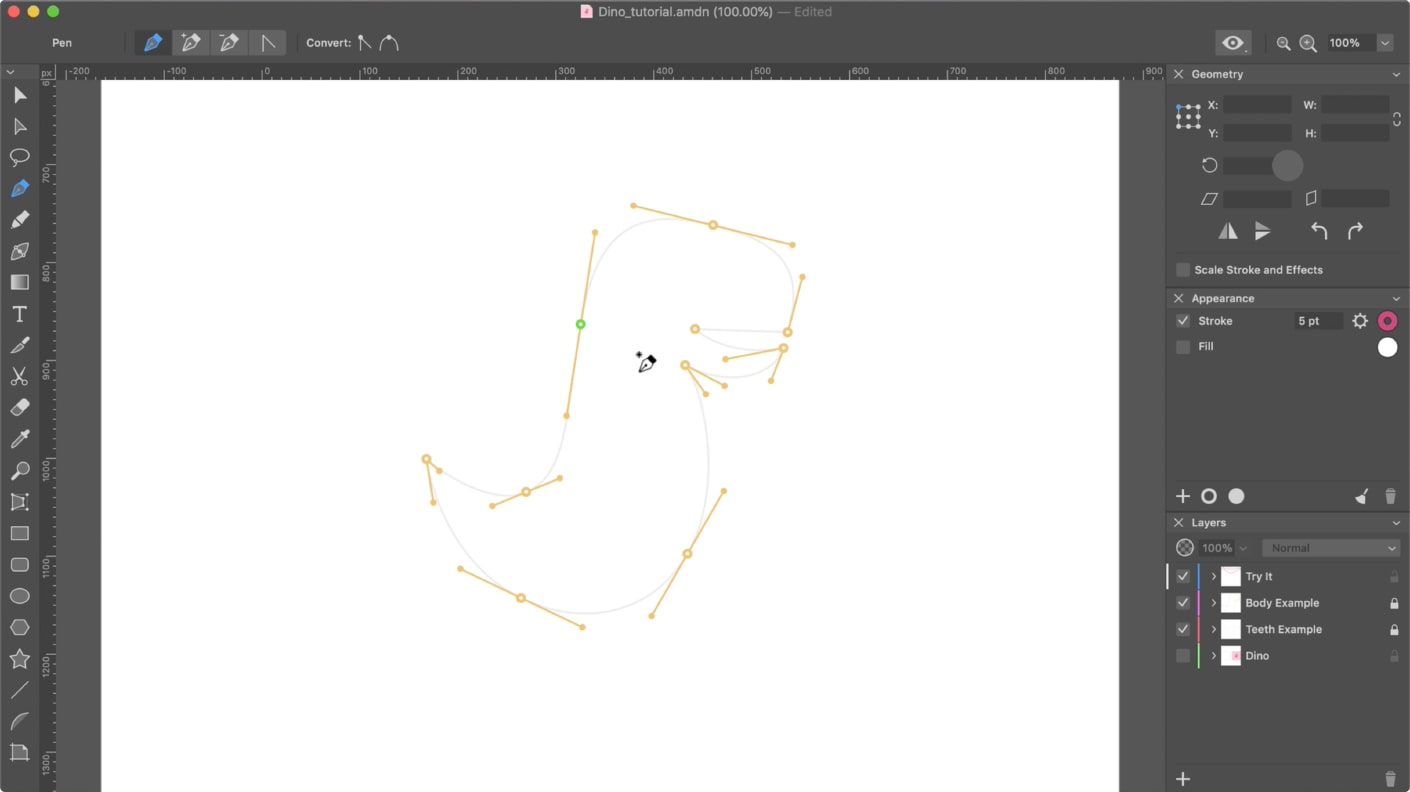
Start by clicking on the green point first, but this time click and drag to pull out the direction lines out of the point.The length and direction of these lines influence the curvature of the path. Since we will be drawing in the clockwise direction, the direction line should also be pulled in the same direction. Make sure the length of the handles corresponds to the auxiliary lines. Otherwise the path you create won’t match the one in the original drawing. Move the cursor to another point, then click and drag to pull out the direction lines again. Move to the next point and repeat the process.
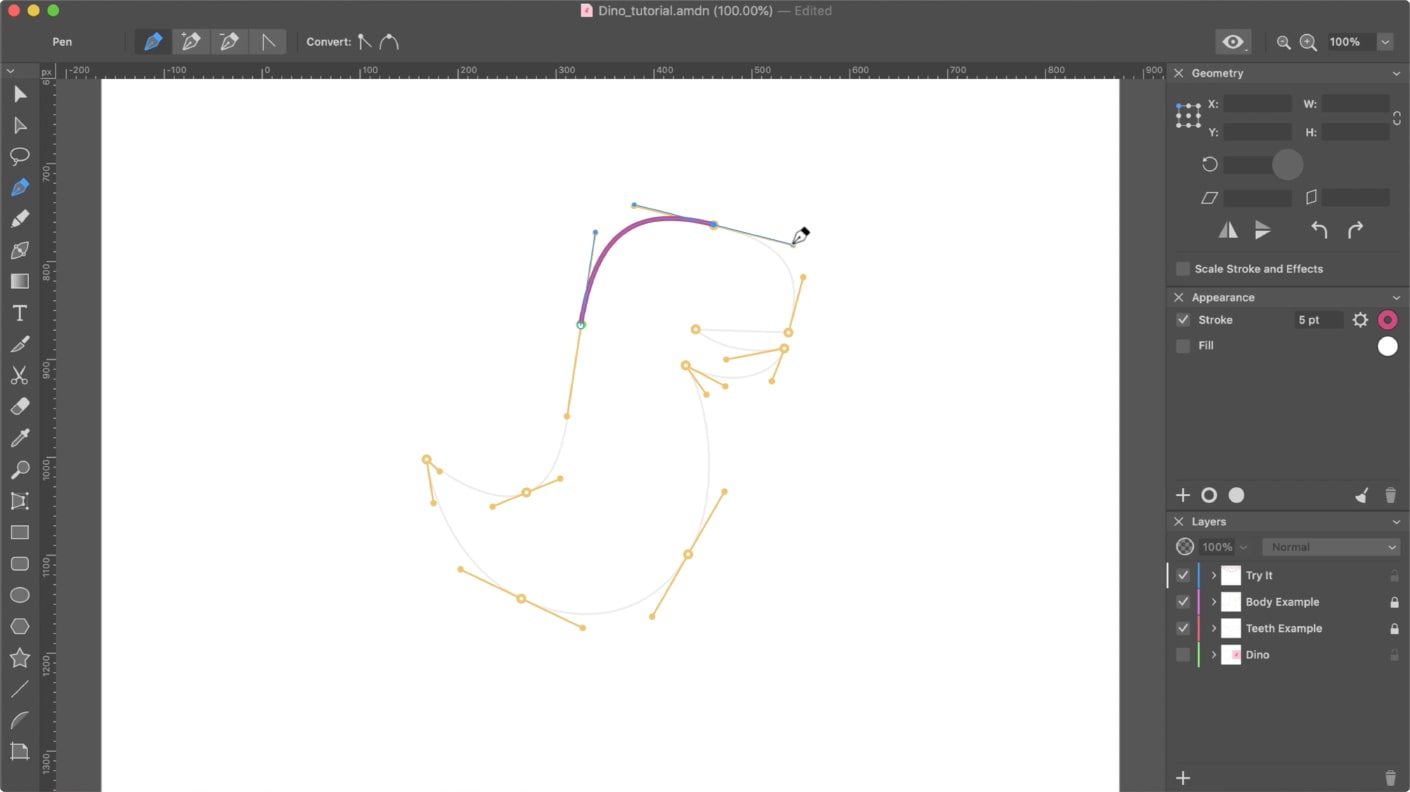
As you can see, the tool created a smooth point again, while we need to have a corner here. To overcome this, place the cursor over the point once again until a small angle icon appears, and make a click. This will convert the point into a corner point and we can continue drawing with the straight line.

Make a click once, without pulling out the direction lines. Move on to another point, click and drag to create the curvature of the lower jaw. As always, make sure the length and direction of each handle corresponds to the auxiliary lines.
To continue drawing, we need to learn how to split the direction lines and give a path an alternative direction.To do this, press and hold the Option key while drawing with the Pen tool. By doing this, you temporarily switch to Convert Anchor Point tool and, as you can see, the cursor changes correspondingly.
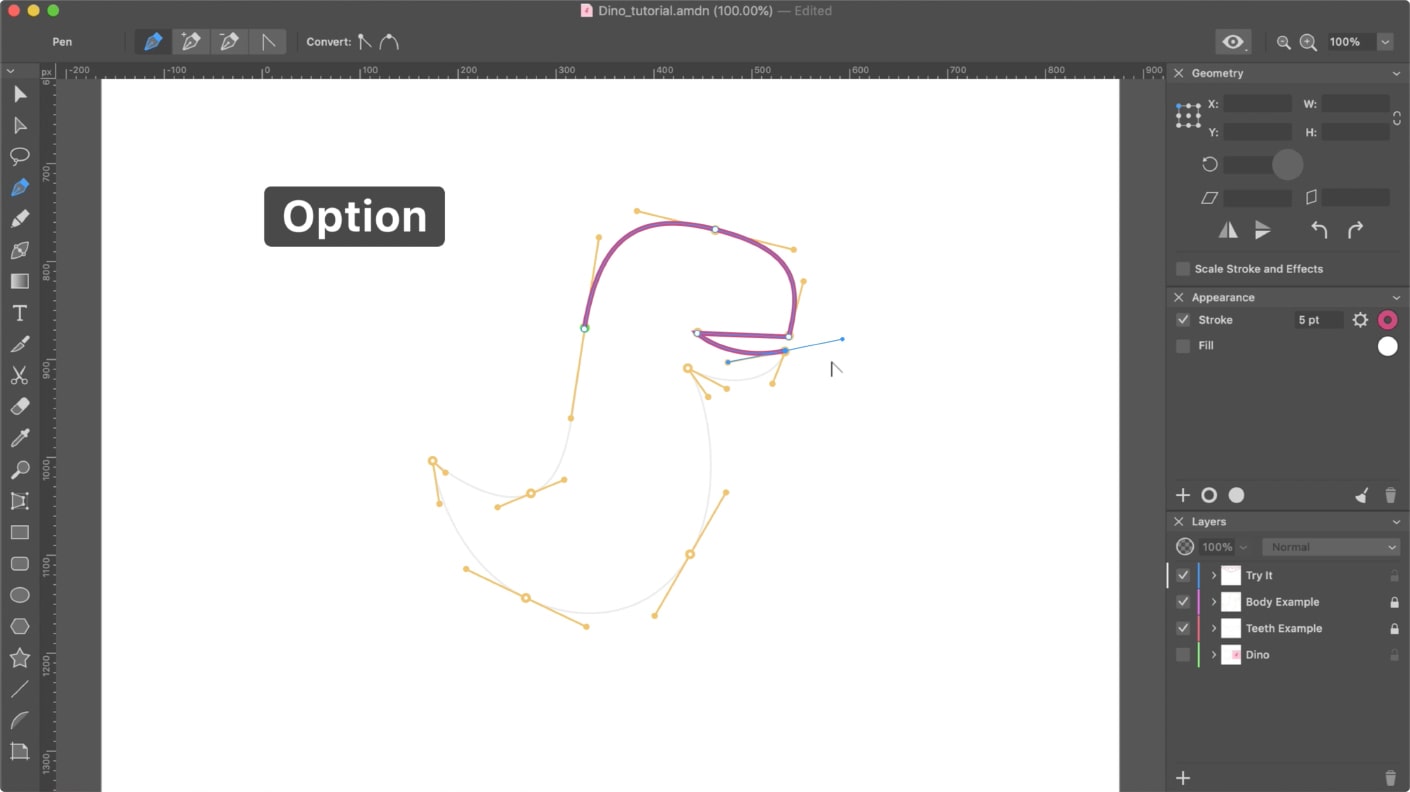
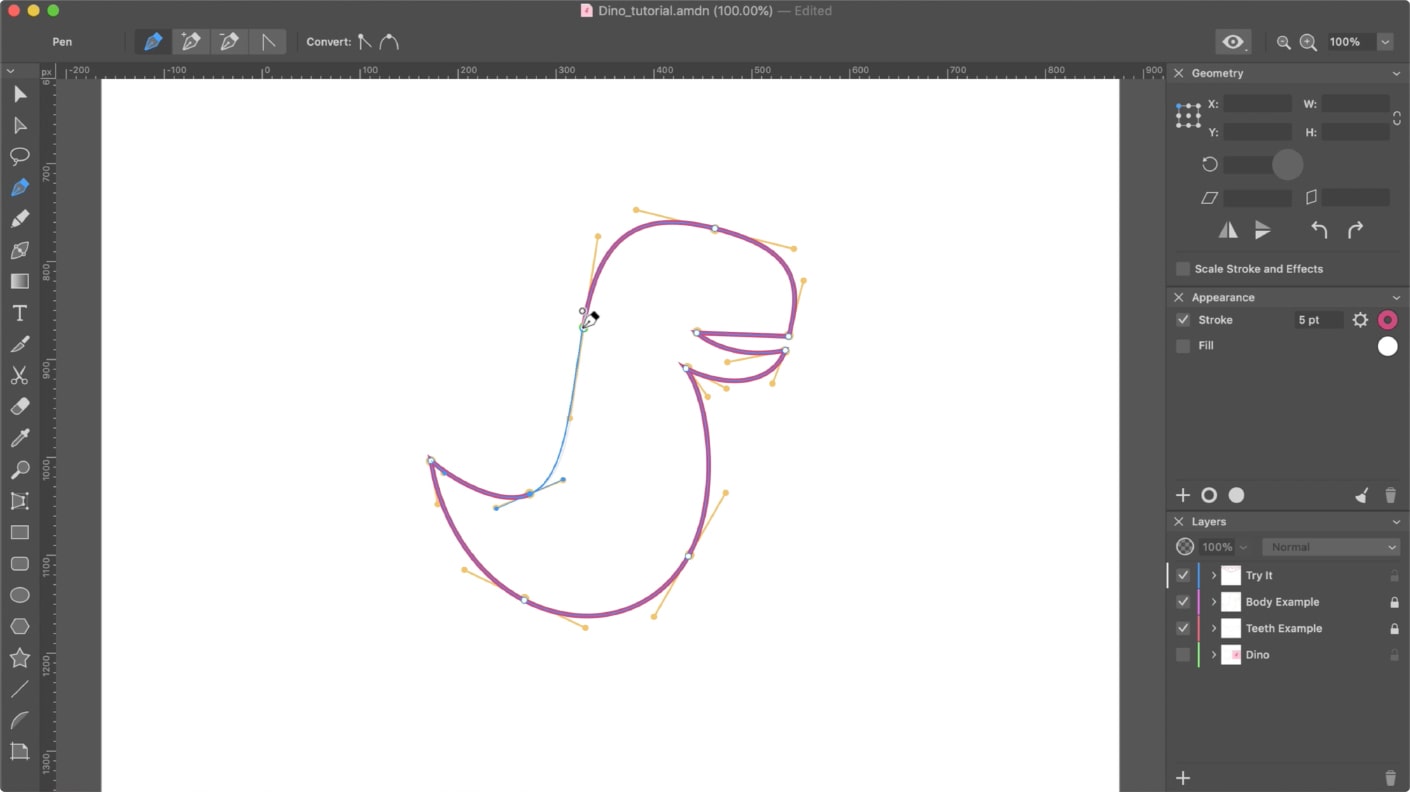
Now, if you pull one of the direction points, the symmetry between the direction lines will no longer exist and we may give the path a new direction. Release the Option key and make a click and drag at a new point. Press and hold the Option key to split the left direction line. Release the Option key and proceed to our next point. Click and drag to make it a smooth point. Click and drag on the next point as well. Click and drag on the next point. Press and hold the Option key to split the left direction line. Adjust them accordingly. Release the Option key and proceed to our next point.
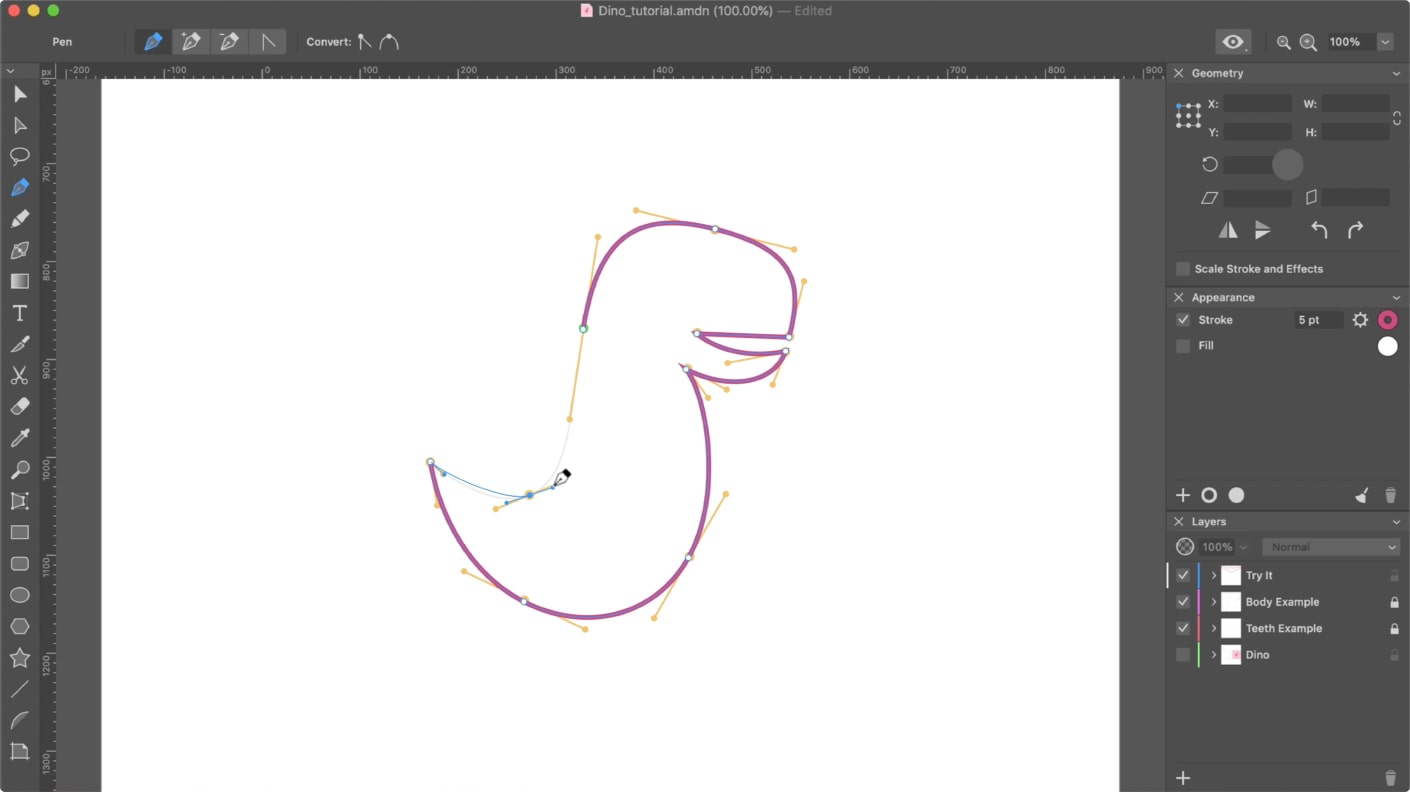
Click and drag, then finally proceed to our original point. When the cursor approaches the starting point, a little circle will appear near the cursor. Click on the starting point to close the path.
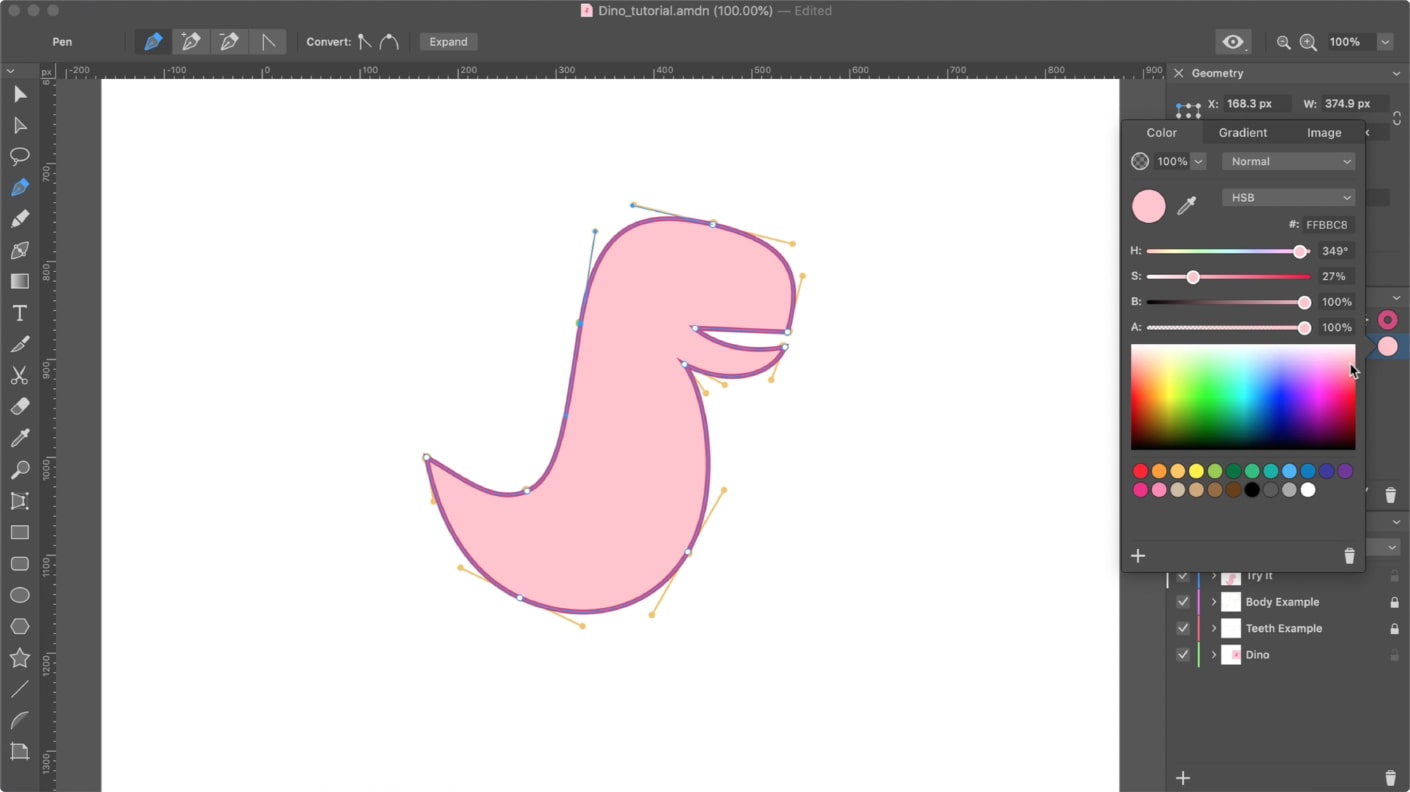
Once we close the path, we can fill the created shape with a color using the Appearance panel.
Finishing Touches
With a little practice, you will be able to create objects of any shape.
Don’t worry about slight imperfections in the drawing. Even experienced designers will not create such complicated shapes in one go. A common workflow is to draw a shape that looks close to what you need, and then adjust one part of the drawing after another until you reach perfection.

In our next video we will demonstrate what path editing options are available with the help of Selection and Pen tools.