Color, Gradient and Image Fill
Gradients
There are two ways to fill an object with a gradient:
- Use the Gradient tool to add and adjust a gradient directly on the canvas.
- Use the Color panel.
Note that any of these methods does not exclude another. You can do part of the work with the help of one method and then finish using another.
Using the Gradient Tool
Add a Gradient
To fill an object with a linear gradient:
- Select the object.
- Activate the Gradient tool
 on the Tools panel.
 - Place the cursor over the object, press the left mouse button and drag. You have added the start point of the gradient.
- Move the cursor around to adjust the direction of the gradient and control the way it fills the object.
- Click to at the end point.
The Color panel is used to choose the linear or radial gradient type.
The Gradient tool can fill several objects with one gradient. To do that, select multiple objects or grouped objects. Each of the objects will take a part of the gradient.
Adjust Gradient Colors
Let's see how a gradient is created. We'll talk about linear gradients for simplicity. In order to edit a gradient on the canvas, activate the Gradient tool.
Any gradient has two predefined colors at its ends. Let's call such predefined colors "base colors". Base colors are shown inside circles. The default gradient has two base colors. We'll see later how to add more.
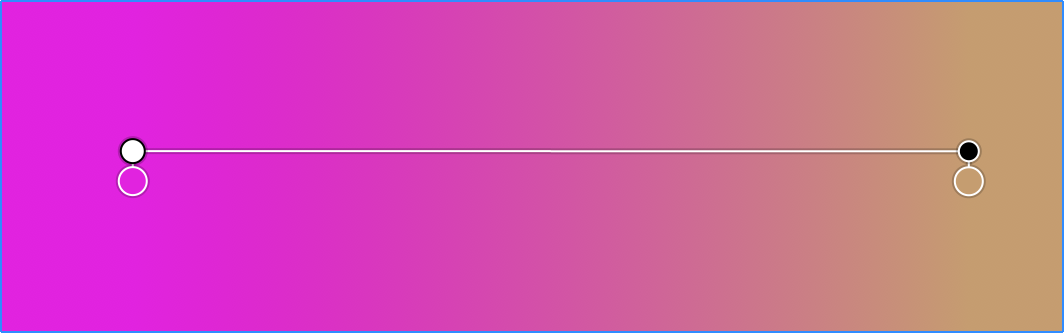
All colors in the middle are generated by the software to create a smooth transition between the base colors.
The direction along which colors change is shown by a line that links the base colors. There are white and black handles at the ends of the line.
To add an intermediate base color, click on the line. A plus near the cursor shows that this operation is possible.
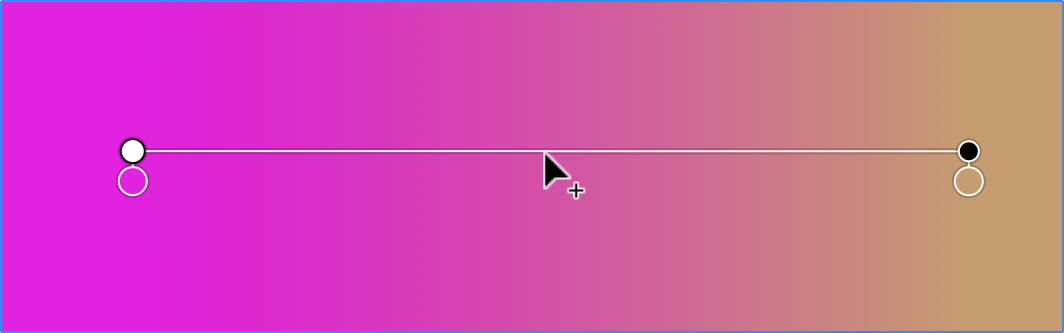
The third base color will be shown in a new circle attached to the line.
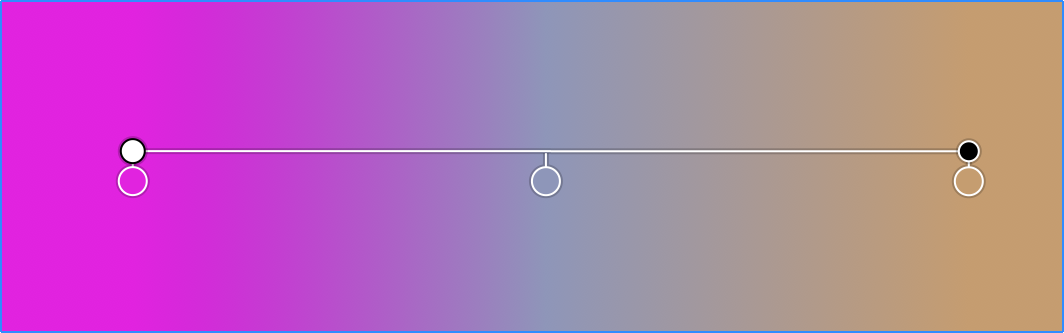
You can move base colors using the mouse in order to change the distribution of colors over the given area.
To delete an intermediate color, drag it off the line until a cross appears near the cursor. Then release the mouse button.
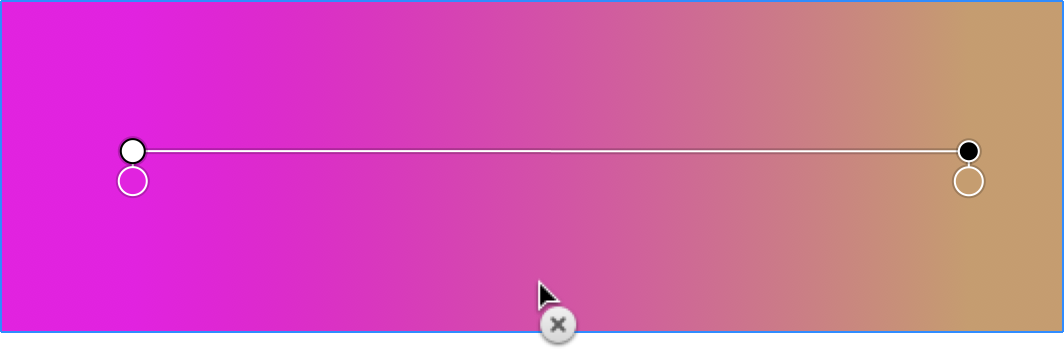
Only intermediate base colors can be deleted.
In order to change a base color, click on the corresponding circle. Then use a simplified version of the Color panel to select a new color.
Adjust the Gradient Position on the Canvas
The black and white handles let you rotate the gradient and also change the distance between the base colors at the ends.
To move the gradient in relation to the object, drag the line which links the two handles. Alternatively, drag the white and black handles to new positions.
To rotate the gradient, drag either black or white handle around the opposite one.
To change the width of the color transition area, move one handle to or away from another handle.
Adjust Radial Gradient
To create a radial gradient, activate the Gradient tool. After that, switch to the radial gradient in the Color panel. Then draw with the tool over an object to fill it with a gradient.
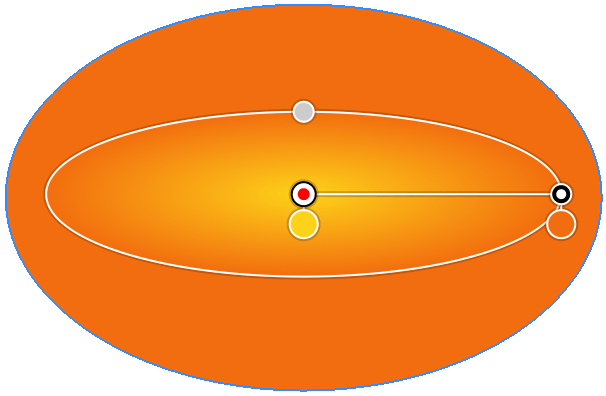
Once applied to an object, the radial gradient displays several handles. The handles allow you to set the location of the middle point of the gradient, make it either circular or oval and more.
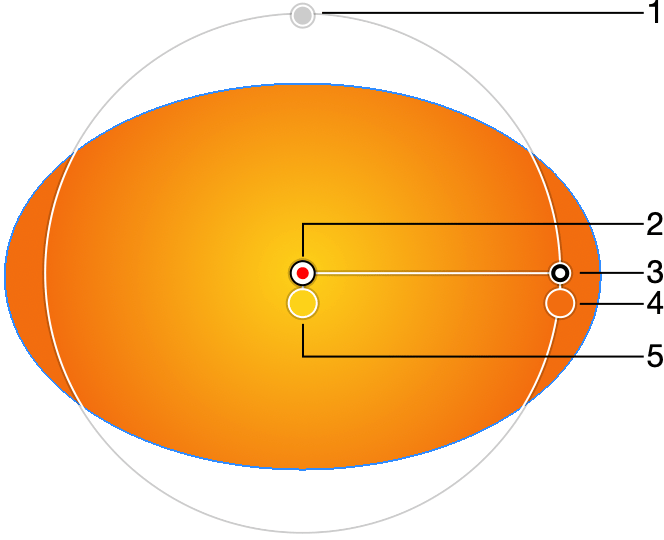
1 - Adjusts the shape of the gradient. Moving the handle toward the center turns a circular gradient into an oval gradient. The handle lays on the circle or oval that indicates the shape of the gradient.
2 - Handle that defines the location of the central color of the gradient.
3 - Handle that defines the size of the gradient outlined by a circle or oval. Beyond the outlined area, the color is the same.
4 and 5 - Base colors. Click on a circle to choose a different color.
Radial gradients let you add and delete intermediate colors in the same way as you can do with linear gradients.
Using the Color Panel
Add a Gradient
When you open the Gradient tab of the Color panel, you automatically apply a default gradient to the currently selected object.
Adjust Gradient Colors
You can add and delete base colors in the same way as you can do on the canvas. See the Adjust Gradient Colors subsection for details.
In order to change a base color, click on the corresponding circle.
Drag circles that define the location of base colors to make different color tints take up more or less space.
You can apply a predefined gradient by choosing one in the swatch library. Gradient swatches are used in the same way as color swatches.
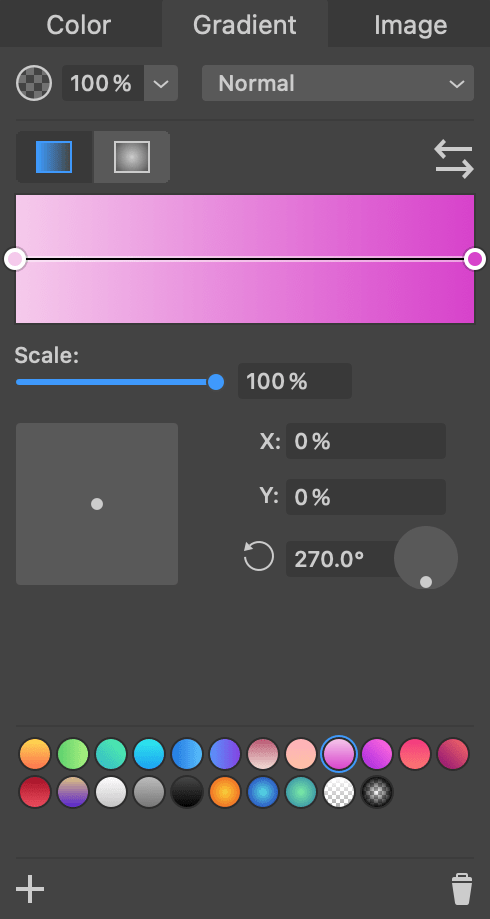
Adjust the Gradient Position
The Scale parameter lets you change the distance between the base colors at the ends. The result is equivalent to moving the black handle on the canvas closer or farther from the white one.
Use the rotation control to change the direction of the gradient.
To move the whole gradient relative to the object, use the square control or change the X and Y values. Note that it is more convenient to move and rotate gradients directly on the canvas.