Changing Object's Shape
The Fusion Tool
The Fusion tool is designed to create objects with complex shapes from simpler ones. With this tool, you can merge particular parts of original objects and remove unnecessary parts. You can do similar work with help of the Boolean operations. However, the Fusion tool is more interactive. It provides you with convenient visual feedback on what is going to happen with the objects that you edit.
To activate the Fusion tool, click on the Fusion icon ![]() in the Tools panel.
in the Tools panel.
The tool operates on selected objects only. While the Fusion tool is activated, you can press Cmd-Shift to temporarily switch to the Move tool in order to select more objects or deselect some of them. In fact, Cmd switches to either Move or Selection tool depending on which of them was active most recently. We additionally press Shift to select or deselect objects.
Controls of the Fusion Tool
The Control panel displays the following options when the Fusion tool is activated.
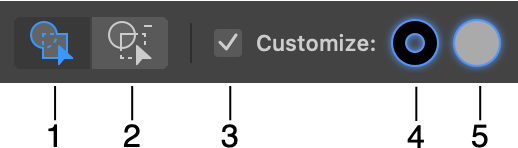
1 - Merge mode.
2 - Erase mode.
3 - Use the current object's appearance, or set up a new Stroke and Fill.
4 and 5 - The colors of new Stroke and Fill. Click to set up the color or other properties.
How the Tool Works
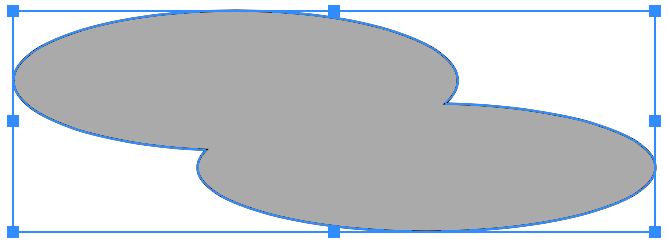
The tool works with objects' paths. Let's select two overlapping objects, place the cursor inside one of them and press the mouse button.
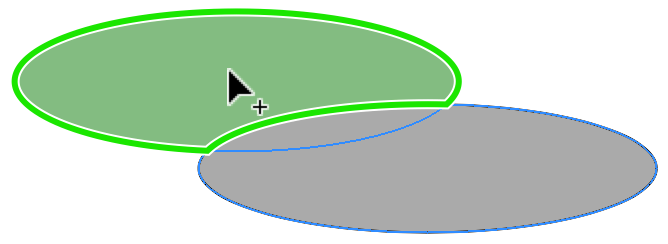
The tool will find all nearest segments, no matter which of the objects they belong to, and try to define the area those segments outline. Then it will highlight this area. When you release the mouse button (the cursor stays at the same place all the time), the Fusion tool will assemble a new path from the segments. So, the highlighted area gives you the idea of the object's shape that will be created.
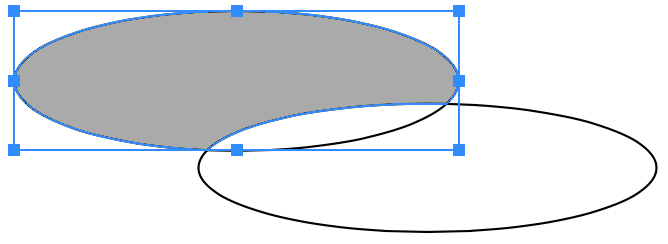
In our example, we have created a new shape that is filled with a gray color. The rest of the segments formed a second shape.
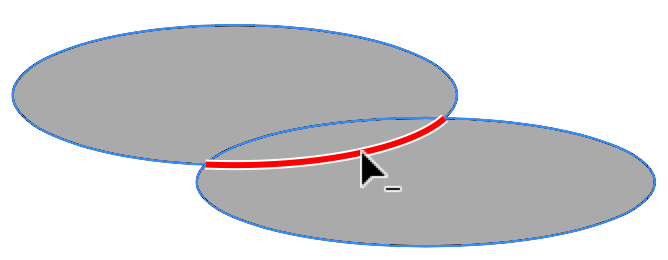
Now, let's go to another example. We start with the same two ovals. But in this case, we'll draw with the tool from the middle of one oval to the middle of the second oval.
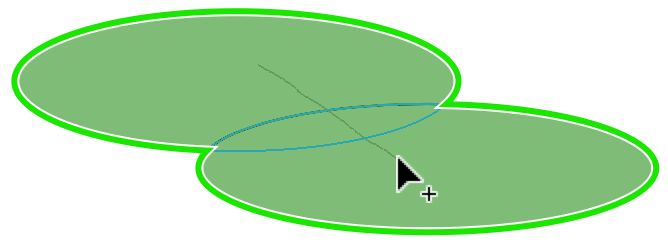
Note that a temporary line indicates areas visited by the cursor which might be affected by the tool. When we cross a path segment with the line, we tell the program to remove this segment and merge the areas the segment separates.
The Appearance of a New Object
The appearance of the created object depends on the Customize checkbox. If it is selected, the app applies the stroke and fill which are displayed near the checkbox. You can click on them to change their properties (e.g., set up the stroke width or color, or fill the object with a different color or gradient). When the Customize checkbox is not selected, the new object will have the same appearance as the first object that was visited by the cursor.
The Fusion Tool Modes
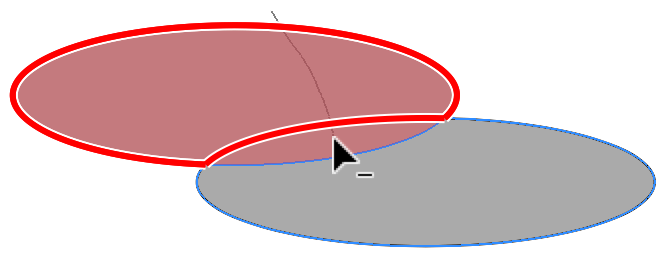
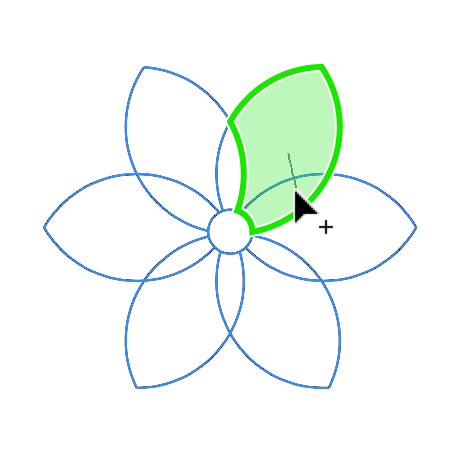
The Fusion tool has two modes that can be selected in the Control panel. We have just learned about the default Merge mode ![]() . In this mode, the tool creates a bigger area from several smaller areas that touch each other. The cursor's icon in this mode has a plus sign.
. In this mode, the tool creates a bigger area from several smaller areas that touch each other. The cursor's icon in this mode has a plus sign.
The ![]() button in the Control panel activates the erase mode. You can also activate it by holding down the Option key. In this mode, the cursor icon has a minus sign. Object parts that will be removed are highlighted with red color.
button in the Control panel activates the erase mode. You can also activate it by holding down the Option key. In this mode, the cursor icon has a minus sign. Object parts that will be removed are highlighted with red color.
If you click on a segment in the Erase mode, the segment will be deleted.
Similarly to the Merge mode, you can draw across multiple segments in order to remove them.
Notice that after using the Fusion tool, you may have a number of separate segments instead of a closed path.
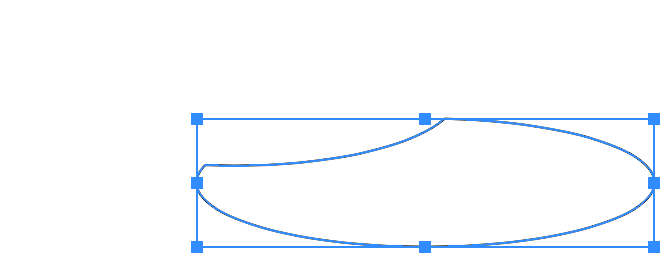
To turn them into a single object, use the Fusion tool in the Merge mode. Just click or drag inside the area. You can also use the Selection tool to link anchor points manually.
Usage Example
Let's create a flower using seven circles and the Fusion tool.
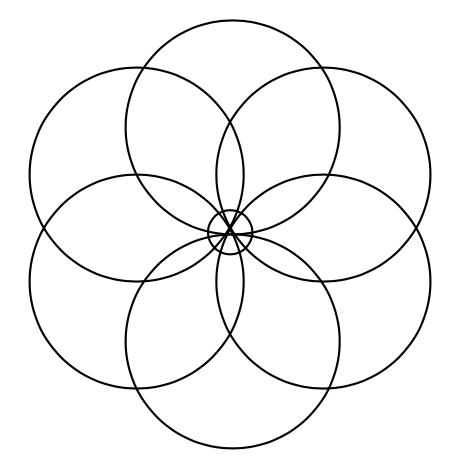
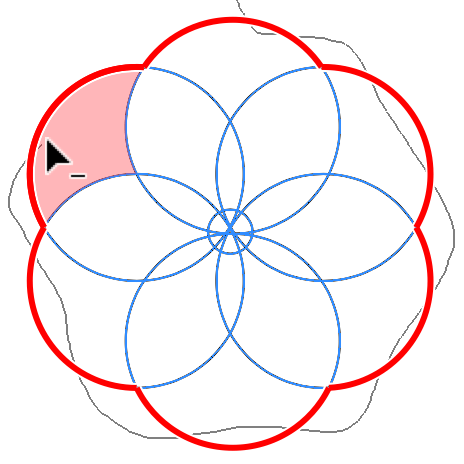
Remove the external parts of circles. By the way, you don't have to do a lot of work in one single step. Delete one segment at a time if this way is easier for you.
As a result, we have the following.
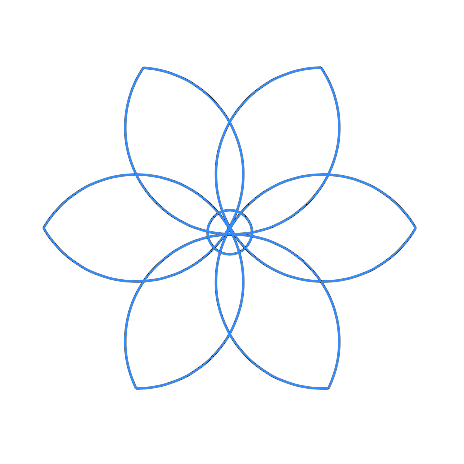
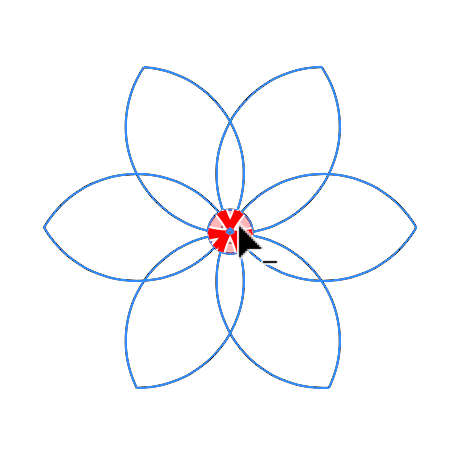
We are going to remove unnecessary segments inside the circle in the center. A different way to do that is to merge the central part of the flower.
Merge two parts of each petal.
This is what we finally have.

Modifier Keys and Shortcut Summary
Shortcut:
- F activates the Fusion tool.
Fusion tool modifier keys:
- Space switches to the Pan mode.
- Command switches to either Move or Selection tool depending on which of them was active most recently.
- Command-Shift switches to either Move or Selection tool and lets you select or deselect objects.
- Option switches from the Merge to Erase mode.