How to Draw With the Pen Tool
The Pen tool is the crucial instrument for vector art creation and this tutorial will show the basics of drawing something more complicated, than lines and simple shapes.
A small change is essential for the start of this tutorial. You need to download and open the sample document, then disable the Smart Guides in the Document tab of the Inspector.
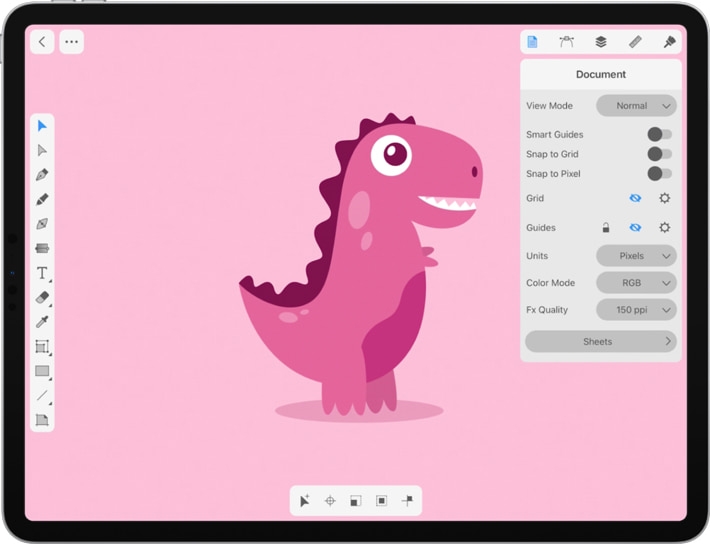
The sample document consists of different paths and anchor points. The paths you see were all created with the Pen tool. Let’s dive deeper into how it’s done.
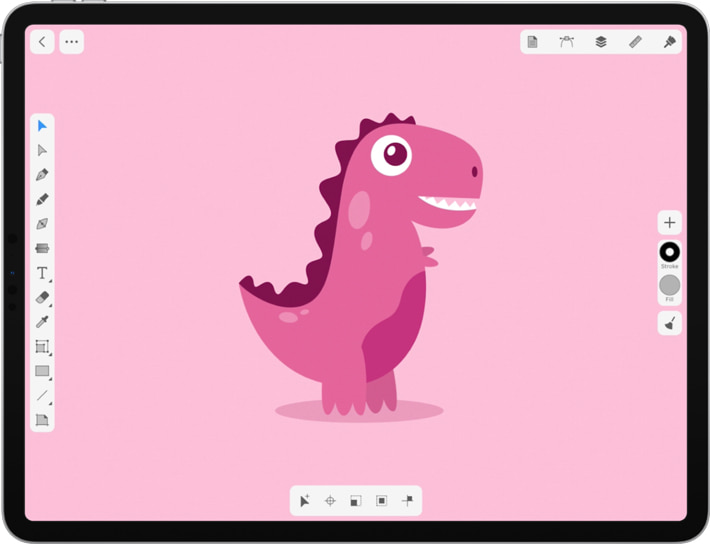
On the canvas you see the full illustration. Our tutorial begins with the first Sheet where the designers prepared for us some parts of the dinosaur to be traced. Pan the canvas with two fingers until you reach the first sheet.
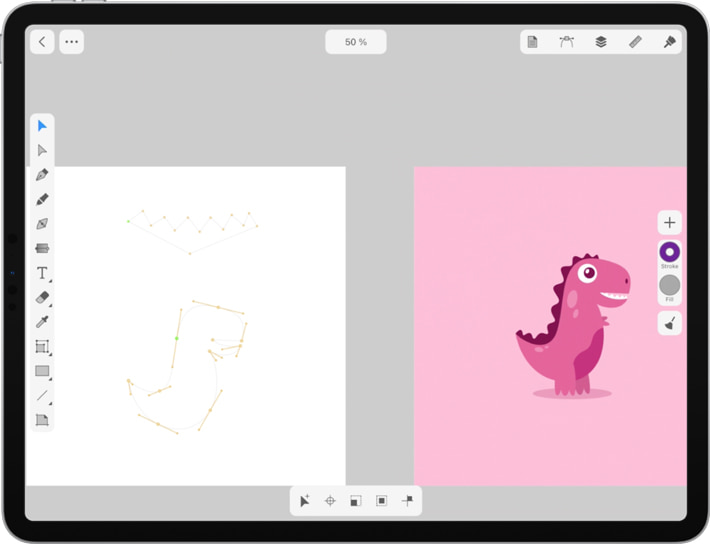
Drawing a Straight Line—Dino’s Teeth
Activate the Pen tool by tapping on the little pen icon in the Tools panel.
Our first step will be tracing the teeth of the pink dinosaur. Don’t hesitate to draw right on the sample. The template is locked on the background layer, so you won't break it. This path consists of the straight lines and it is no problem to reproduce them. What we do now is, tap click on the canvas to create the first point (it is marked in green), then tap again in the new position to create another point.
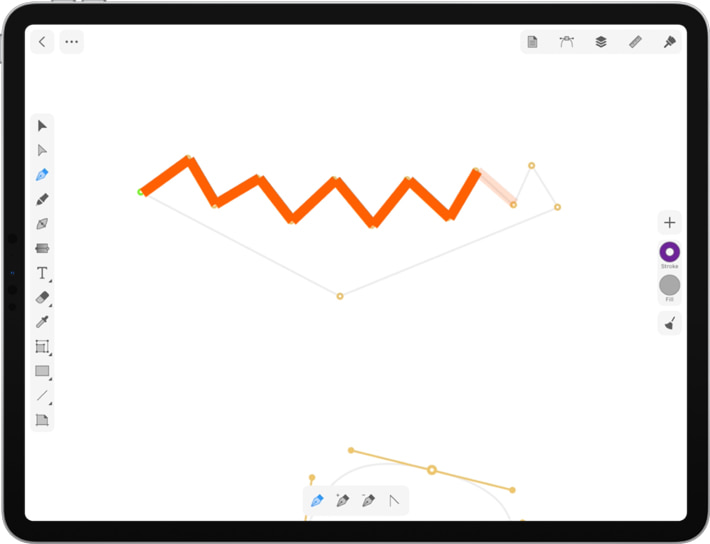
If you made a mistake and added a point to a wrong position, roll back by choosing Undo from the menu, or simply tap with two fingers somewhere on the screen. As you may notice, the area between the lines is filled with color. It happens if the line has the Fill option enabled in the Appearance panel. Tap on the Eye icon to disable the Fill.
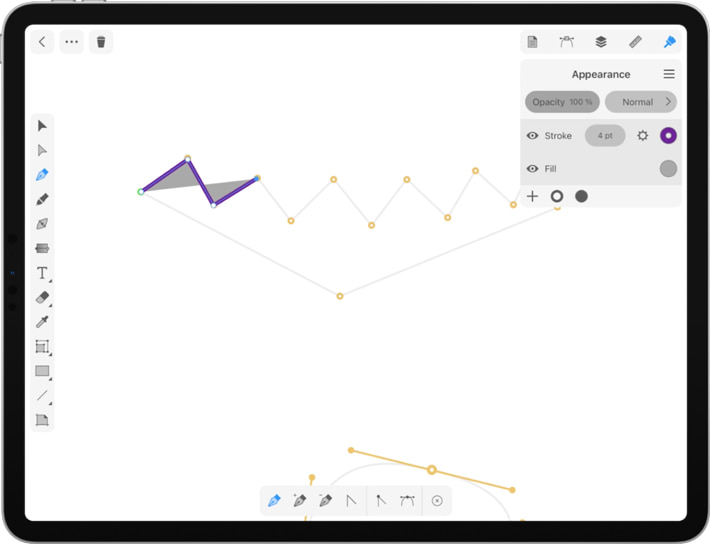
Add new points until you reach the penultimate point. To close the path we need to connect this point with the first one. Just tap on the initial point to close the path.
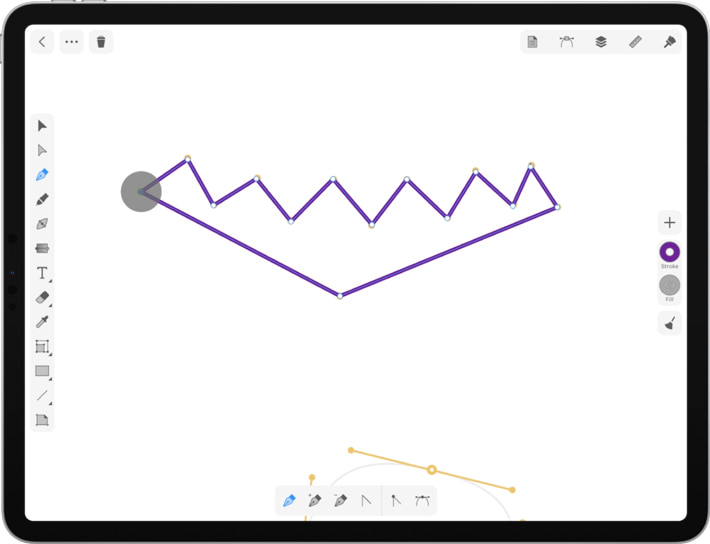
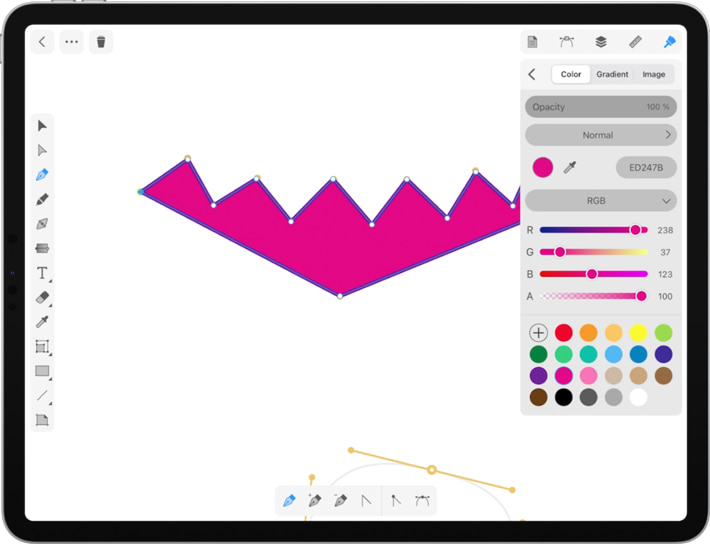
Closed path is, in essence, a shape of a free form. To change the color of its filling, make sure the shape remains selected and open the Appearance panel. Enable the fill and then choose the necessary color in the Color Panel.
Drawing a Curved Path—Dino's Body
Returning to the initial document let’s try to draw a more complicated path. The second part of the tutorial is dedicated to tracing the dinosaur’s body.
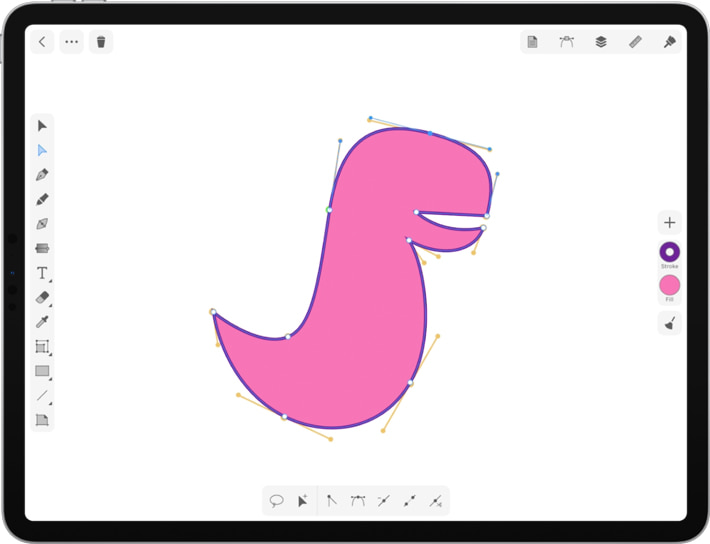
Smooth points and corner points are the constituent parts of the path that outlines the dino’s body. In the tutorial there are some auxiliary lines to the drawing so that you can hone your skill more easily.
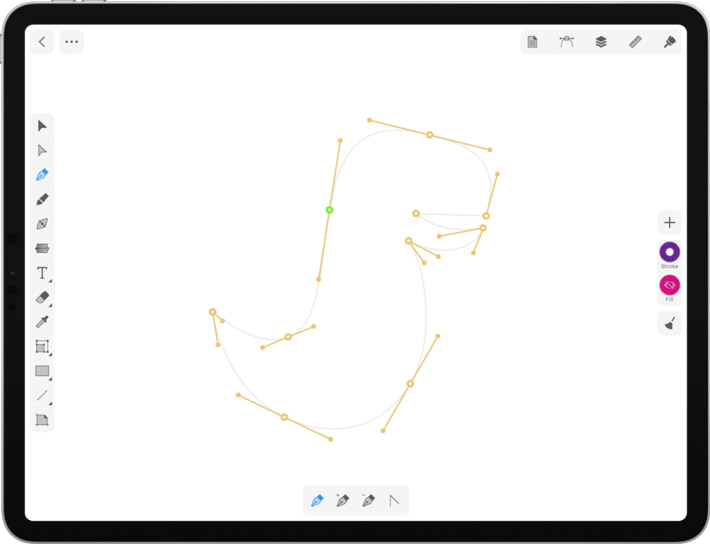
As before, the green point is the starting one with the first tap, but this time tap and drag to pull out the direction lines out of the point. These lines control the curvature of the path in both length and direction. We are drawing in the classical clockwise direction, so pull the direction line clockwise and ascertain that the length of the handles is exactly the same to the auxiliary lines. Lest the path you create will differ from the one in the sample drawing. Tap on the other point and drag to pull out the direction lines again. Repeat the action moving from one point to another.
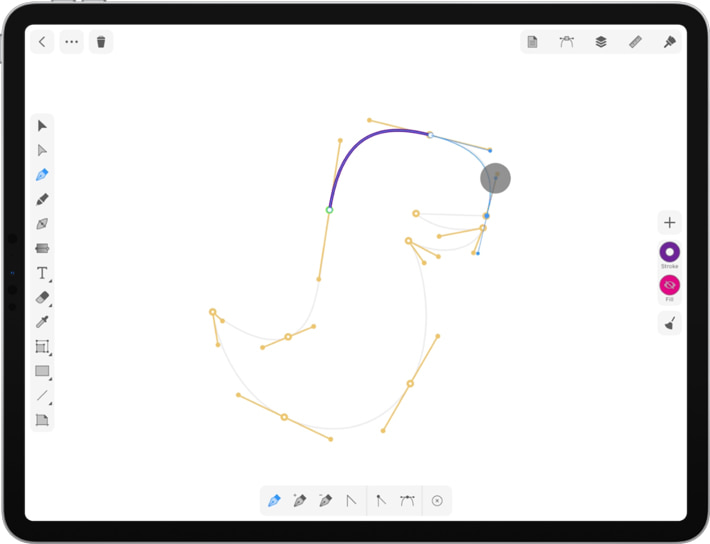
Approaching the dino’s mouth with the first sharp corner angle the Pen tool creates a smooth point the way we’ve been doing it previously. But this time we need to have a sharp corner to form the lines of the mouth. In order to solve this issue, use the Convert to Corner Points tool on the Control bar. You need to tap on it to convert our point into a corner point. After this operation we changed the type of the tool and can proceed drawing with the straight line.
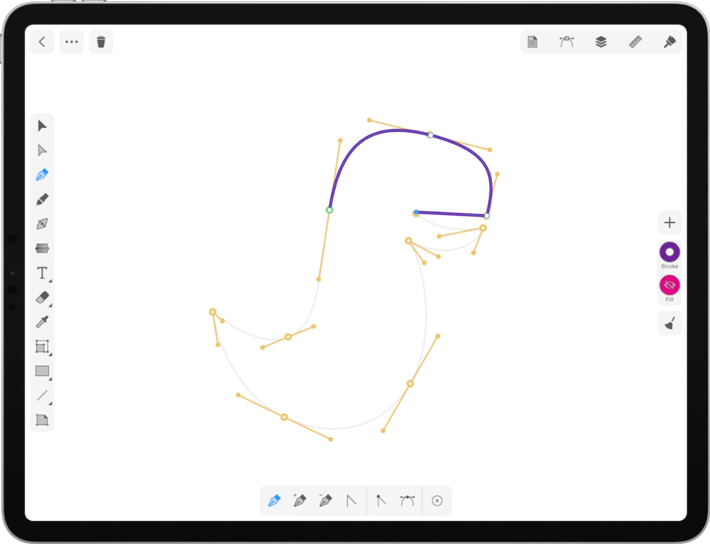
Tap once, without pulling out the direction lines. Move on to the next point, tap and drag to create the curved line of the lower jaw. Don't’ forget to check that the length and direction of each handle corresponds to the auxiliary lines.
For the next drawing element we need to learn how to split the direction lines and give a path an alternative direction. In order to do this you need to hold down the second finger without releasing the first one, while drawing with the Pen tool. This leads to switching to Convert Anchor Point tool while you hold down both fingers.
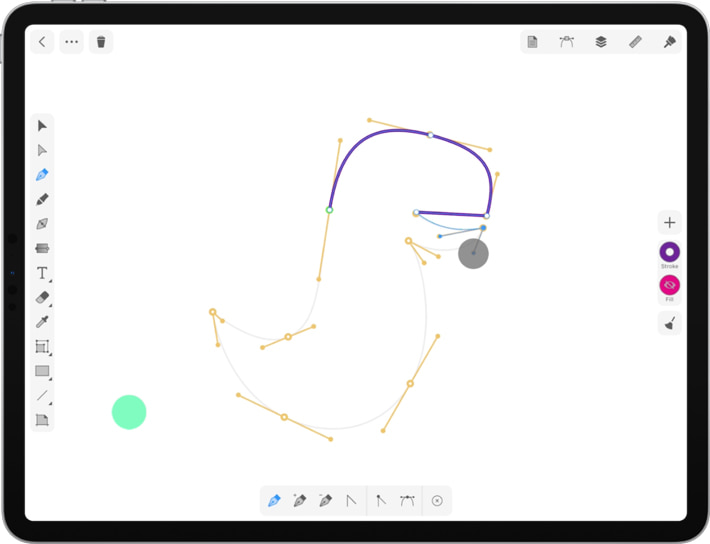
You hold your second finger down and pull one of the direction points. What happens is that the symmetry between the direction lines has stopped to exist and we can change the direction of the path as needed. Here you need to release the second finger and tap and drag at a new point. Once more hold down the second finger without releasing the first one, in order to split the left direction line. Release the second finger and proceed to our next point. And now you can again use the Pe tool in the original way: tap and drag to make a smooth point, the next several points of the drawing. When you approach the dino’s tail, hold down the second finger to split the left direction lines again to match your drawing to the template. Don’t forget to make the direction lines exactly the length as in the example. Release the second finger and move to the next point on the dino’s body.
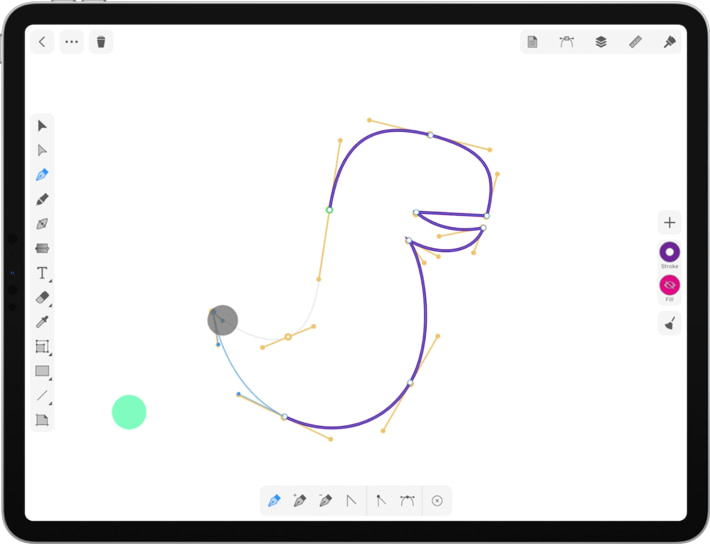
Tap and drag, then proceed to the starting point. The tap on the starting point will close the path and make dino’s body a shape of the given form. When the body is ready, you can fill the created shape with a color using the Appearance panel.
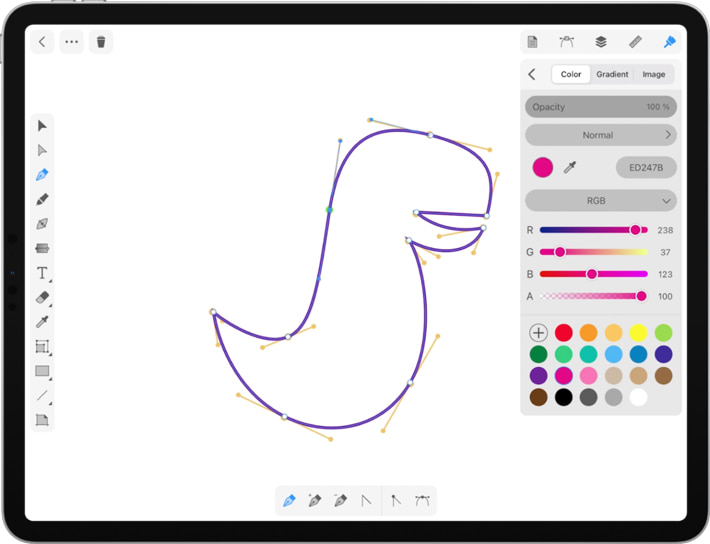
With this techniques the objects of any shape can be created with more or less effort in every given case. You don’t need to bother if the drawing does not match your imagined shape from the very beginning. Usually no one creates too complicated shapes at a time. More experienced designers draw a general shape, reminding the needed object and then adjust each point and reach the desired result by gradual adjustments.
