Selecting and Arranging Objects
Align Objects to the Pixel Grid
Create a Pixel-Aligned Object
To create a pixel-aligned object, activate the Snap to Pixel option in the Document panel.
As you draw a standard shape or create a path using the Pen tool, the path will snap to pixels. As a result, all anchor points of the created path will be aligned to the pixel grid.
Align an Object to the Pixel Grid
To have a rasterized line look sharp, its width should be a whole number in pixels (no fractions). Also, this line should be aligned to the pixel grid.
In many cases, when you align an object to the pixel grid, you want to align vertical and horizontal lines to the pixel grid. This can be done by aligning anchor points to the grid. To do this, activate the Snap to Pixel option in the Document panel. It can also be useful to display the pixel grid by setting the View Mode option to Pixel or Retina. Then slightly move anchor points near their locations with the Selection tool to snap them to the grid.
The pixel grid becomes visible at a zoom of 1000% or higher.
The Pixel Preview mode is also discussed in The Main Window section.
Why should you Align Objects to the Pixel Grid?
The alignment of objects to the pixel grid may make a big difference if your graphics are going to be exported in a raster format.
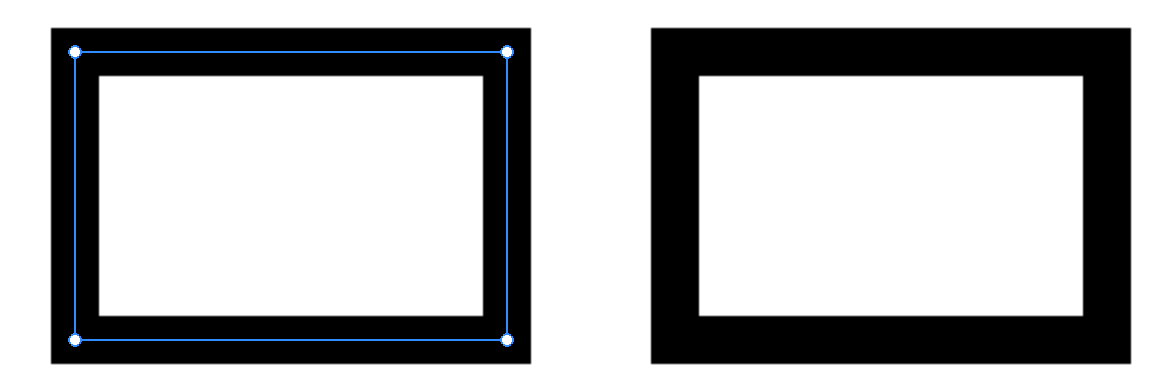
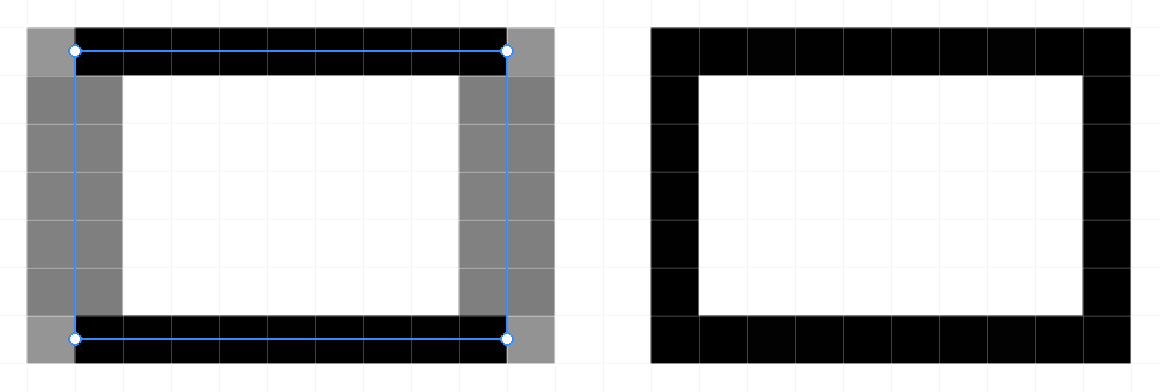
In the following example, we have two identical vector rectangles. The one on the right is aligned to the pixel grid. The left one is not aligned to the pixel grid horizontally. Its offset is 1/2 pixel. Both rectangles have 1 pixel wide black stroke.
In the normal preview mode, both rectangles have a perfect look as it is expected from vector graphics.

The Pixel Preview mode reveals the appearance of the rectangles once they have been rasterized. Vertical lines of a misaligned left rectangle become blurred. This happened because 1 pixel vector line was mapped not on one but on two columns of pixels.

To activate the Pixel Preview mode, set View Mode option to Pixel.