Selecting and Arranging Objects
Group and Expand Objects
Group or Ungroup Objects
Grouping objects lets you combine them into a single piece of design. The created group can be moved, rotated and resized as you could do with a single object. Some other manipulations like adding Fill and Stroke or applying distortion are also possible. This may be useful if your whole design or its part is created out of several primitive objects, and you don't want it to fall apart when you move or rotate it. For example, you can create a keyboard as a number of keys and the body. Then you group them together to have the keyboard as a single unit.
The item in the Layers panel that represents a group is named Group by default. You can tap on the V-shaped icon near the group name to access the grouped objects.
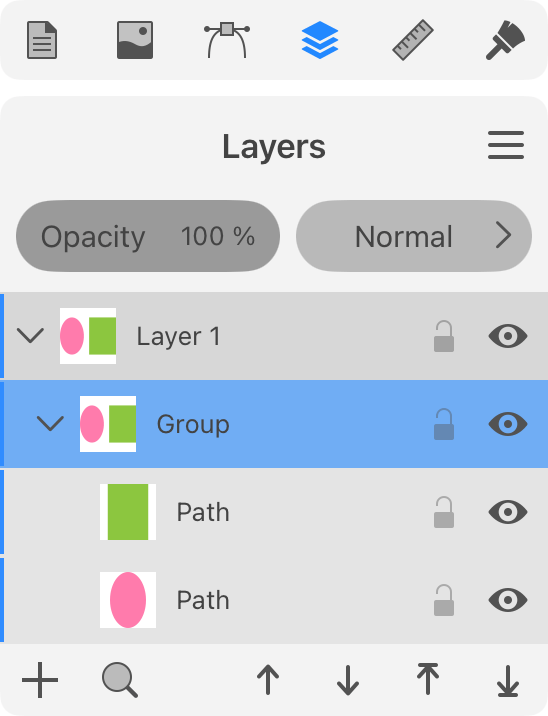
A group can include another group and so on. In this case, we say that groups are nested.
To group objects, select them. Then choose Group in the main menu.
To ungroup, select the group and choose Ungroup in the main menu.
It is possible to select an individual object in a group on the canvas without ungrouping it. To do that, use the Selection tool.
The Group and Ungroup commands can also be found in the Path panel.
There are two other types of groups. Compound groups are explained in one of the following sections. Clipping groups are related to the clipping masks which are described in the Using a Clipping Mask section.
Using the Layers Panel for Grouping and Ungrouping
In order to ungroup objects, select one or several of them in the Layers panel. Then drag the selected objects outside the group. Objects moved in this way outside the group will become ungrouped. Once a group is empty it disappears. This method also works with compound and clipping groups. The latter though have a small difference. If you move all but one object outside a clipping group, the last object will be moved outside automatically and the clipping group will disappear.
To create a clipping group, drag the name of one object in the Layers panel and drop it onto a second one. The second object will become a clipping mask for the object that you have dropped.
In order to add a new object to an existing group of any type, drag the object into the group in the Layers panel.
Using the Isolation Mode to Edit a Group
You can edit a group in the Isolation Mode without ungrouping it. That includes moving and rotating an object in the group in relation to others, editing text and more. To activate the Isolation Mode, select the group. Then double-tap on it with the Move tool.
Compound Group
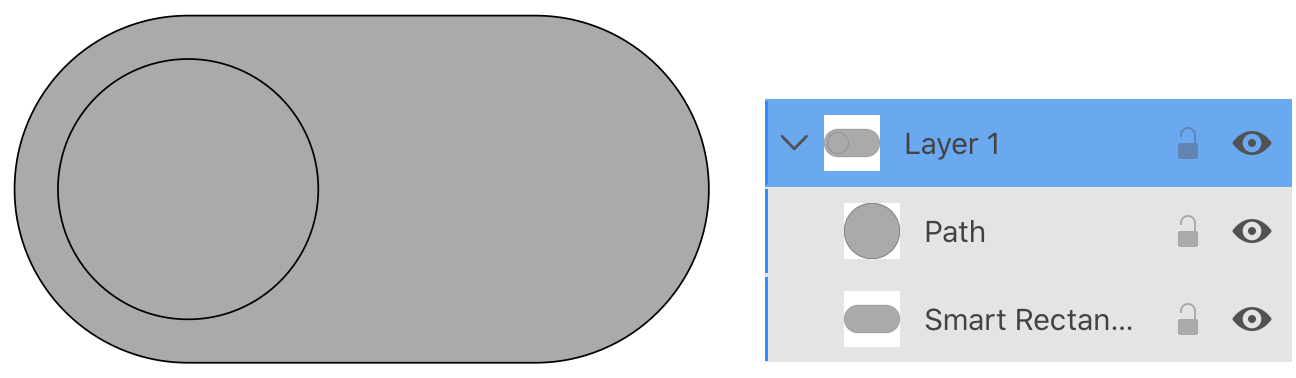
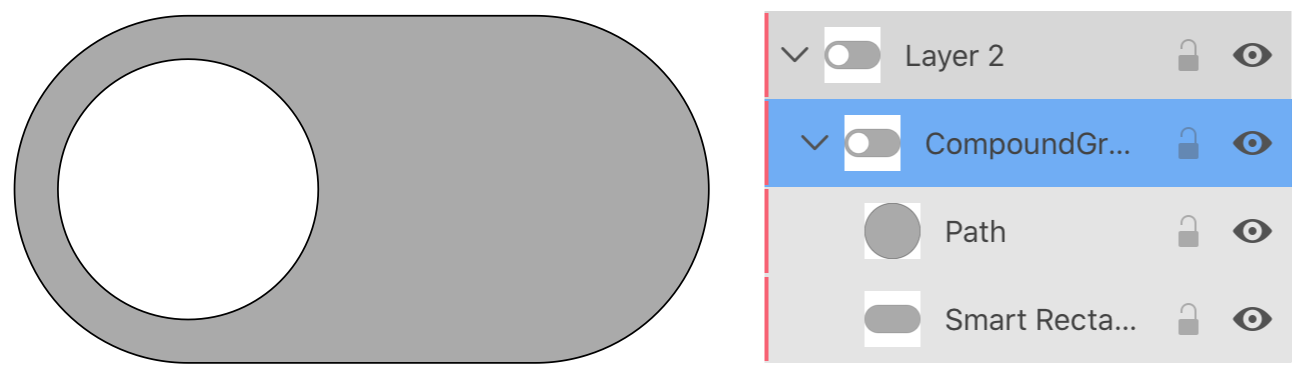
By applying one of the Combine commands (e.g., Union) to multiple objects, you can create a compound group. Like groups discussed earlier, a compound group serves as a container that includes the original paths. This means that you are still capable of modifying these paths and therefore updating the result. For example, we can create a hole in a shape using the Subtract operation. Then the original objects will appear inside a compound group, which can be operated mostly like a regular object. But, at the same time, you can reach the original objects using the Isolation mode or the Layers panel, and change their location or shape.
Expand Objects
The Expand button, located in the Path panel, turns an object into a number of typically more primitive objects. Those objects together look exactly like the original one. Objects are often expanded in order to edit their parts.
The following image shows an arrow with a stroke and gradient fill expanded into two objects: an arrow with gradient and the arrow outline. All created objects were manually moved apart for the illustration.
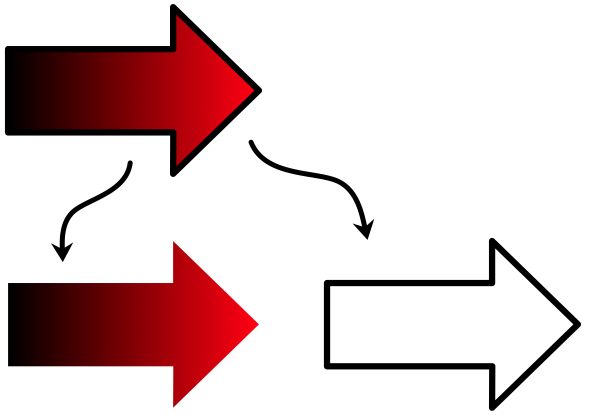
The result of expanding is a group of objects. After expanding in the example above, the outline and gradient are grouped. This is the most common case.
The Expand feature has many different use cases. They often rely on the fact that vector objects are expanded into paths that you could access independently. This enables object editing that is not possible in other ways. For example, the Rounded Rectangle tool creates a parametric object. The shapes of its corners are defined by respective settings. But these settings limit your capabilities to adjust the object's shape. Once you have reached that limit, you can expand a rounded rectangle and edit it as a path using the Selection or other tools.
Another case is text. Once it is expanded, you can make letters look differently from the original font. For instance, rotate individual letters, turn the "O" letters into smiley faces and so on.
There is no way to switch back and forth between the expanded object's state and the original one. That can be done using the Undo command by canceling all the editing you did after expanding. Before expanding, it is useful to create a duplicate of your original object or text just in case you need it later.
In certain cases, you have to apply Expand more than once to actually expand an object. For example, let's take a shape with rounded corners. When you expand it for the first time, the app converts parametric corners into a rounded path. At the second time, the object's fill and stroke will be expanded.