Working with Documents
Document Settings
The Document panel lets you set up your document.
To open the panel, tap on the corresponding icon in the main window.
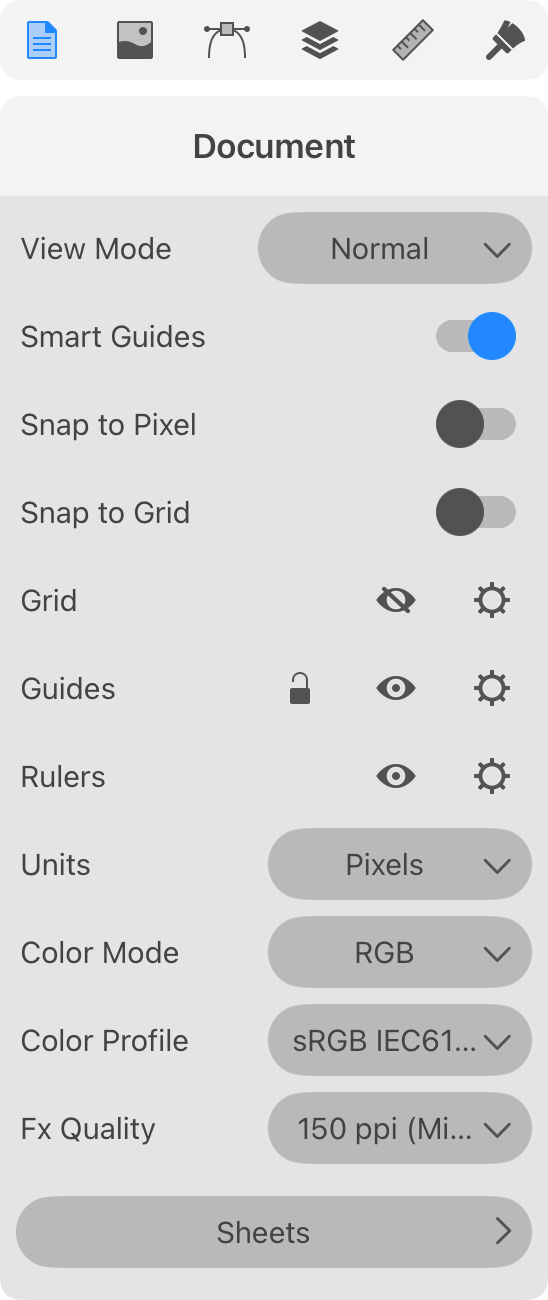
View Mode: Lets you select one of document view modes. You can choose a mode that is most suitable for editing your graphics. Or, you can preview how your design might look once it is exported to a raster format.
Transparent Background: Shows the transparency grid as the background of sheets.
Smart Guides: Shows smart guides when you move or resize objects.
Snap to Pixel: Snap objects to the pixel grid. This makes sense when you need to save your vector graphics in a raster file format. For more details, read Align Objects to the Pixel Grid.
Snap to Grid: Allows the program to snap objects to the grid when you move them.
Grid: The eye icon shows or hides the grid. The gear icon opens the Grid Options panel.
Guides: The lock icon locks or unlocks all guides. The eye icon shows or hides all guides. The gear icon opens the Guides panel.
Rulers: The eye icon shows or hides the rulers. The gear icon lets you choose either Global Rulers or Active Sheet Rulers. With the Global Rulers selected, the coordinate system and, consequently, the rulers' zero are used for the whole document. If you choose Active Sheet Rulers, the coordinate system and the rulers' zero are local for each sheet. As soon as you activate a new sheet in this mode, the rulers will align the zero coordinate with the sheet. By default, whichever sheet you activate, its upper left corner appears at zero.
Units: Defines the measurement units for the current document.
Color Mode: Lets you choose between the RGB and CMYK color models.
Color Profile: Defines the color profile for the document.
Fx (Effects) Quality: Defines how accurately effects such as shadow or glow should be displayed on the canvas. With higher values, effects will be rendered more smoothly. Smaller values make the program interface more responsive when you are editing a complex document. Note that this option does not affect the quality of exported graphics.
Sheets: Opens the Sheets panel.