Working with Documents
Creating Documents
To create a new document, select the File > New command in the main menu. The New Document dialog will open. You should set up document properties and click the Create button to have the document created.
When you start the program, the New Document dialog opens up automatically.
New Document Dialog
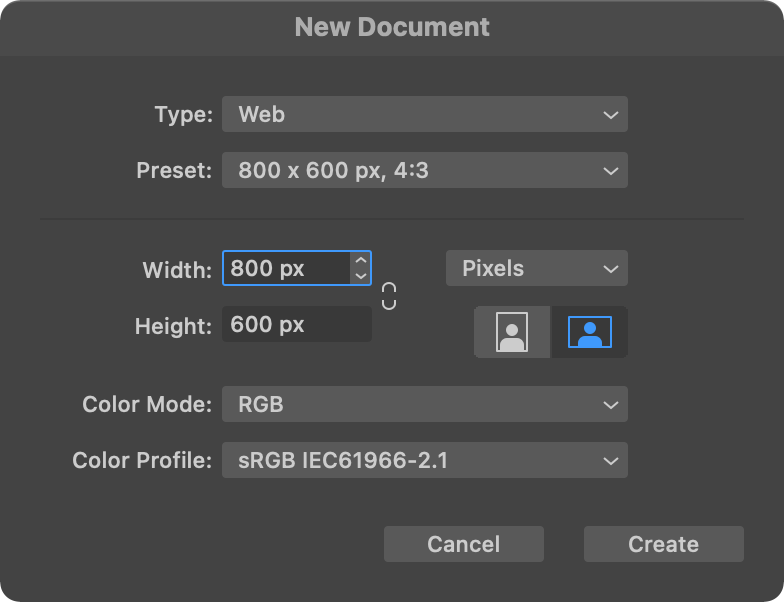
The combination of the Type and Preset options lets you select one of the predefined templates. The Type lets you choose a set of presets by usage (e.g., Web). Then you can select a particular sheet size from the Preset drop-down list.
The Width and Height give you an alternative way to set up the sheet size. Instead of choosing a template, you can set any size you want directly.
The Measurement Units drop-down menu lets you select units to show the Width and Height. The same measurement units will be used for sizes and distances on the canvas. You can change units any time later.
The Orientation buttons let you choose either horizontal or vertical orientation of a sheet by swapping the Width and Height values.
The Color Mode popup menu lets you choose between the RGB and CMYK color models.
The Color Profile popup menu defines the color profile for the document.
Notice that the dialog helps you create the first sheet. Your document can consist of multiple sheets of different sizes. Once a new document is created, you will be able to add more sheets.
Creating a New Document by Importing an Image
If you drag-and-drop an image onto the icon of the program, the latter will create a default document with your image added.