Drawing
The Appearance Panel
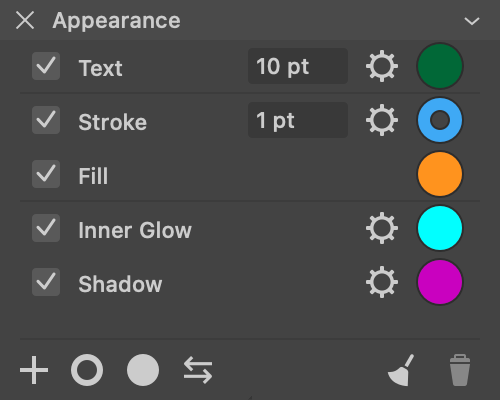
The Appearance panel lets you manage the object's Fill, Stroke and other effects. To open the panel, choose Window > Appearance from the main menu.
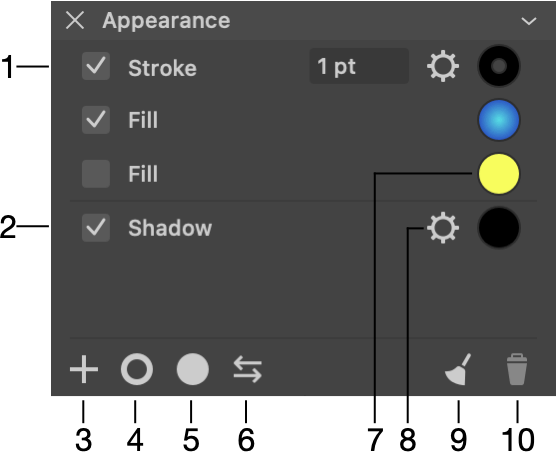
1 - Each line contains one effect, such as Stroke or Shadow.
2 - Hide or show an effect. Uncheck an effect to remove it from the design but still have the ability to easily re-apply it again.
3 - Add an effect. You can choose from a list of all supported effects: Fill, Stroke, Gradient, Brush, Inner Glow, Outer Glow, Inner Shadow, Shadow and Blur.
4 - Add a stroke.
5 - Add a fill.
6 - Swap the colors of a stroke and fill. If an object has multiple strokes or fills, only the upper stroke and upper fill exchange their colors. The rest remain unchanged.
7 - Change the color.
8 - Show a panel with the effect's settings. Some of the settings, such as the color or stroke width, can be accessed from the Appearance panel directly.
9 - Restore the default object's Fill and Stroke and also remove all of the customized properties.
10 - Delete the selected item.
The panel has the context menu. You can open it by right-clicking on an item in the list like Stroke or on empty space. The menu has these commands:
- Add adds a Stroke, Fill or an effect. This command does the same as the plus button at the bottom of the panel.
- Duplicate creates a copy of the selected item in the list.
- Delete removes the selected item from the list.
- Copy Style copies the style of a selected object. This includes all of the strokes, fills and effects present.
- Paste Style applies the copied style to a selected object.
- Reset Style applies the default Fill and Stroke and also removes all of the customized properties.
- Swap Stroke/Fill (Shift+X) swaps the colors of the object's stroke and fill.
Changing the Order of Effects
Effects in the Appearance panel are ordered in the same way as they were applied to an object.
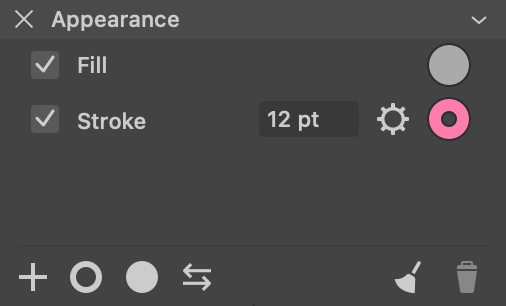
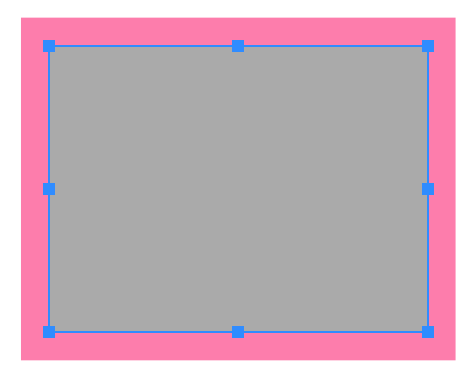
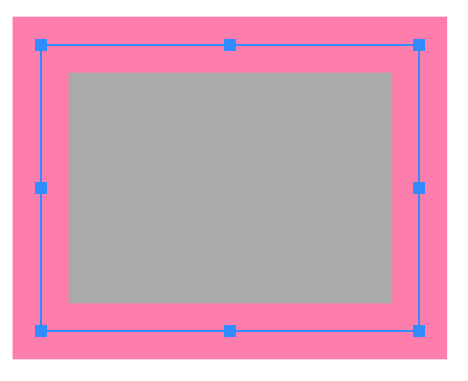
The arrangement of effects atop one other defines how the object looks on the canvas. Two rectangles below have identical paths, stroke and color fill. The only difference is that the left one has the stroke below the fill. The rectangle on the right has the opposite order of effects. As you can see, when the stroke is behind the color fill, half of the stroke width is invisible, making it look two times thinner.
To change the order of effects, drag one to a new position.
The ability to place certain properties or effects above or below others in the list depends on their type. These types are presented in the Appearance panel as sections separated with lines. Let's take a text object as an example. The panel has separated all properties into three sections.
The Text entry always occupies the top of the list. The section in the middle can contain only Fill, Stroke, Gradient or Brush entries in any order. The lower section is for Inner Glow, Outer Glow, Inner Shadow, Shadow or Blur. You can rearrange properties within their own section, but placing them into another section is not possible.
The Style of an Object
Any object in your design has particular effects set up in a certain way. We call such a combination of effects "style".
In order to apply exactly the same style to a second object, you can copy this style. To do this, select the first object and choose Edit > Copy Style from the main menu. Then select the second object and use the Edit > Paste Style command. These commands are also available in the context menu which can be opened by right-clicking on an object.