Importing
Tracing Images
The app can trace (vectorize) bitmap images such as JPEG or PNG creating vector graphics as a result. The created graphics will consist of one or multiple paths which can further be edited with various tools. To open the image tracer, select an image on the canvas and choose Modify > Trace… from the main menu.
When you trace an image, the app detects boundaries between contrasting colors. It translates those boundaries into paths. This makes the quality of an input image very important. It should have sufficient contrast and/or areas with distinctive colors. Tracing blurry images or images containing areas with gradient colors may produce less accurate results.
It is not recommended that you trace large amounts of text. For better readability you can add text manually rather than keep vectorized letters.
The result of tracing can contain only closed paths filled with a particular color.
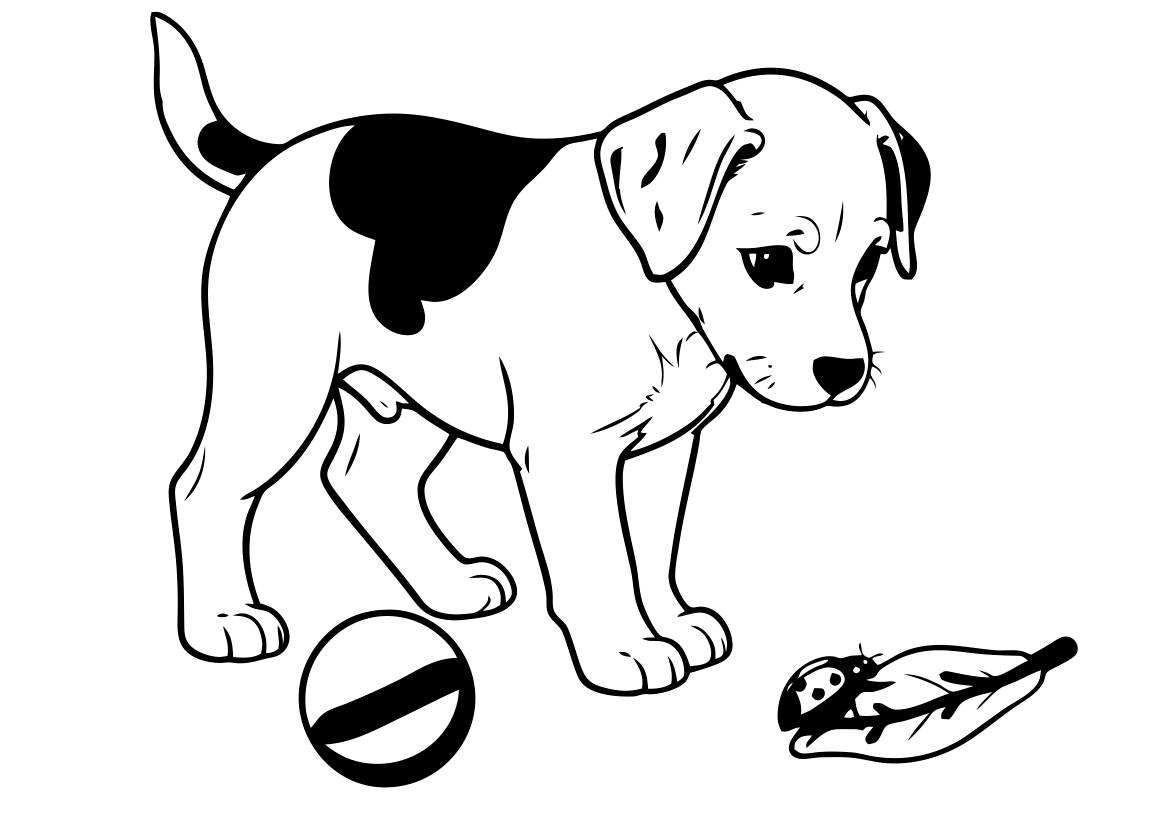
The tracer has the Monochrome and Colored modes. Choose the mode depending on the input image and the amount of detail you wish to have in the output.

Choosing the Source Image for the Tracer
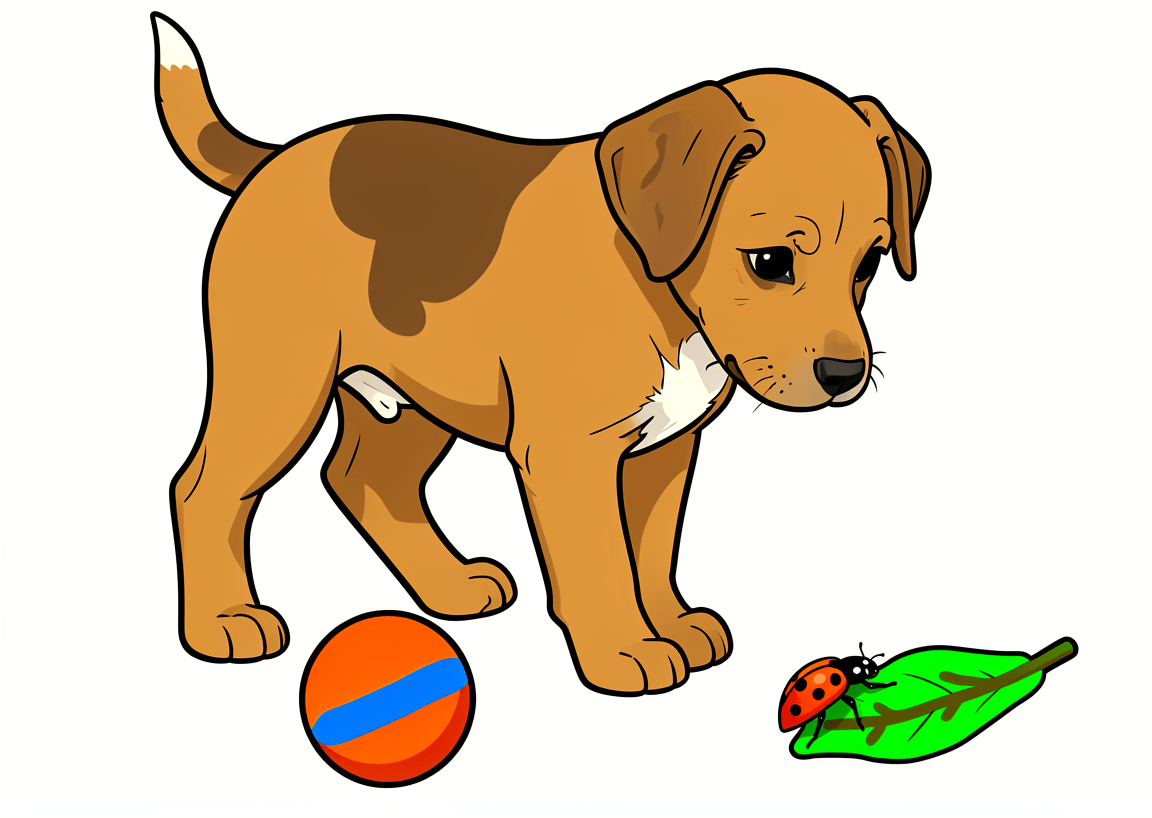
To trace an image you should import it (e.g., drag and drop a file from Finder or paste it from the Clipboard).
Note that once imported, an image turns into an object that can have different properties such as outline or shadow. The tracer takes the entire object as the input including properties such as stroke or shadow that you can add. If you apply rounded corners to the original image, the traced image will also have rounded corners. For best results, trace the original image without modifying it.
Monochrome Tracer Settings
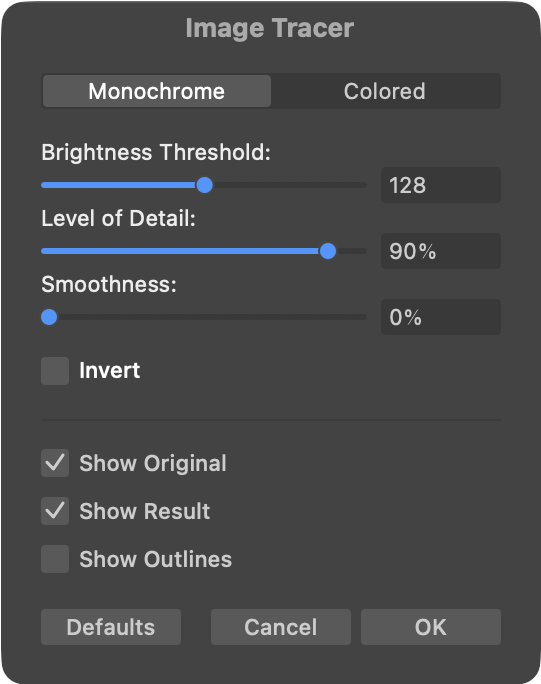
Brightness Threshold: Pixels that are darker than the threshold are considered as a part of the image. These pixels define areas enclosed by paths. Pixels that are lighter are treated as the background. The Invert option swaps the meaning of the dark and light pixels.
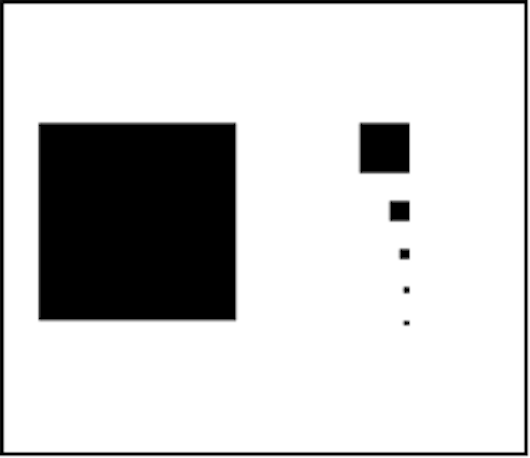
Level of Detail: The input image may contain very small spots (either noise or just small details). These spots can potentially turn into very small paths once the image is vectorized. A large number of small paths overcomplicates the resulting vector image. This also increases the size of an exported SVG file. The Level of Detail sets up a threshold. Details in the image will be discarded if they are smaller than the threshold.
In the image below, at 100% all of the black areas are vectorized. The smallest spot is discarded at 91%, the second smallest at 86%, the third smallest – at 60%. The three biggest squares will remain even if you set 0%.
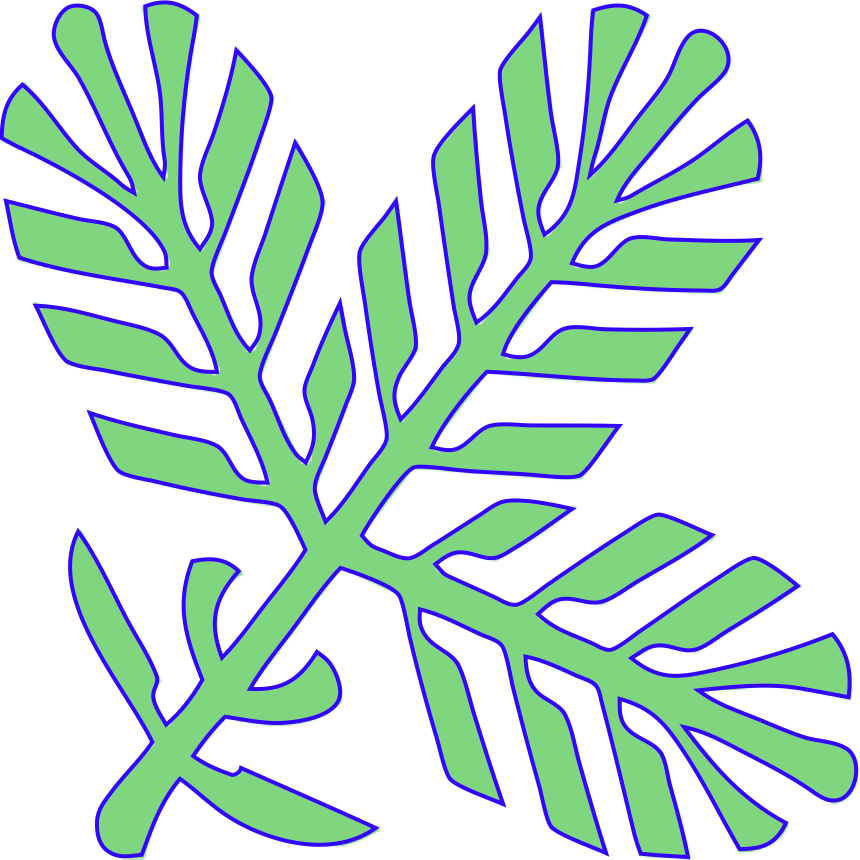
Smoothness: The result of tracing can be simplified by reducing the number of anchor points. With less points, paths look smoother but they outline the original image with lower accuracy. For maximum accuracy, set Smoothness to 100%. In the examples below, an original green image is compared with tracing results shown as outlines.

Invert: This option inverts the input image. Bright pixels will become dark and vice versa.
Defaults: The Defaults button restores the default settings.
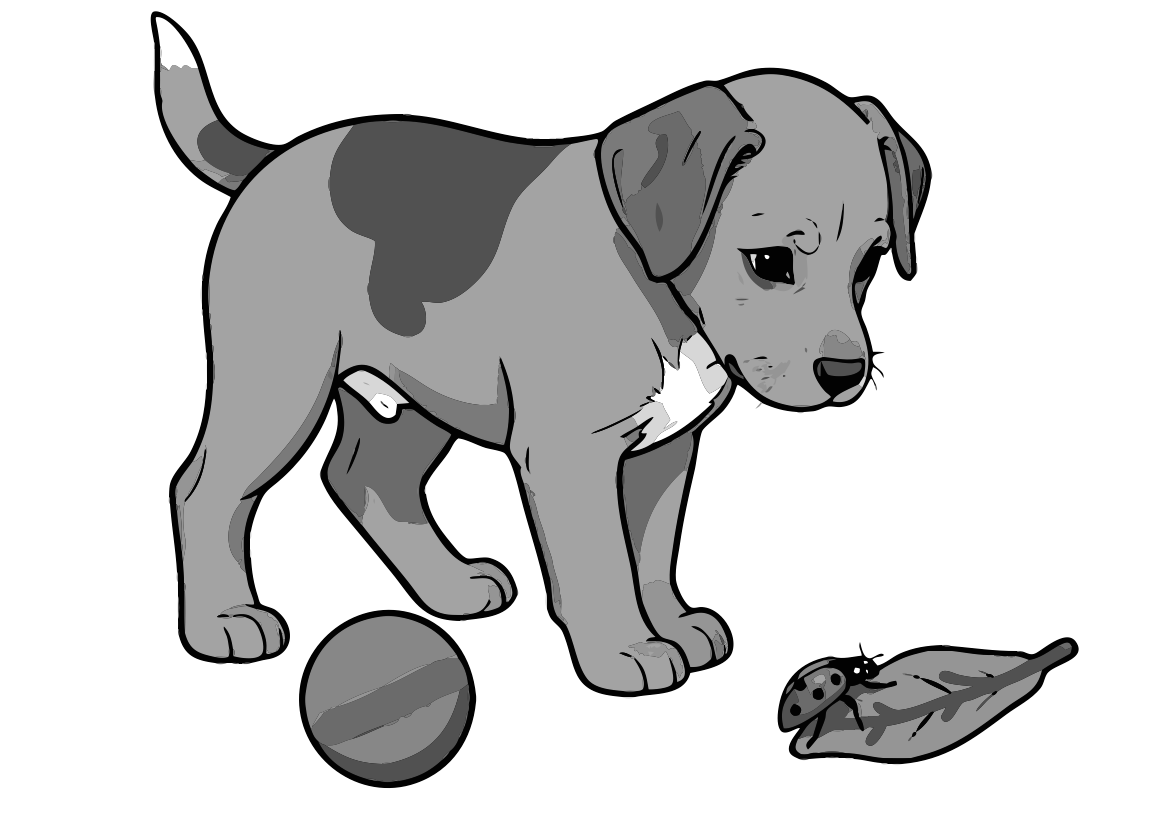
Colored Tracer Settings
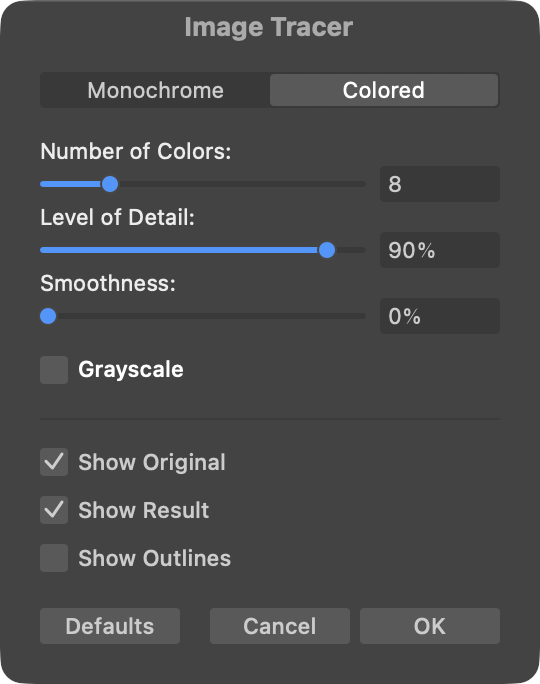
Number of Colors: Before tracing an image, the app groupes pixels of the same color into outlined shapes. In order to limit the number of the shapes, pixels with similar colors are treated as the same color. This is called posterization. The Number of Colors parameter sets the maximum number of colors that can be present in the created vector image.
Level of Detail: Same as in Monochrome Settings.
Smoothness: Same as in Monochrome Settings.
Grayscale: Option to convert a colored input image into a grayscale image before tracing.
Defaults: The Defaults button restores the default settings.
Preview Modes
While you are adjusting the settings, the result of tracing appears directly on the canvas. You can choose to preview the traced image alone or on top of the original raster image.
Show Original: This option displays the original image.
Show Result: This option displays a black or colored image depending on the mode.
Show Outlines: This option displays traced paths without color fill.
You can zoom in and scroll the preview in order to look closely at particular details.
Tracing Strategy
Image tracing is an iterative process. You may need to readjust some of the settings to find the best combination for a particular image. Often, you will look for a balance between the higher accuracy (amount of details) and lower complexity of the output image.
In the Monochrome mode, set the Level of Detail to the 90-100% and Smoothness to 0. Find a Brightness Threshold value that gives you most of the details. Start decreasing the Level of Detail and stop just before important details begin to disappear. Keep the Smoothness at 0 if you need higher accuracy. To reduce the number of anchor points, try to increase the Smoothness, or use the Simplify tool after you finish tracing the image.
In the Colored mode, set the Level of Detail to the 90-100% and Smoothness to 0. Find the lowest value of the Number of Colors that gives you enough details. With certain raster images turning on Grayscale gives more details than with colors. Start decreasing the Level of Detail and stop just before important details begin to disappear. Keep the Smoothness at 0 if you need higher accuracy. To reduce the number of anchor points, try to increase the Smoothness.
With either of the modes, turn off the Show Original option from time to time to make sure that you clearly see the result and do not confuse it with the original image in the background.
It is recommended that the input image size is about 900-1500 pixels per side. If you want to vectorize an image that is much bigger or much smaller, resize it before importing.