How to Draw a Rose in Amadine
Create a document with a width of 2800 and a height of 2500 px and click/tap Create.

In the toolbar, select the . In the Appearance panel, choose Stroke 16 pt and begin to draw the center of the rose.
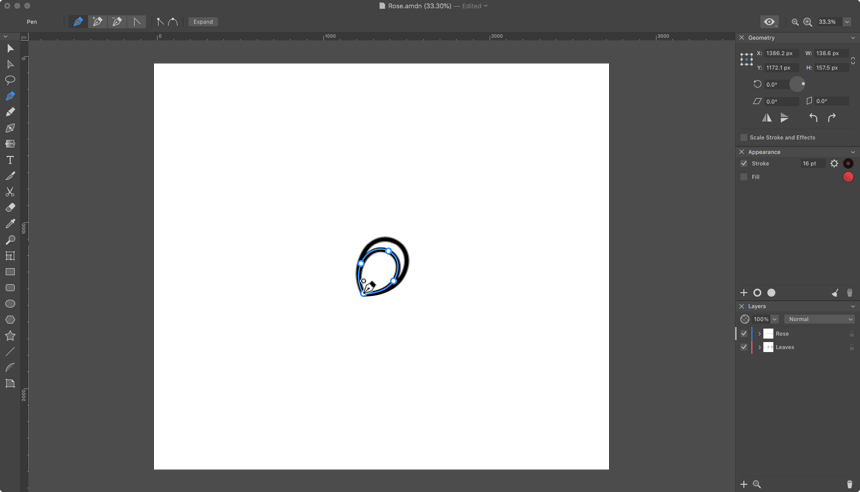
Continue adding the petals behind the original contour.
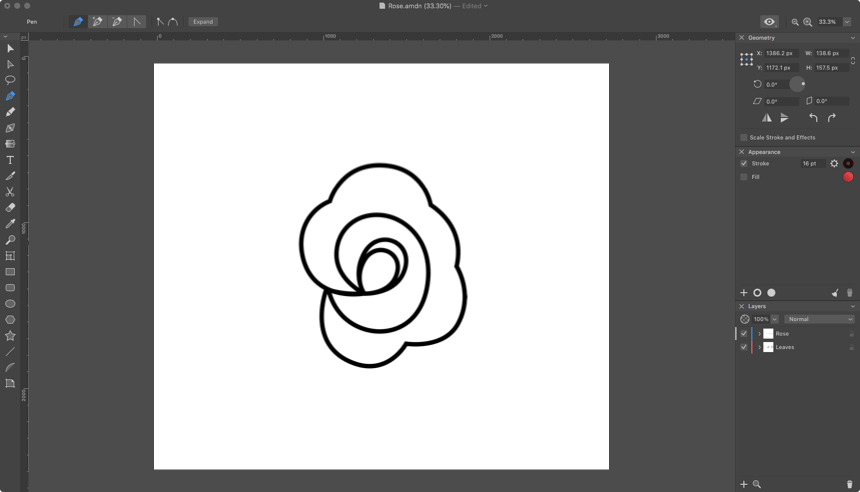
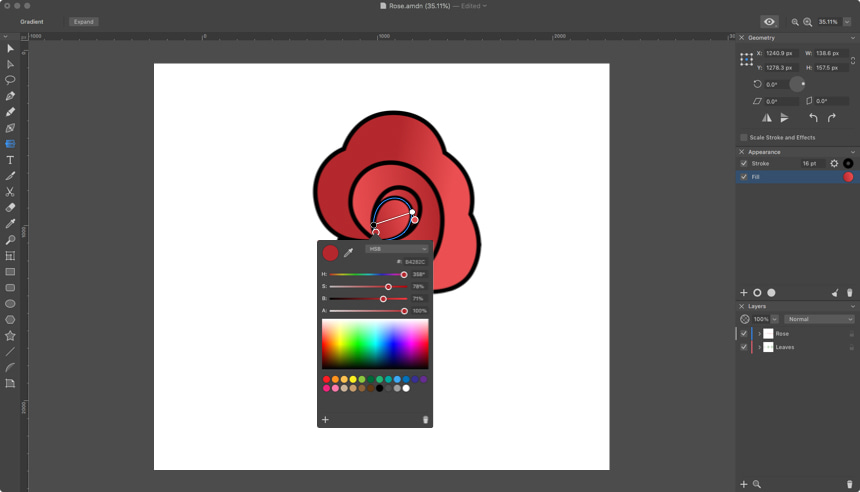
After drawing a few contours, add a gradient. Select the first contour and add the gradient. Select the and start pulling the color marker from one side to the other. Click/tap on the color marker to open the color settings panel. Choose the right color #EC4F52 then select the second marker and choose the color #B4282C. Click/tap on the empty space on the canvas to close the panel.
Add some more contours over the main petals using the .
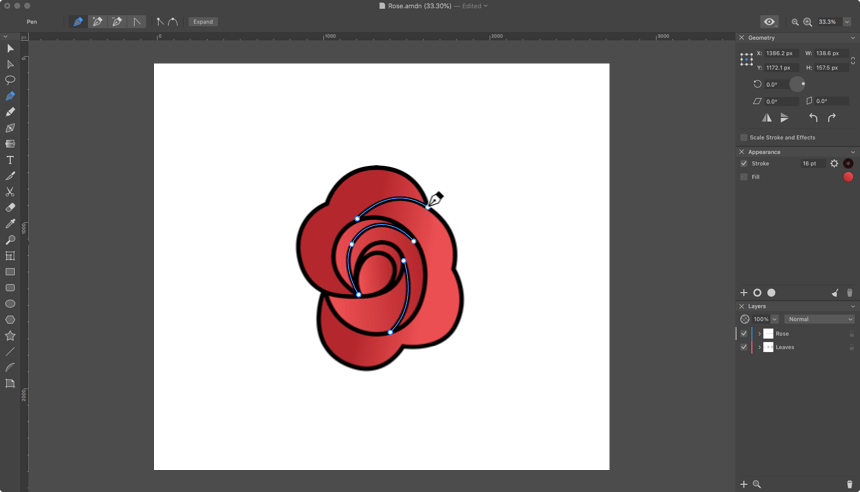
Continue adding petals behind the objects with gradients.
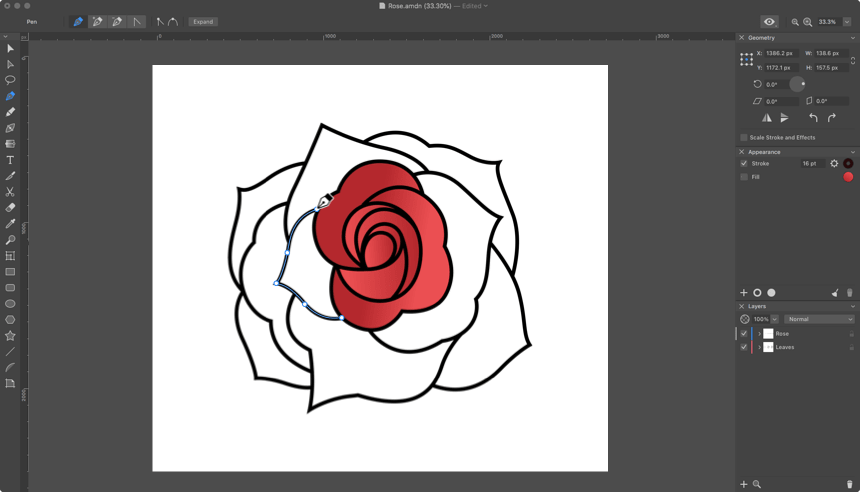
Add a gradient to the remaining petals. Select the and start pulling the color marker from one side to the other. Make a click/a tap on the color marker to open the color settings panel. Choose the right color #EC4F52, then select the second marker and choose the color #B4282C. Click/tap on the empty space on the canvas to close the panel.
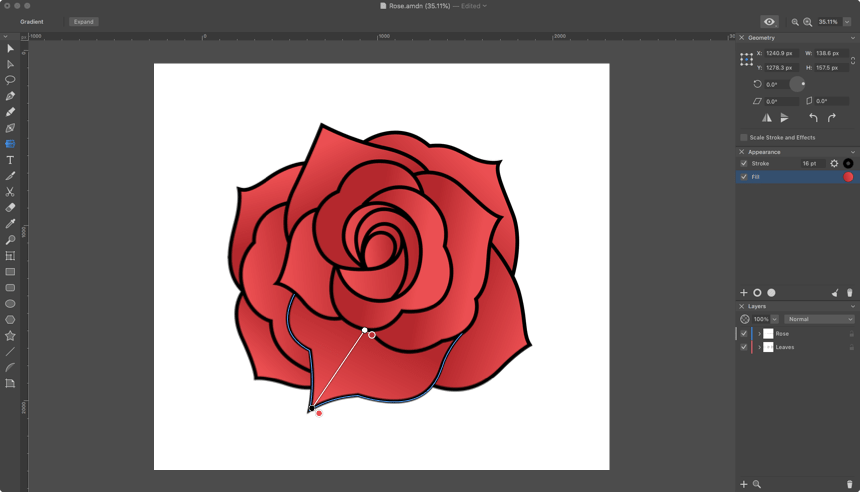
Add final contours over the main petals using the .
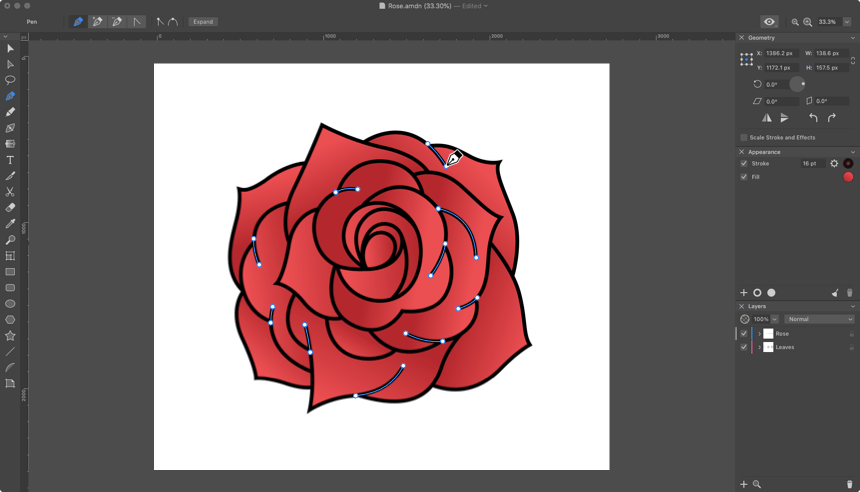
Now it's time to draw the leaves behind the rose petals using the .
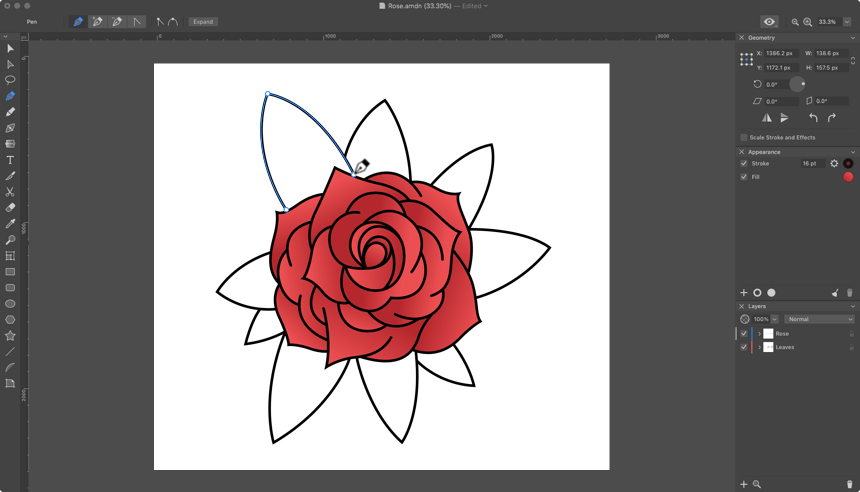
Add a gradient to the leaves. Select the and start pulling the color marker from one side to the other. Make a click/a tap on the color marker to open the color settings panel. Choose the right color #4EA251 then select the second marker and choose the color #82C958. Click/tap on the empty space on the canvas to close the panel.
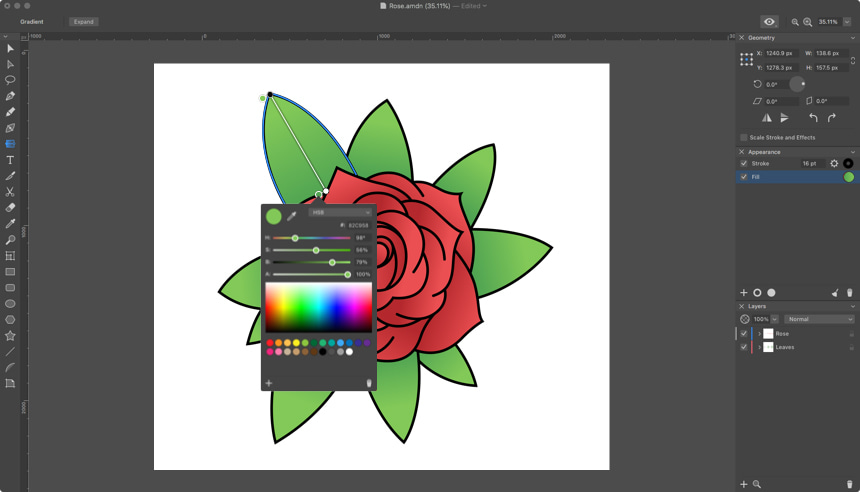
Finally, add more lines to make the leaves more realistic. Select the and draw black lines within a leaf.
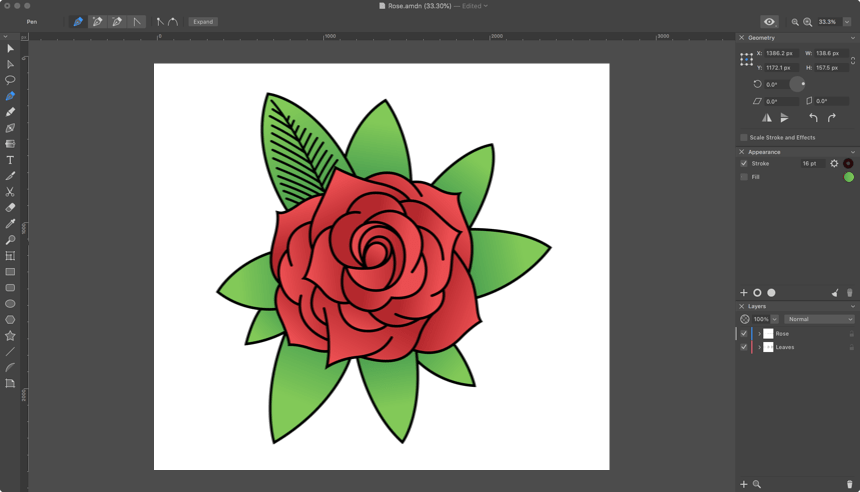
After that, select the lines you have just drawn, find them in the Appearance panel and click/tap on the Gear icon near the Stroke to enter the stroke settings. In the panel that appears, select the Profile which is indicated in the screenshot below. Do the same with all the lines inside the leaves.
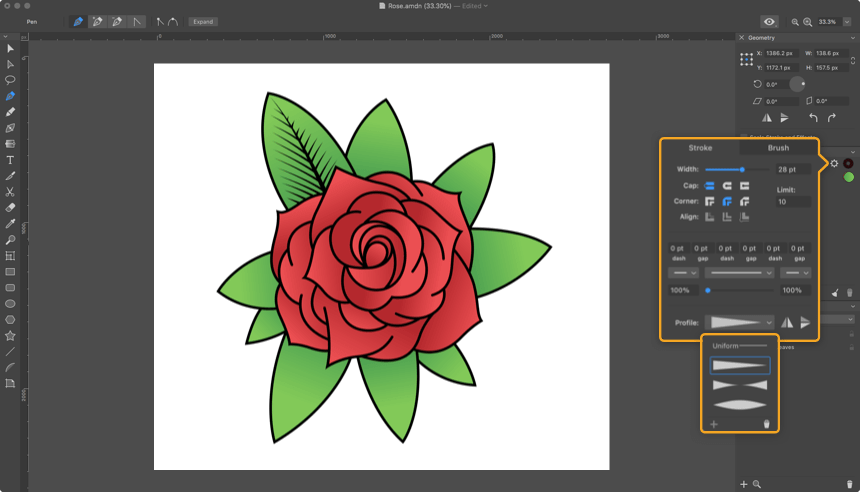
Our beautiful rose is ready!


