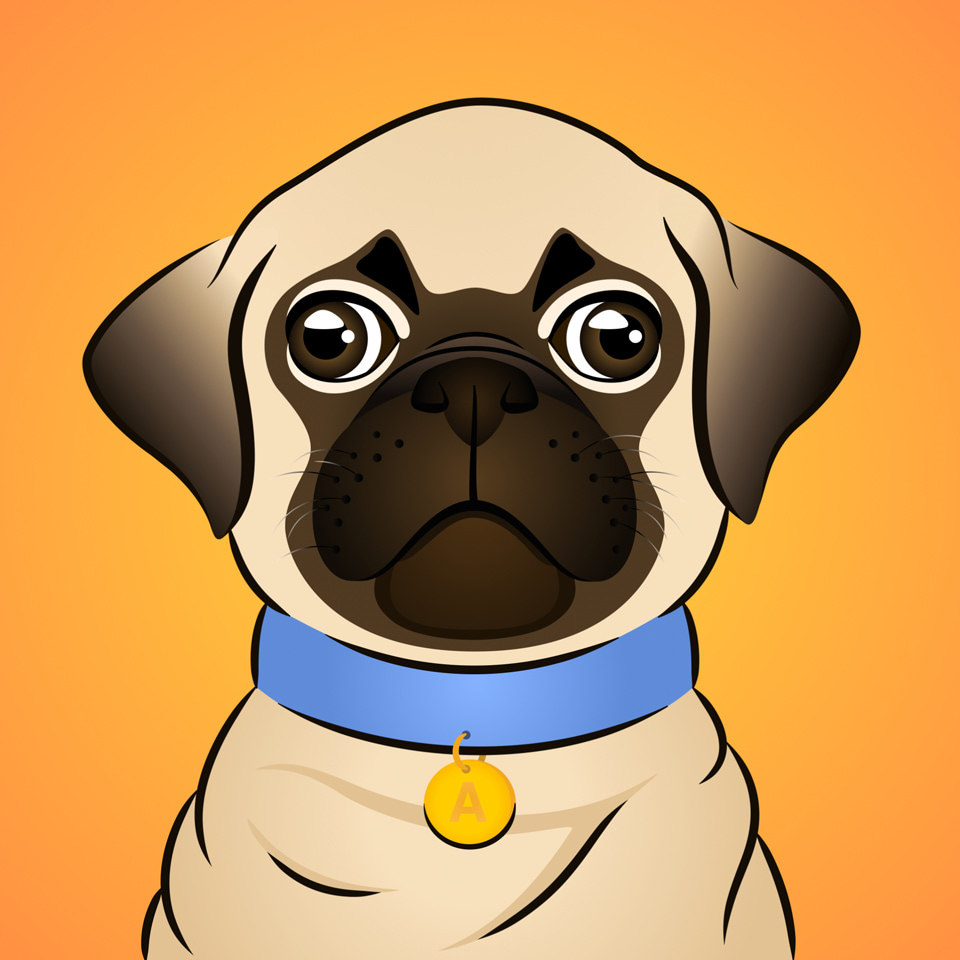
How to Draw a Dog in Amadine
This article will guide you through each and every step of creating a dog vector graphics. The drawing process is quite straightforward even for beginner vector artists. We will use Amadine app for macOS, iOS and iPadOS to explain the design process, which can be easily adapted to other vector drawing apps.
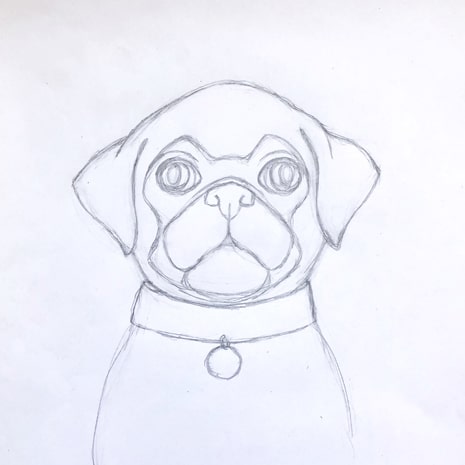
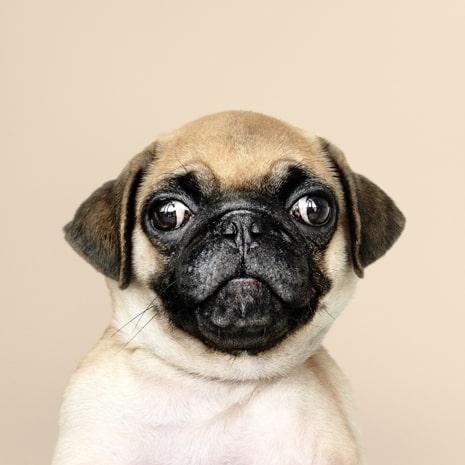
If you wish, you can first make a sketch on paper or use a photograph as a reference. If you use a sketch or photo, you can import it using Import function (File > Import or > on iOS/iPadOS) or Drag & Drop and draw on top of your reference. You can also draw directly in the vector program from scratch.
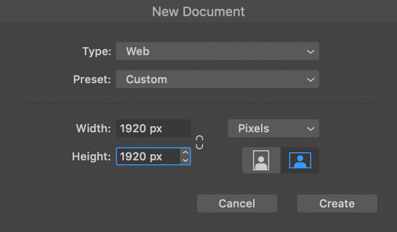
Before you start drawing, you need to create a document. Choose the type and size of the document according to your needs, you can change these parameters later through the Document Setup ( > Sheets > Sheet Properties on iOS/iPadOS).
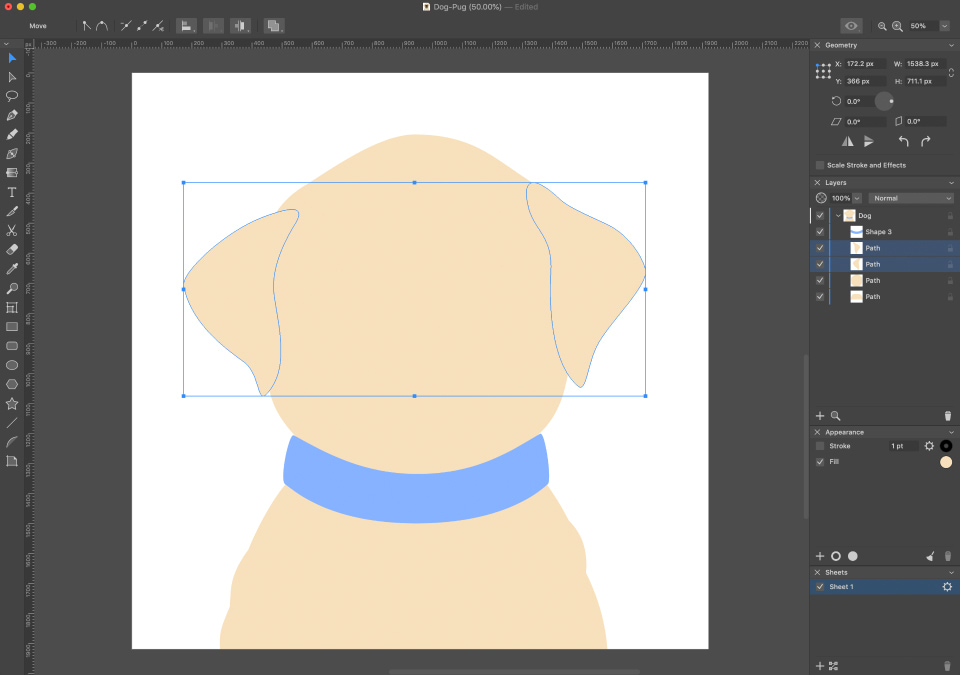
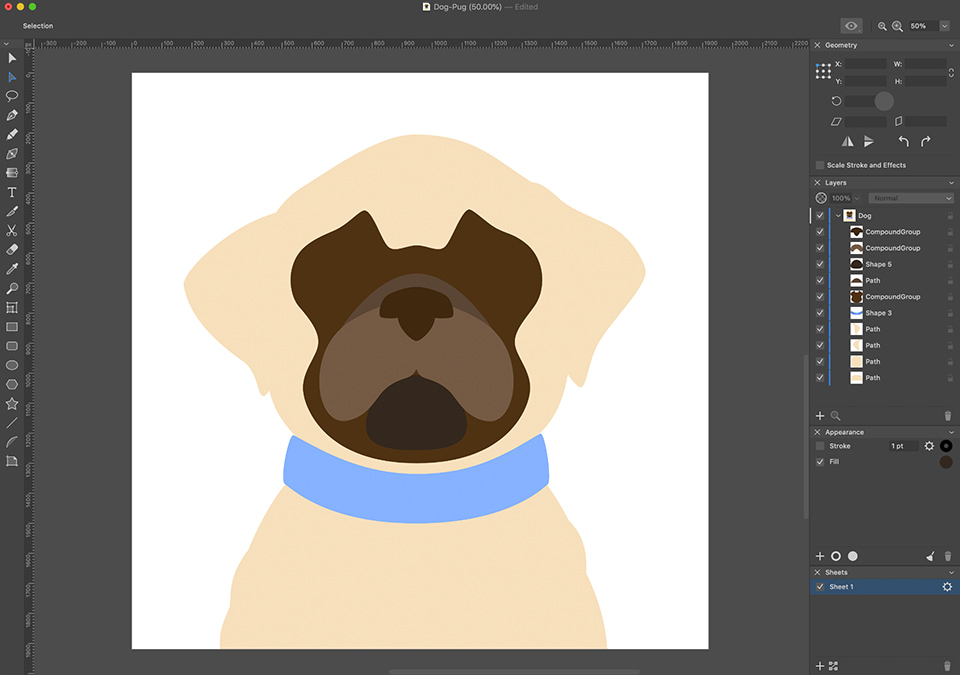
Now we are good to start drawing. First we need to create the basic shapes, then proceed to the color and fine details. Using the , we draw a head shape, torso, collar and ears. To make it more hands-on, you can use nature, sketches or photos. The color fill can be set to any color at that stage.
As we draw a pug, we will create a snout shape—a dark spot that is characteristic of this breed. We create the shape in two stages, draw one side of the snout with the pen, then copy the shape and use the mirror image in the Geometry panel so that we have two identical parts. We move both figures with the help of the , so that they converge into one symmetric form. Next, we can connect them into one shape using Boolean Operations, select the command, and then click Expand (or Modify > Expand). You can find Boolean Operations and Expand in the on iOS/iPadOS.
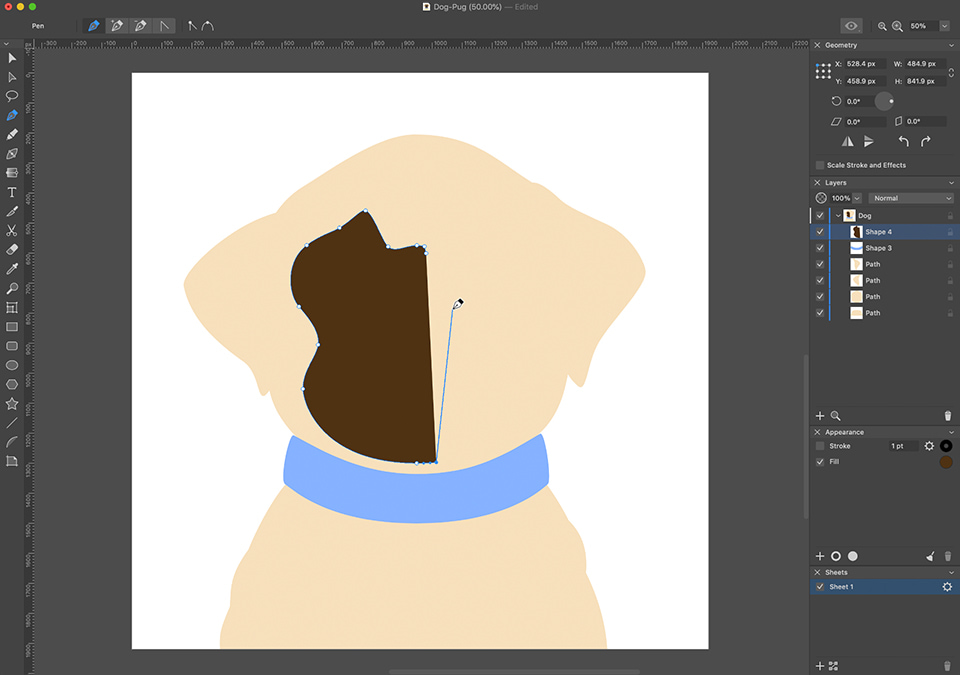
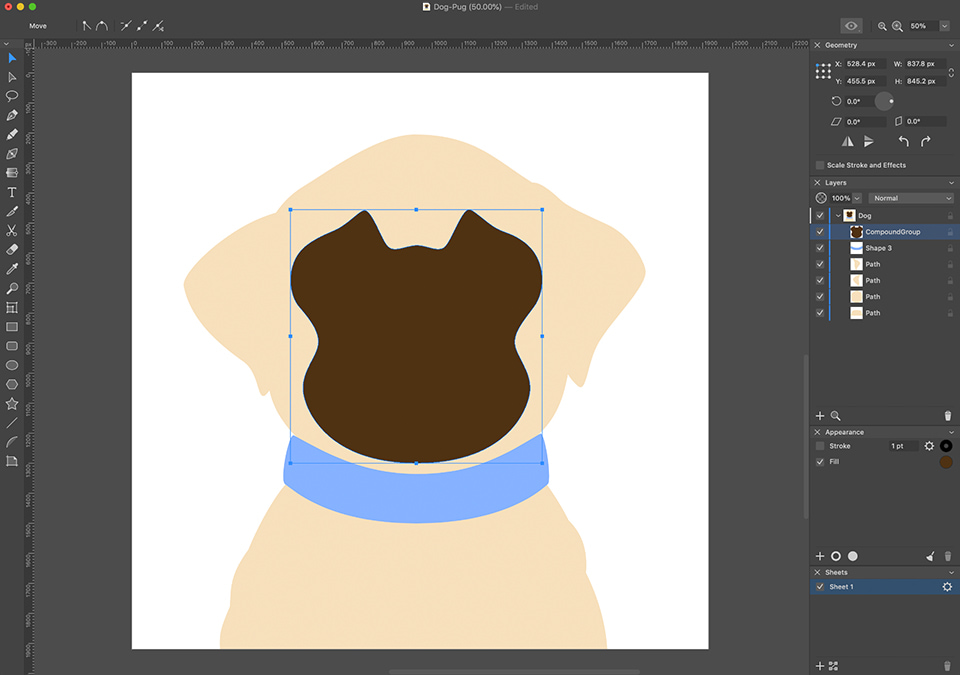
Next, we continue to draw a snout, in the same way creating the upper jaw: draw one half, mirror and merge. The lower jaw is drawn as one shape.
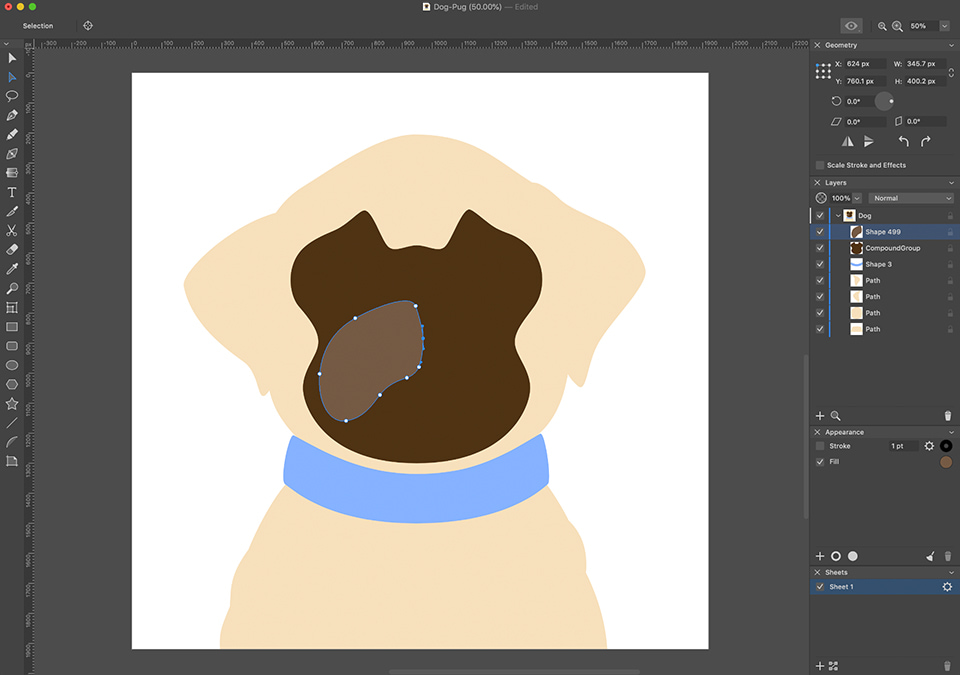
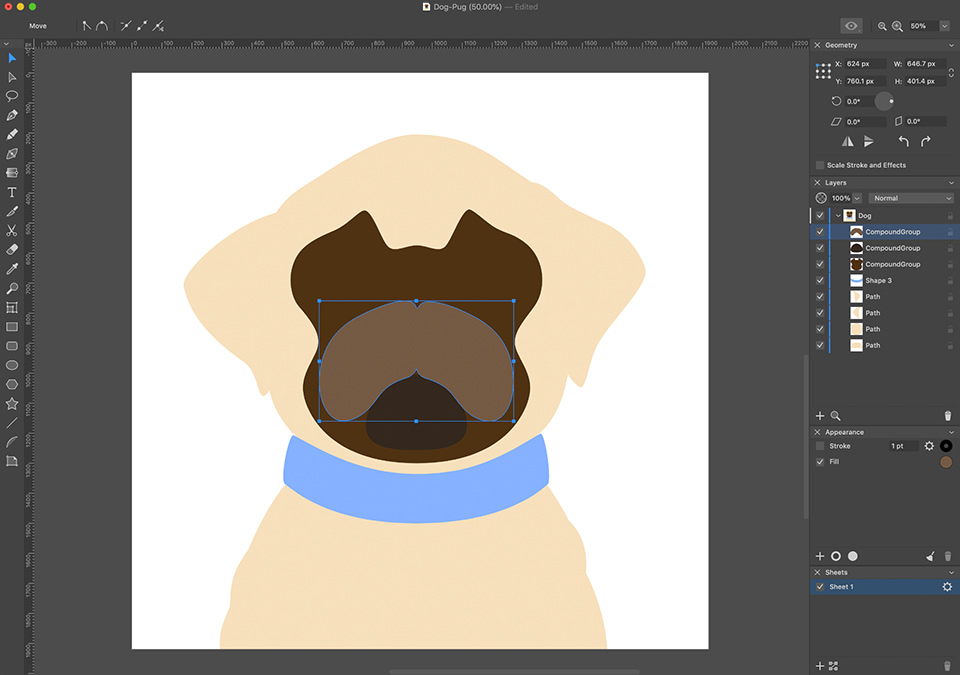
Using the same method, we create a nose: draw one half, then copy and merge it. After that, draw the top of the snout.
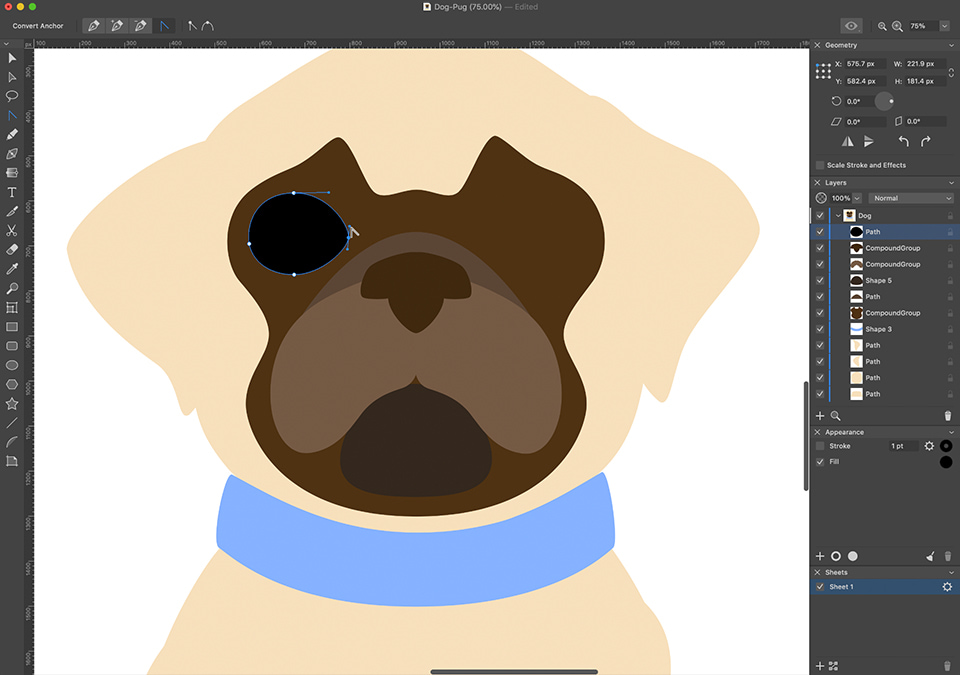
Now we can move on to drawing eyes. Create an eye shape using the Pen Tool. You can also draw it in another way: create an oval using the , then use the to edit one of the points of the ellipse so that it looks like an eye—click (or tap on iOS/iPadOS) on the point and pull the handles from it that will fit your idea of an eye. It is also possible to use the to move the remaining points so as to give the shape a more natural form.
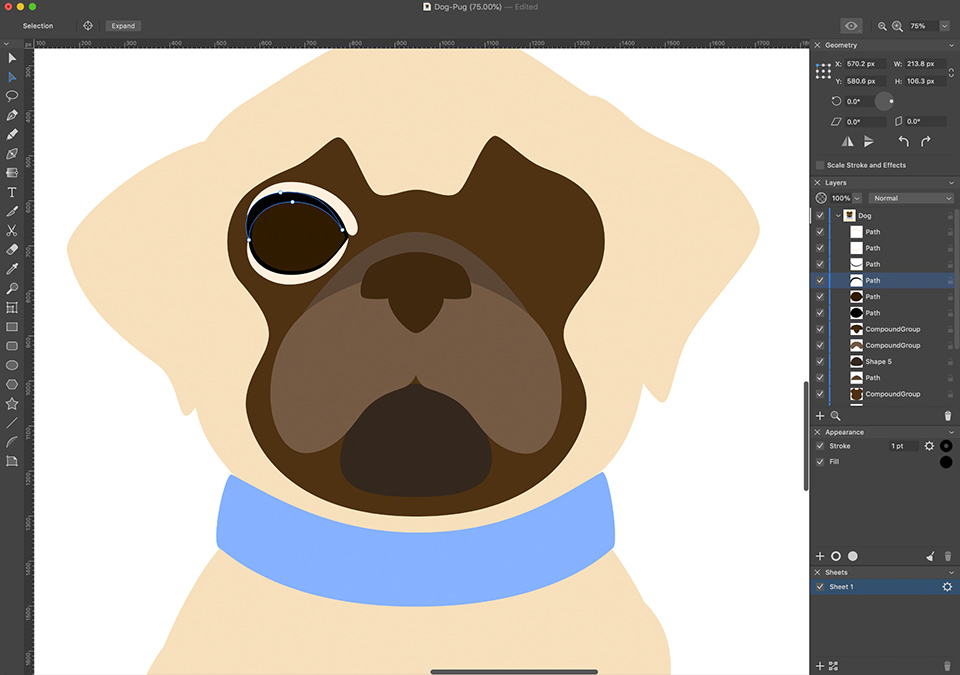
Next, draw the rest of the eye, the inside, the upper and lower eyelids, the dark areas (shadows) under the eyelids.
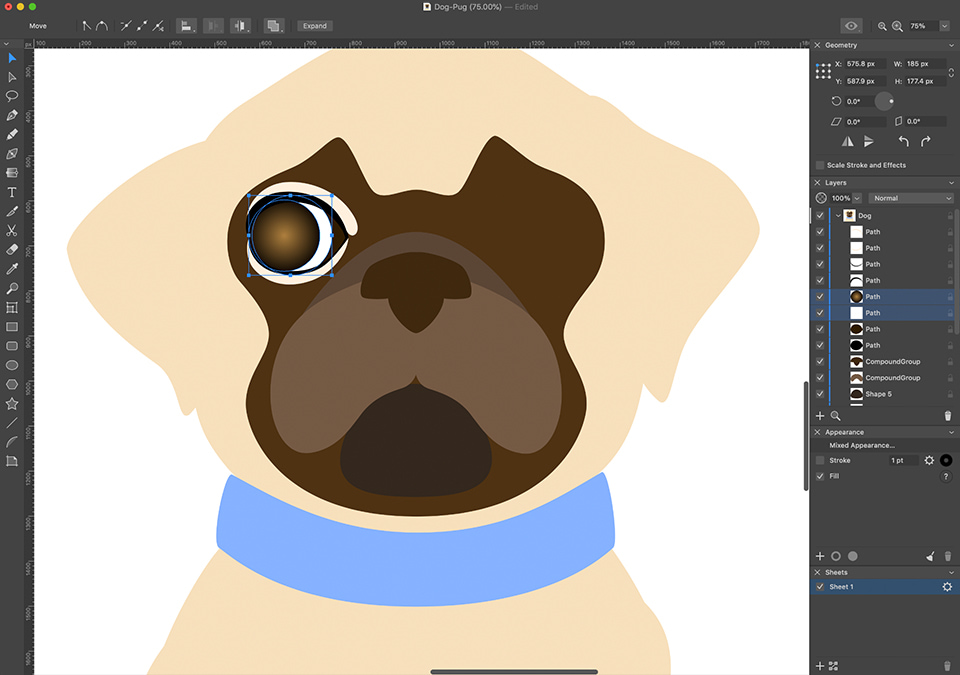
Using the , we create two circles—a white and an iris—and place them in the Layers panel so that they are under the upper and lower eyelids. For the iris, immediately set the radial gradient, the light color inside the iris is #AE7F3E and the dark is outside #130C04, scale 50%.
If you are working in Amadine app, choose the object to fill, for that click on it once. In the Appearance panel go to Fill and click on the color circle. In the Сolor panеl choose color picker (an eyedropper) and you will be able to pick any color you click on with it. The chosen object will get the color you’ve clicked on. (The eyedropper in the Tool panel does not perform the same function—it copies the style of the object, not the pixel color).
Next, in the same way, we draw the pupil and add the reflection of light—two small figures of white color. You can make them differently shaped. Next, select all parts of the eye using the and group them using the Cmd+G key combination or go to the > Group or to the > Group on iOS/iPadOS. In the Layers panel, we change the name of the group to “Eye 1”. To rename a layer on iPad or iPhone, double tap on the layer name. Draw the dog’s brow with the .
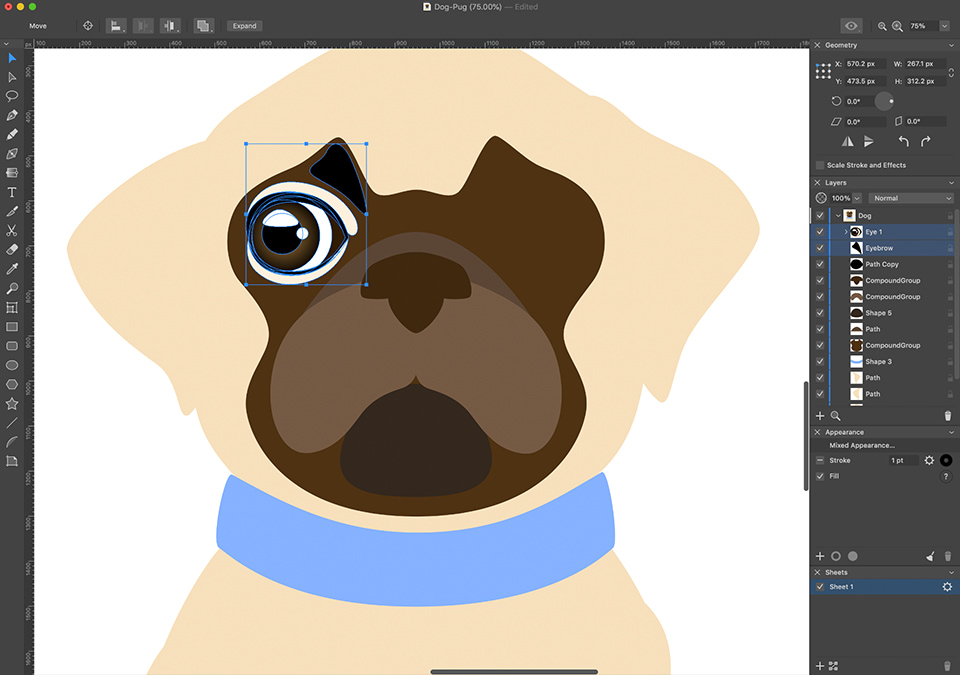
Select the “Eye 1” group and the eyebrow, copy and mirror them, and place the mirrored copy symmetrically on the other side of the snout. To move an object clearly horizontally or vertically hold down the Shift key on Mac or hold the one finger on iPad/iPhone. We change the location of the reflection and the pupil so that the eyes look in one direction. Change the name of the second group with an eye to “Eye 2”.
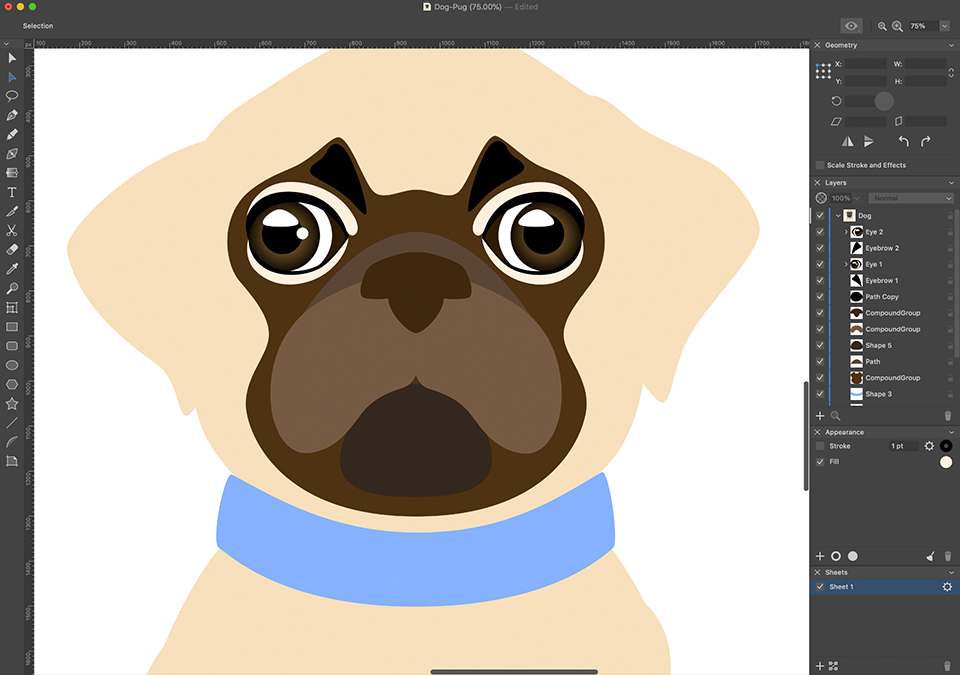
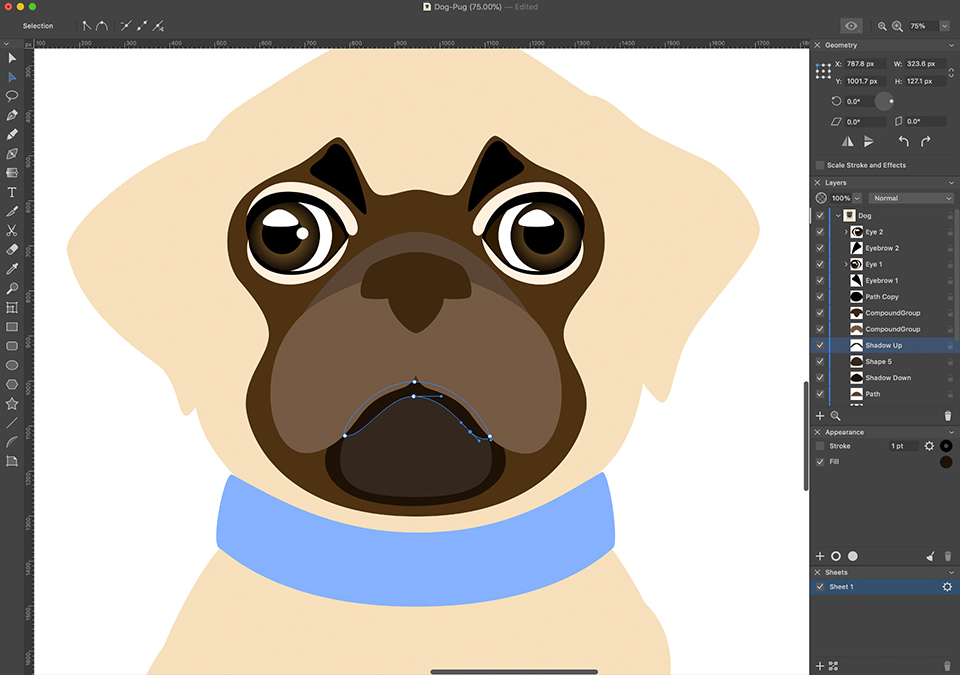
We start drawing smaller details adding the shadows for the upper and lower jaws. It is necessary to place each shadow on the Layers panel under the corresponding part of the jaw—the upper under the upper, the lower under the lower. On iOS/iPadOS you can move layers by dragging or using the arrow buttons on the toolbar at the bottom of the . Fill these details with dark color #1E1307.
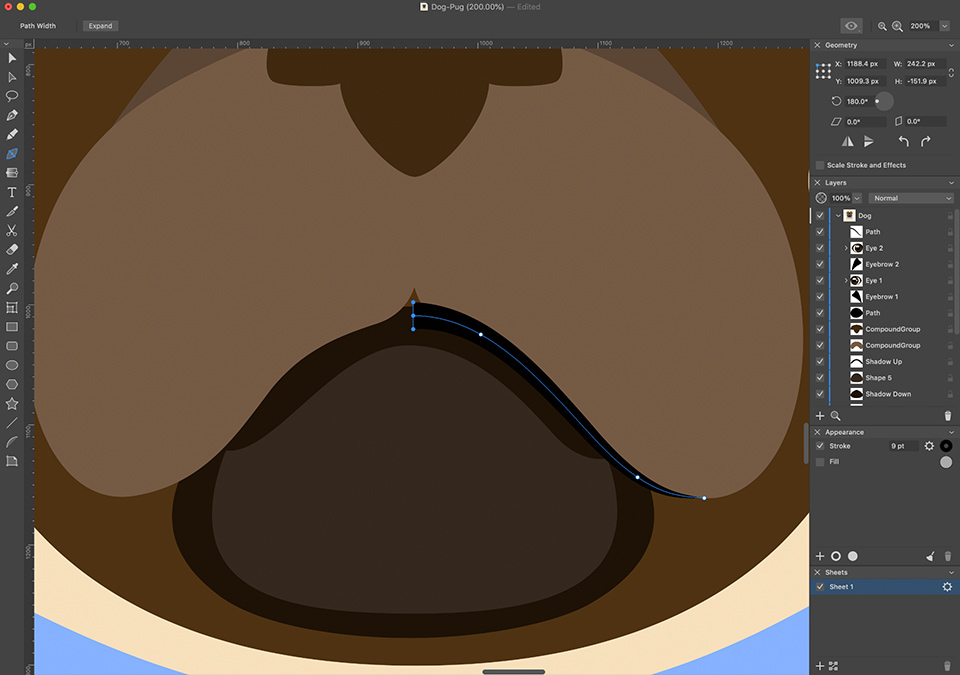
After that, draw the details of the snout and add the outlines. To do this, use the or the (it is often called Brush in other apps) if you draw on the tablet or iPad. Set the stroke (Appearance panel > Stroke settings) with a thickness of 9–10 pt and in the settings of the stroke select the profile which is thinning along the edges.
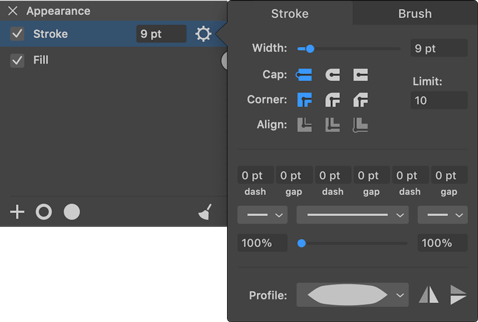
We draw a line repeating the contour of the upper jaw. Next, take the , select the leftmost point on the line and drag it so that the line expands. Do the same with a point right to the left from the middle of the line. Duplicate ( > on iOS/iPadOS) and mirror the line on the other side of the snout. Next, draw a line in the center of the snout and nose, using the same profile. We trace the edges of the nose in the place where the nostrils should be, set the profile which is thinning towards the edges, and with the help of the we change the thickness in the middle. Set this color for lines: #030303.

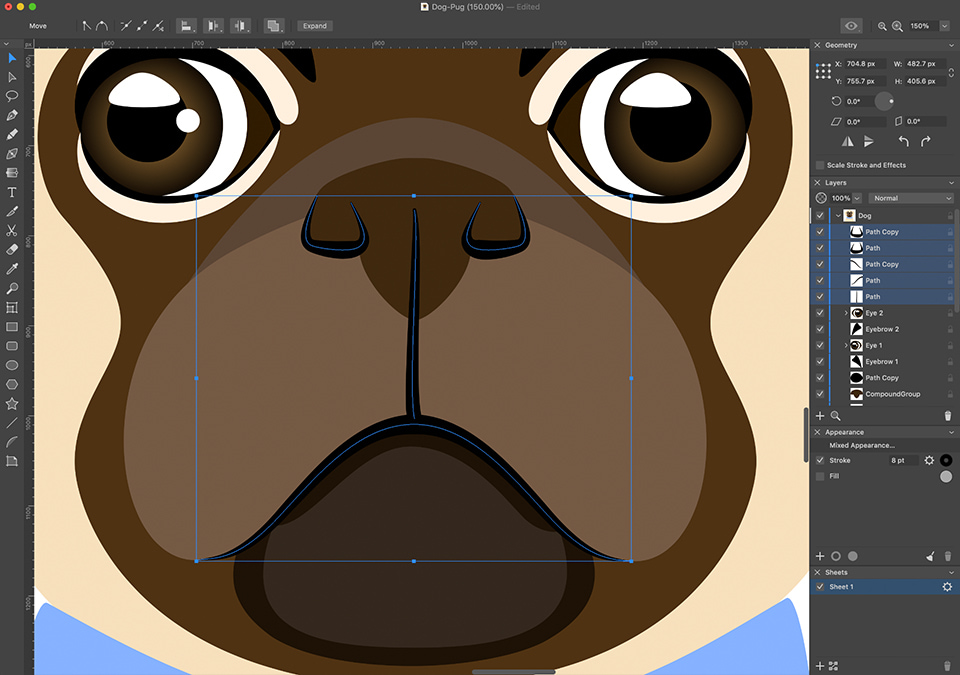
Next, draw the lines of the main contours—the head, ears, torso, collar, you can add lines on the muzzle. The inner ear lines can be set to a larger thickness—25 pt to create a sense of shadow. Create a separate layer for the contours, call it Lines and move all the lines to this layer.
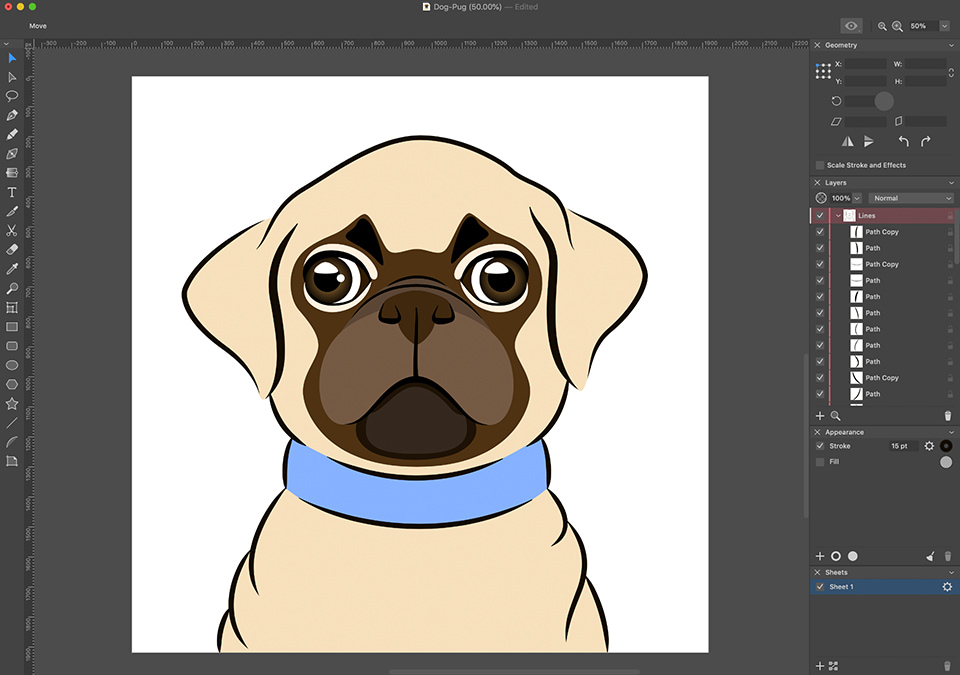
Let's add some more details to our dog. Create another layer and name it “Details”. Let's draw small wrinkles on the body with the help of a pen, also add a suspension on the collar, using the . You can add text to the pendant, to do this, select the , print, set the required size and click Expand (Modify > Expand or > Expand on iOS/iPadOS). If we need to adjust the size again, then change it with the while holding down the Shift key or holding one finger on the screen on iPad/iPhone to keep the proportions of the letters.

In order to align some of the details with each other, select the parts that are in the middle and must be centered: the head, the dark part of the muzzle, nose, jaw, collar and torso and choose ( > Arrange on iPad or iPhone).
Now let’s add the necessary colors to our drawing using gradients.

For the head, adjust the radial gradient from dark to light, align it so that the dark area is above the middle of the head. The dark color is #E2C293 and the light one is #F8E0BD, scale 60%.
We create a torso with the same gradient, just change colors in places so that the dark is outside, and light inside and align the gradient to the center, scale 100%.
Put the wrinkles on the body with the color #E2C293.
All lines, except those that we have already set the color for, should be #130C04.
The collar needs a radial gradient, dark color outside #5F8CD9 and light inside #86B2FF, scale 100%.
The gradient for the ears is linear, four colors from dark to light: #120B03, #6A5544, #B99C75, #F3DBB4, scale 100%. The angle is set so that the light color merges with the color of the head, the left ear is 25°, and the right color is 165°.
Radial gradient for the face #120B03 and #4F3921, dark inside, scale 50%.
To color the nose use radial gradient, dark color outside #030303 and #38250F, scale 50%. Part of the muzzle over the nose should be set the linear gradient from #110D0A to #5B4535. Change the position of the color sliders on the gradient to get a satisfactory result.
For the upper jaw set radial gradient, dark color outside #120D07, light color inside #563B1E and scale 50%. The lower jaw is #120B03 and #4F3313, we position the light color just above the center of the figure, the scale is 100%.
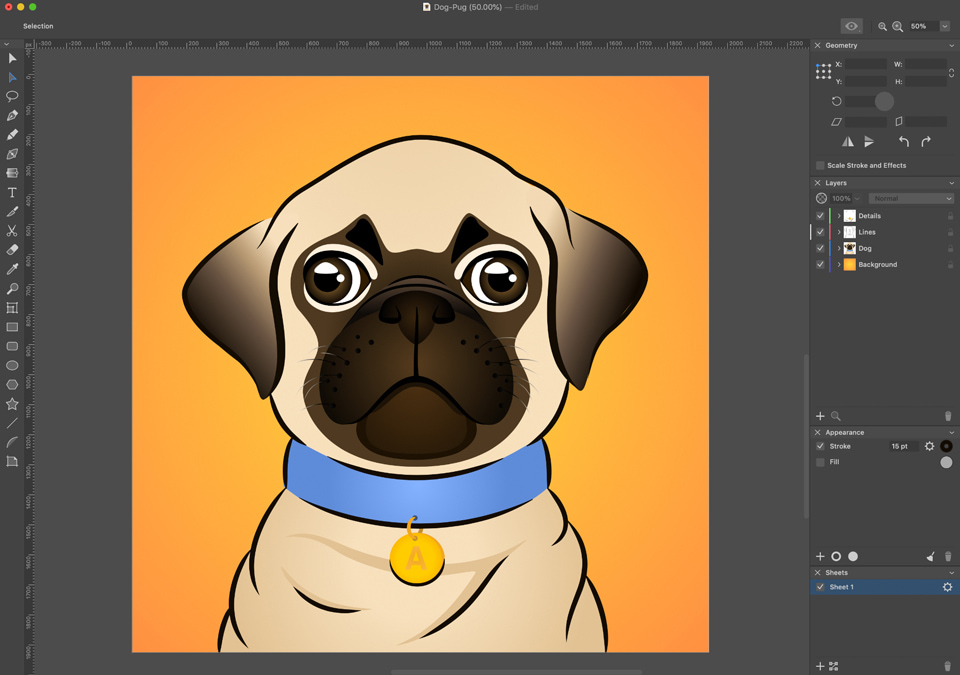
For the pendant, the radial gradient is three colors, dark сoutside #F26D0F, #F9A006 and #FFCC00, scale 100%. The text is written in a radial gradient of color #F3A820 and #FFBE47, the side of the pendant is color #F3A820.
The bright parts of the eyelids are the color #FFF0DD, the dark parts of the eyelids and eyebrows are #000000. The whites and patch of reflected light are painted in white color #FFFFFF.
Let’s finish drawing a mustache on the muzzle. Using the , we draw circles, from which the mustache will grow and set them a linear gradient from black #000000 to #110F0C. Whiskers should be drawn with the or the (Brush), where we select the Stroke profile, which is thinned to the edges or to one edge. We put the gradient from black #000000 to light #FFF1DD. We draw a mustache on one side of the muzzle, then copy it to the other side and slightly change its location and shape, so that there is a small asymmetry.
And the final touch, add some background to our little dog, draw a rectangle or square using the , fill it with a radial gradient, dark color outside #FF9143 and light inside #FFD738. Remember to place the background on the bottommost layer. That's it, our pug is ready. This detailed instruction is a perfect manual on how to draw a dog in Amadine. Now we can export it to the needed format.
You can download complete design here