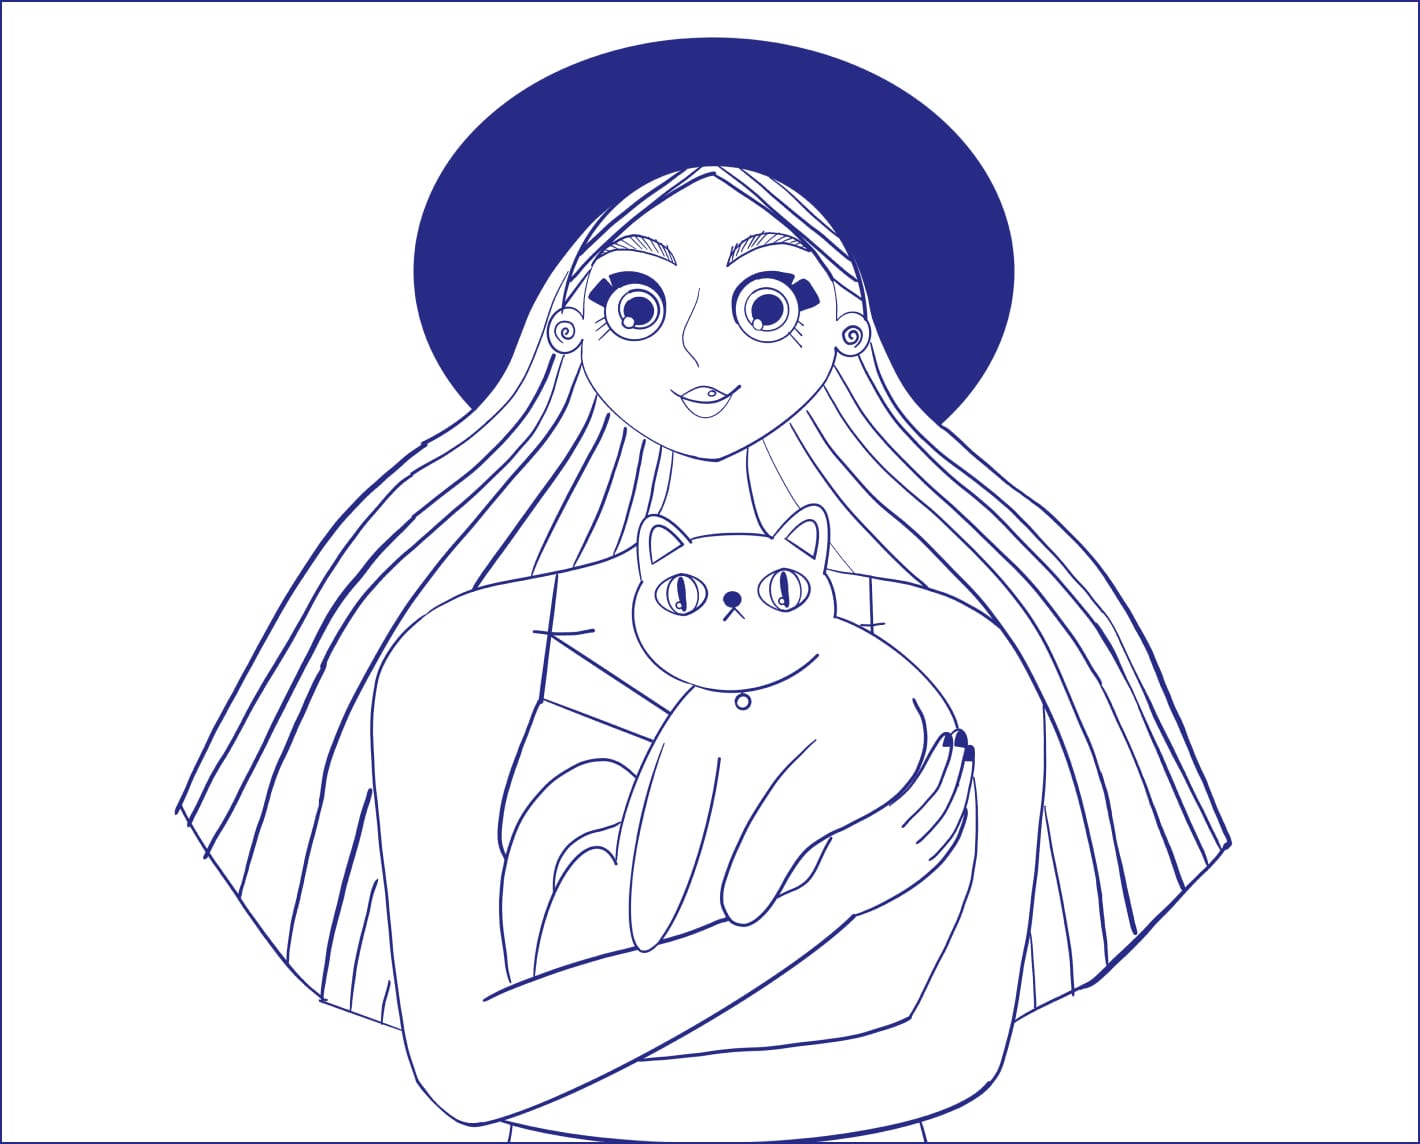
How to Draw a Portrait of a Ginger Girl With a Cat
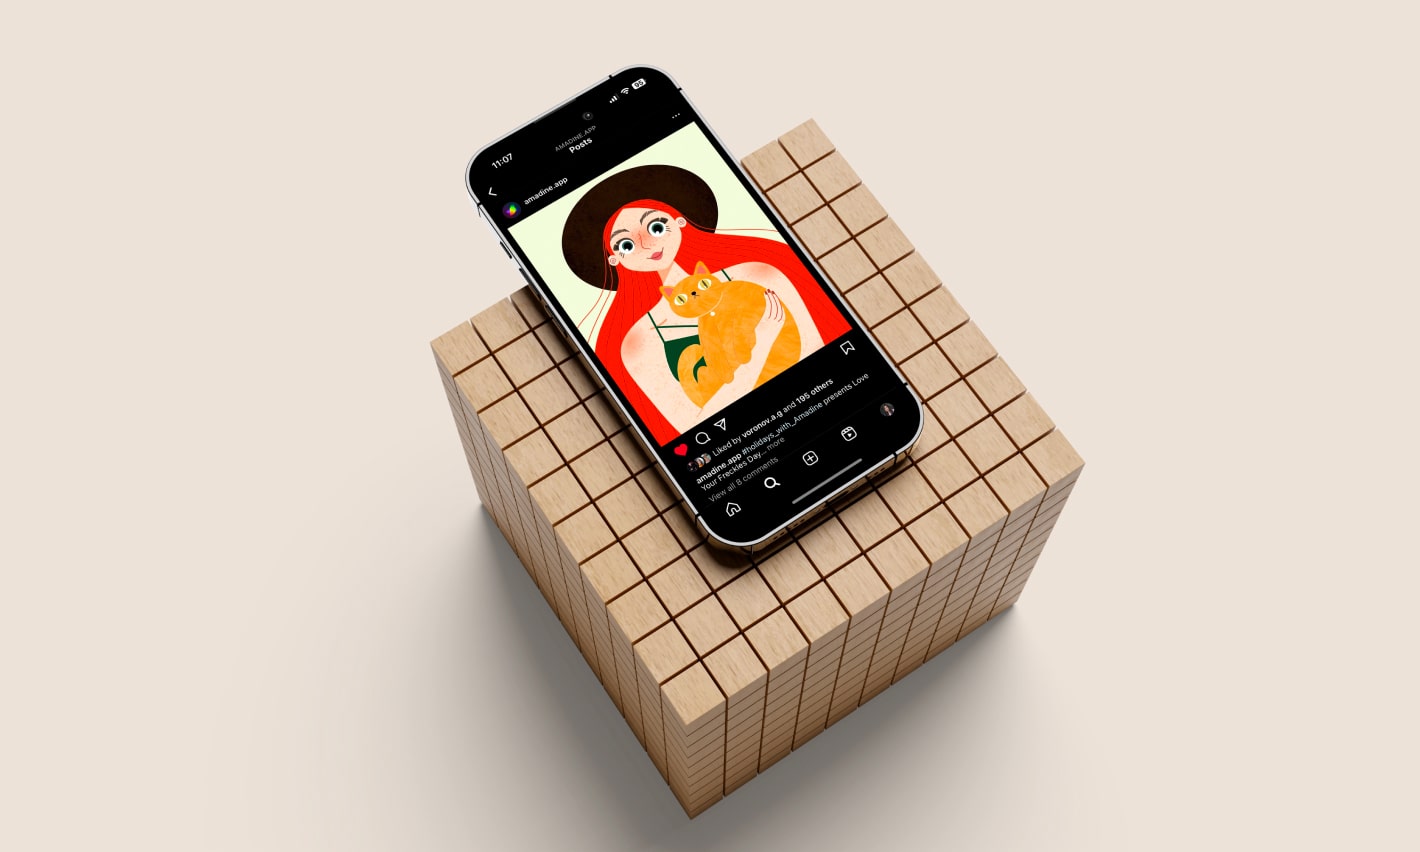
This tutorial will shed light on the creation of one of the most romantic and warm illustrations in the Amadine app—a portrait of a ginger girl with a cat. You might have seen it, as well as many other cool things, on Amadine Instagram. If you still haven’t, it’s high time to check it out!
To make the process more accurate, first draw a sketch of the future illustration. There are several ways to do it. The most common way is to draw a sketch on paper. You can also create a digital sketch using a raster program, or (if you know how to use the Draw tool) draw it directly in the Amadine app.
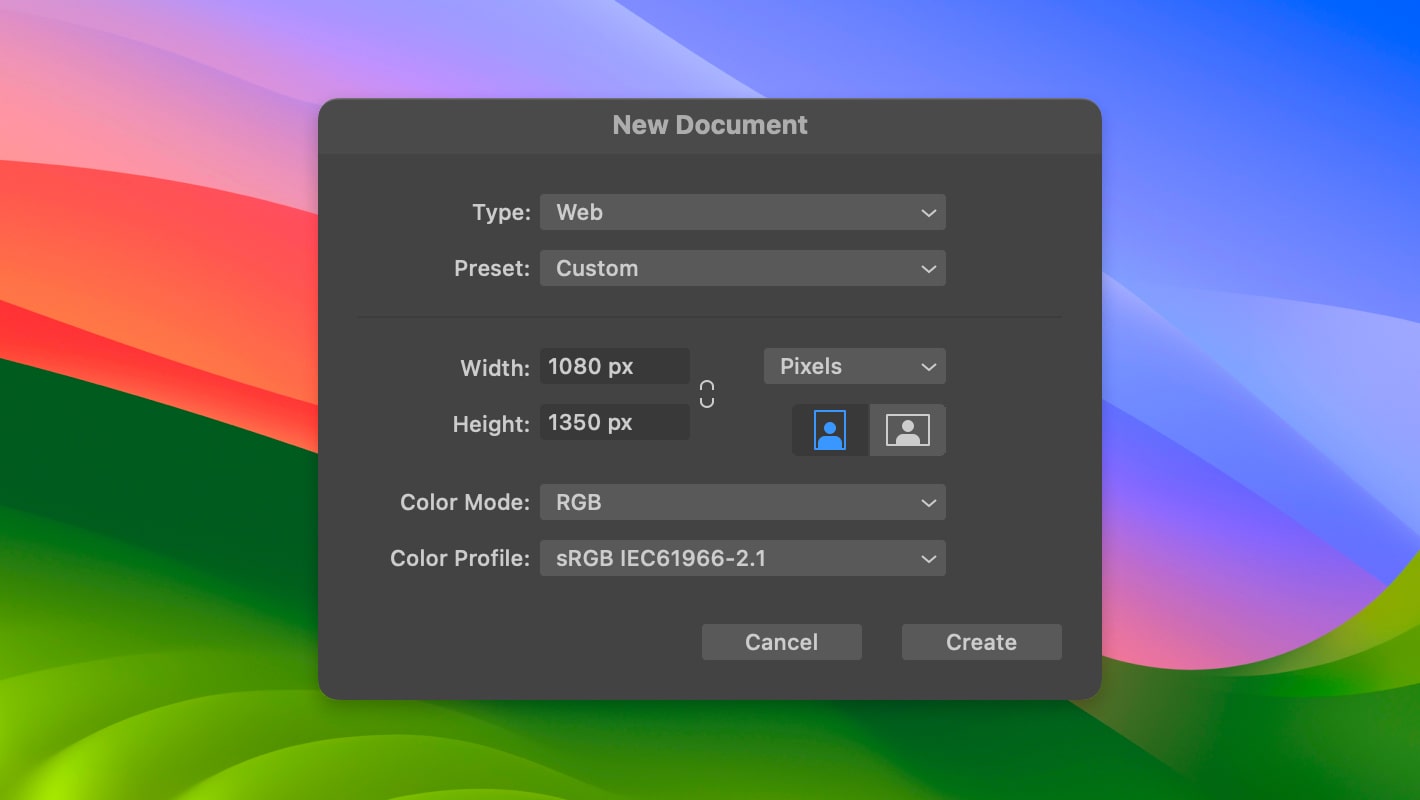
Let’s start by creating a document of the required size. In our case, we choose the popular size for the Instagram post of 1080 × 1350 pt with a vertical orientation. We chose the RGB Color Mode, since we are going to make an illustration for internet use. If you use a sketch, it can be imported using the Import function (File > Import on your Mac or Menu > Import on an iPad) or drag & drop and draw on top of your reference.
We are going to move on with our illustration from bigger basic details to smaller and more intricate ones. Let’s start by drawing the girl’s head and body using the . To create her ears, use the . Go to the Appearance panel and set #FDC39E Fill color for all the elements.
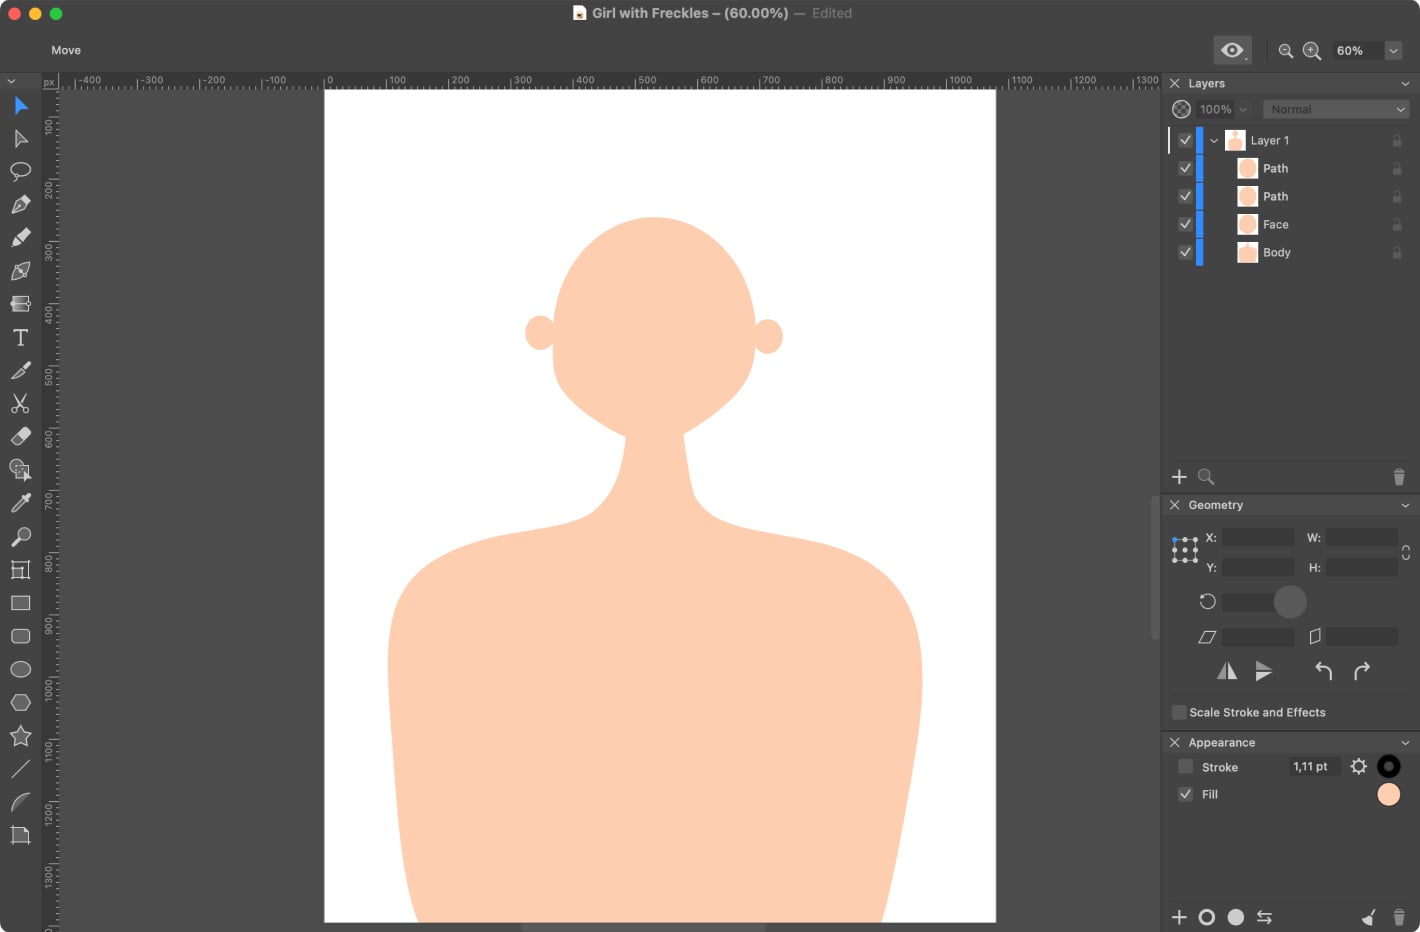
If you want easier navigation in the final document, you can rename any layer by double clicking on it or double tapping, if you’re drawing on iPad. This will give you the opportunity to find any detail of your illustration more quickly and work with a better document structure in the future.
Let’s continue to use the Pen tool to draw the girl’s dress and hair. Set the green #004926 Fill color for the dress and orange #FF451E for her hair.
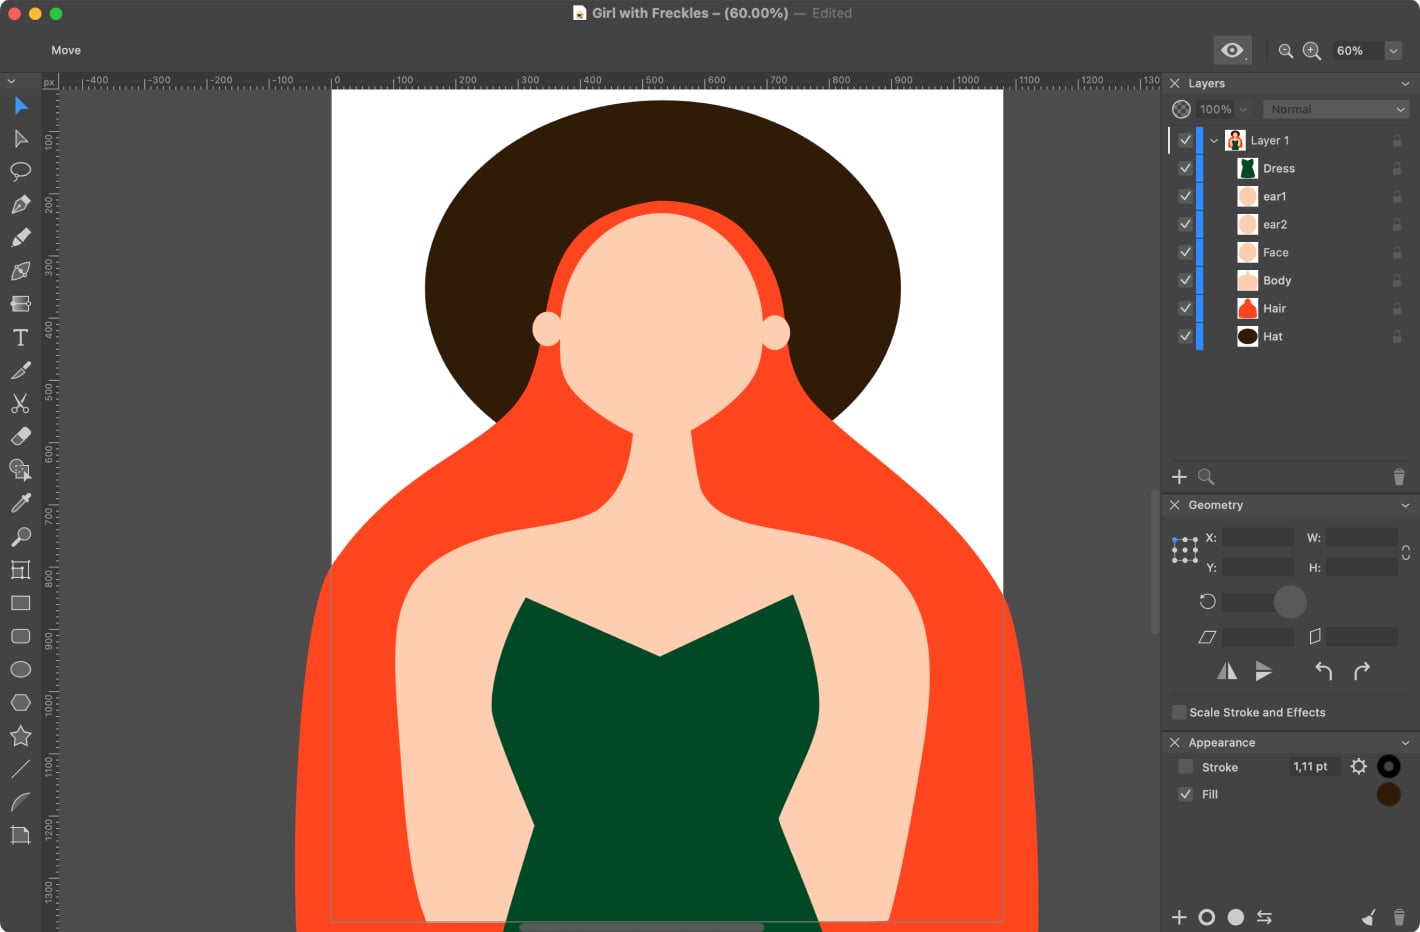
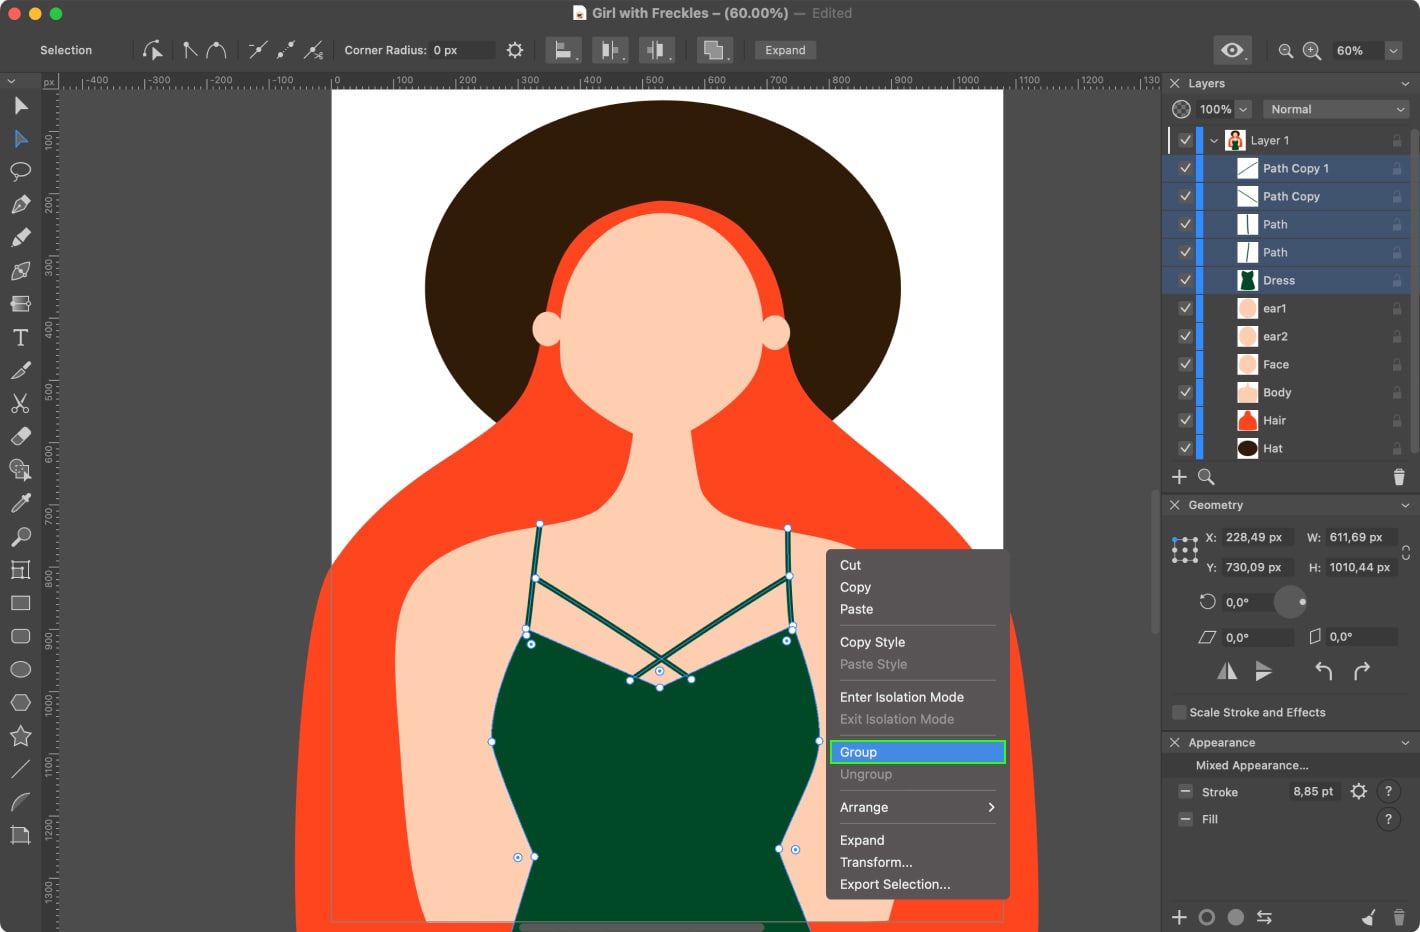
In the Toolbar, choose the to create the straps of her dress. Turn off Fill in the Appearance panel, and enable the checkbox Stroke with a thickness of 9 pt and a green color #004926. Go to the in the Toolbar, and hold the Shift key to select all parts of the dress. On the iPad hold down one finger on the canvas to achieve the same result. Right click on the selected objects and choose Group from the context menu on a Mac or Menu > Group on an iPad.
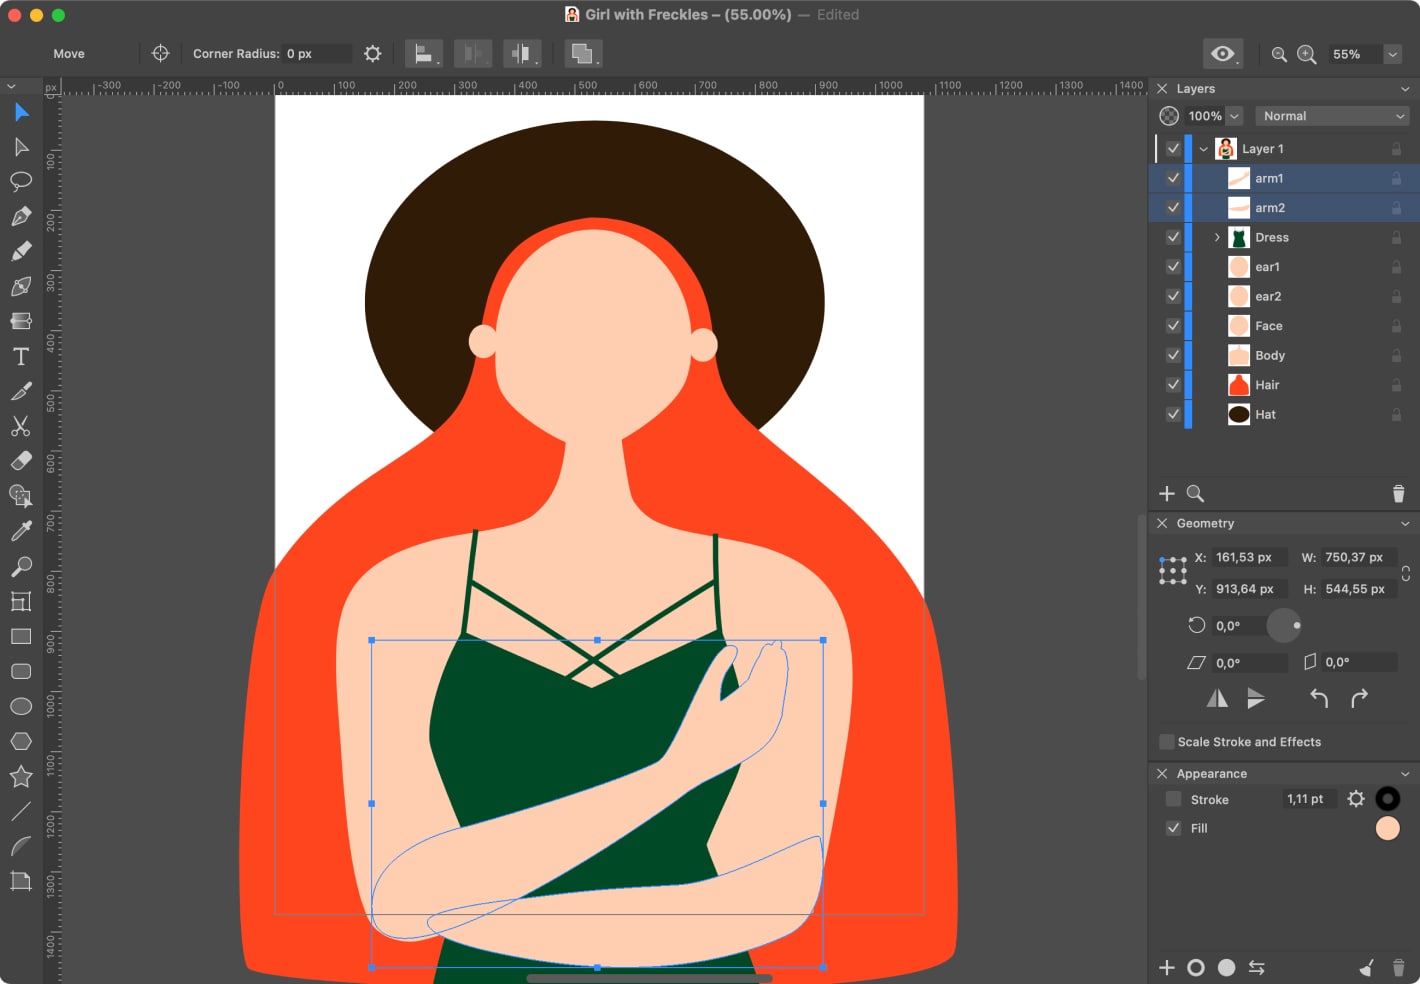
Now, add hands with the Pen tool using the same Fill color #FDC39E as the body.
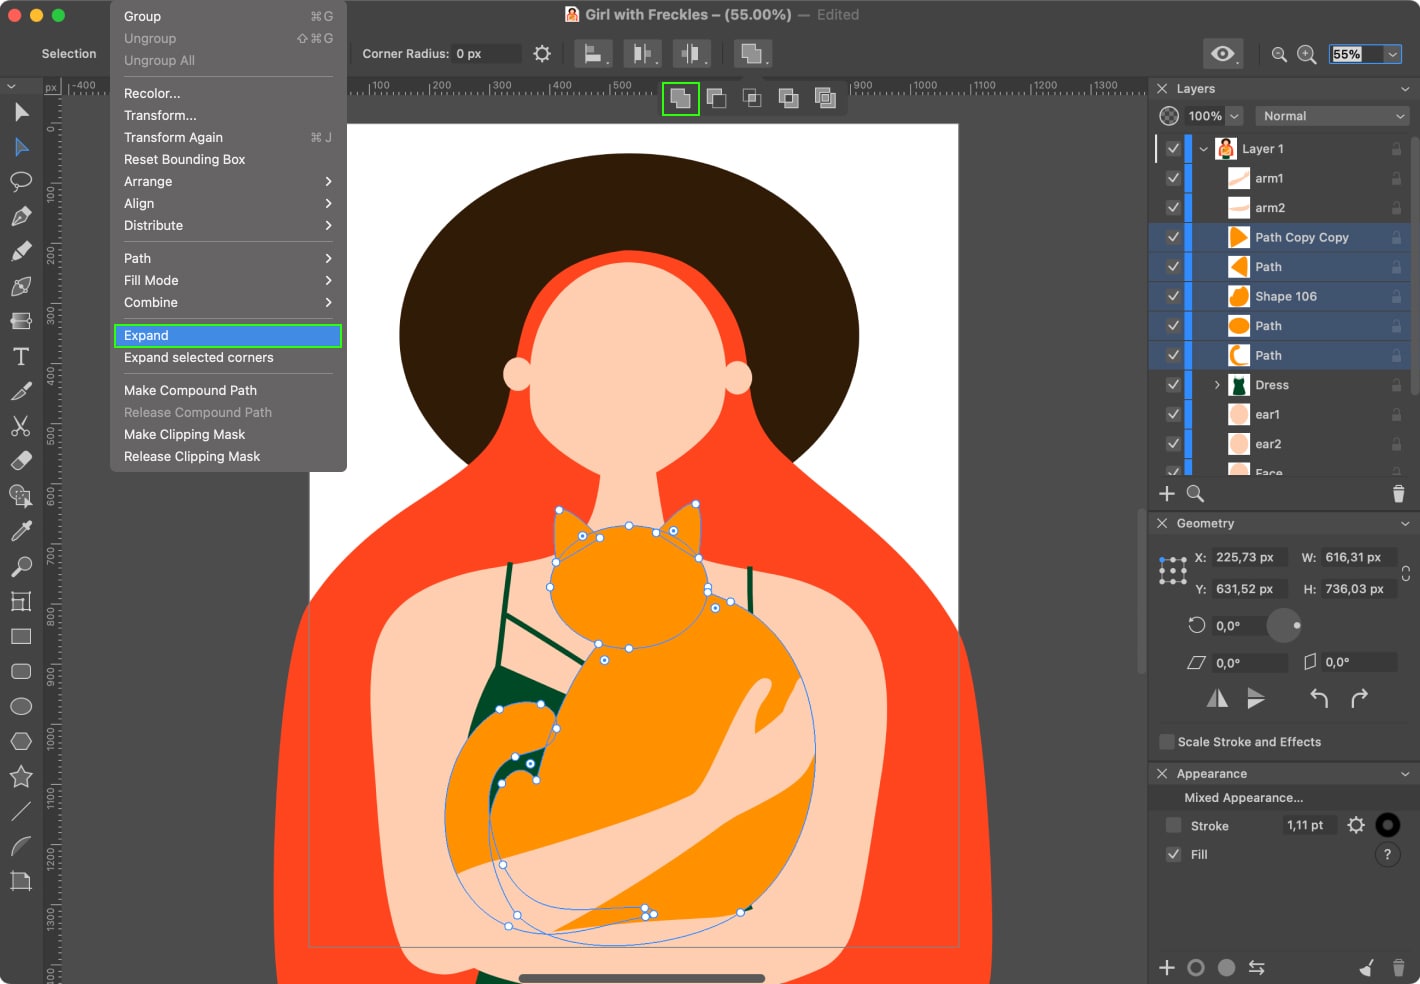
Draw the cat using the Ellipse tool for the head and the Pen tool for other parts of the cat’s body. Hold the Shift key and select all layers with the cat using the Selection tool. Drag the cat under the layers of the arms in the Layer panel. On the iPad, select all the layers with the cat while holding one finger down, then release the finger and drag selected layers under the layers of the arms. Next, we will connect them into one shape using Boolean operations. So make sure all parts of the cat are selected, click the command, and then click Modify > Expand. On an iPad, you can find Boolean operations and Expand in the .
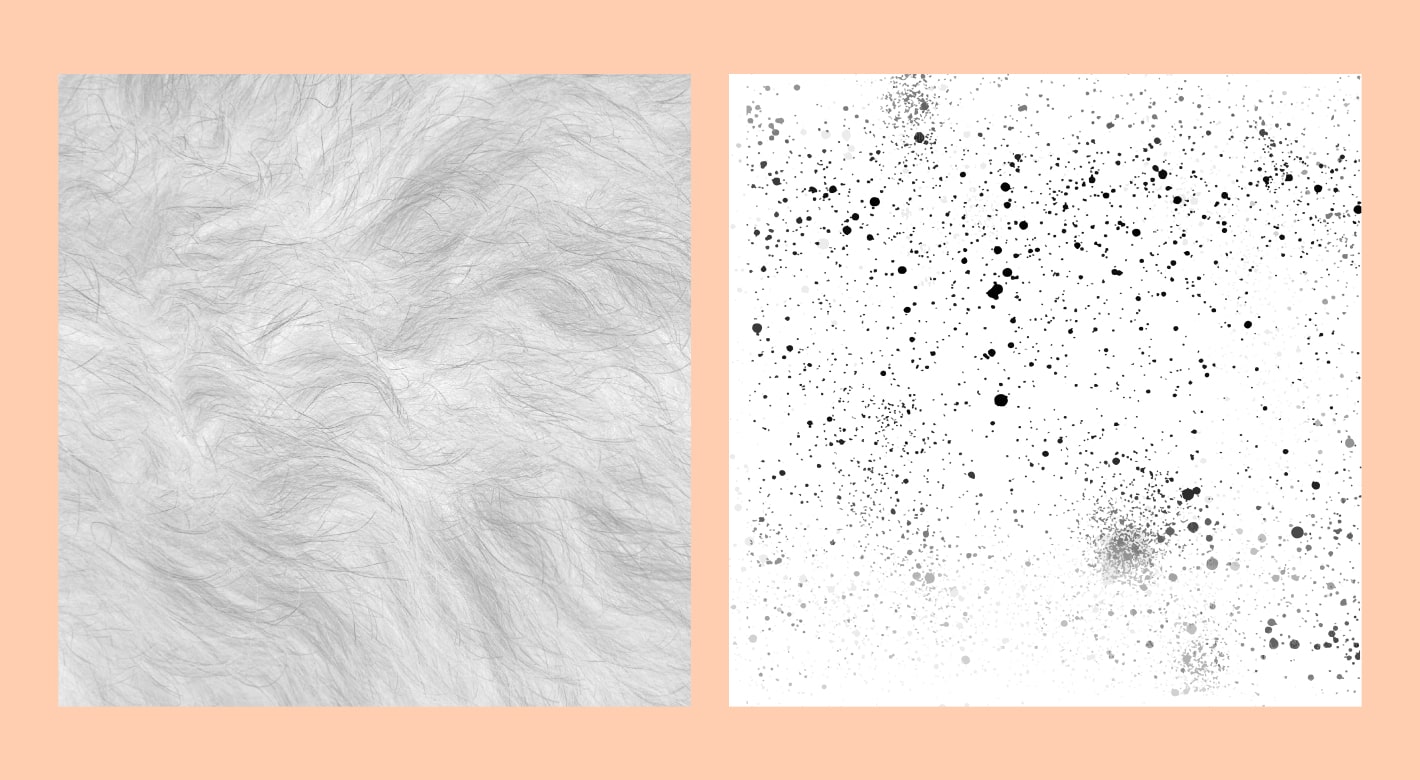
Well done! It’s time to add some texture to our characters. In our case, we will use the fur texture for the cat and the grain texture for the girl’s freckles. You can download all of them from the internet, from free or paid stocks.
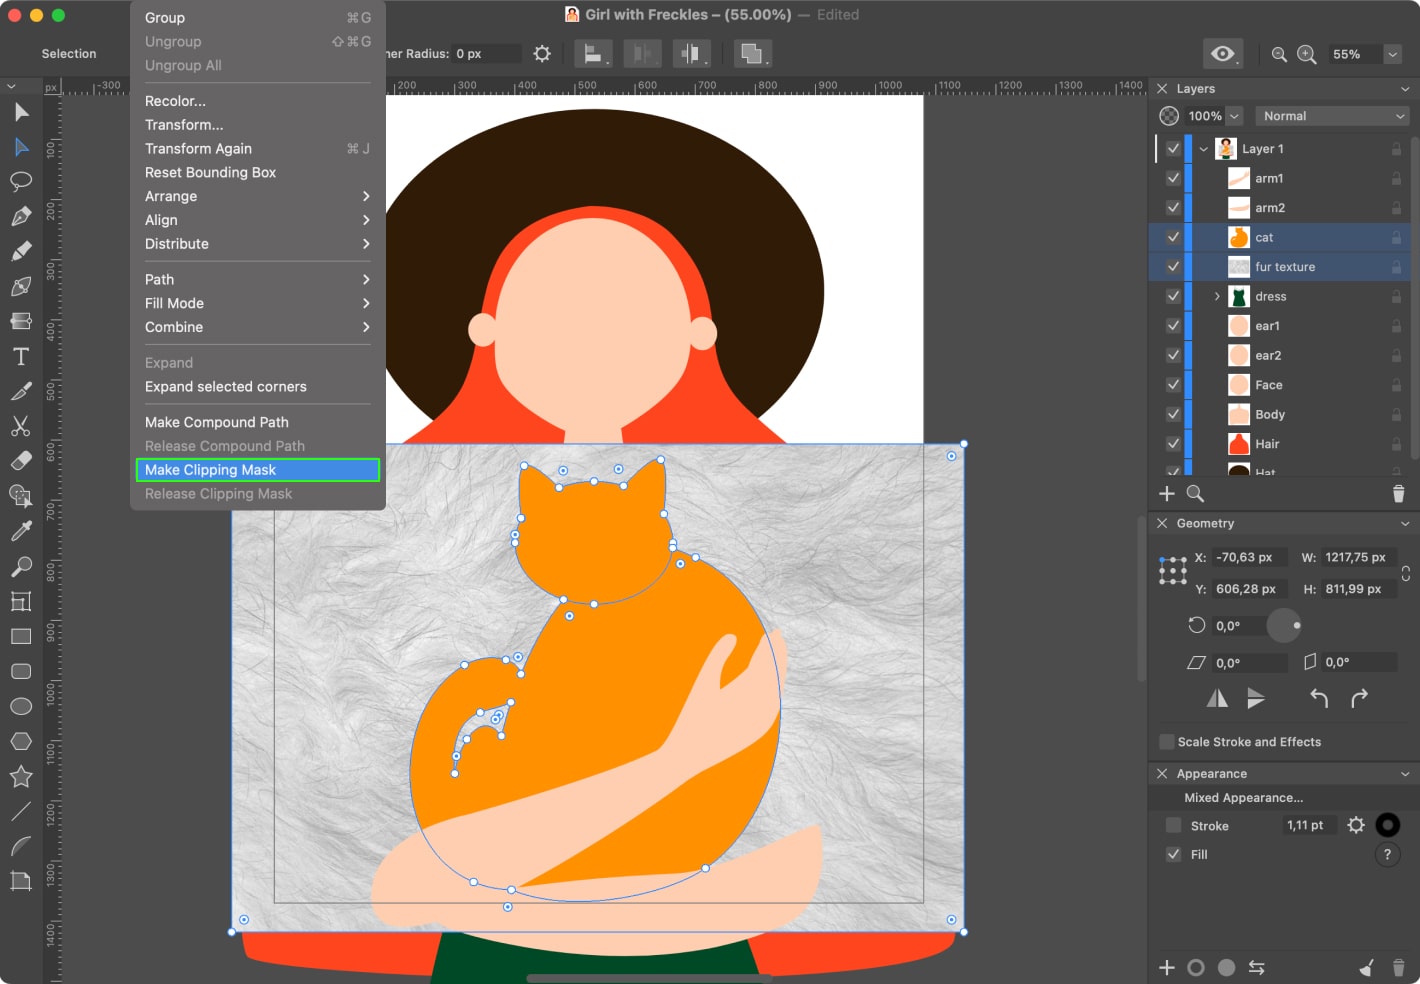
To add some fur texture to the cat, use a Clipping Mask. Put the fur texture behind the cat, select both objects and go to Modify > Make Clipping Mask on a Mac or Menu > Clipping Mask on an iPad.
Great, now our cat is fluffy! In the Layers panel, open the clipping group and select the layer with the cat path. In Appearance, enable the Fill checkbox with the orange color.
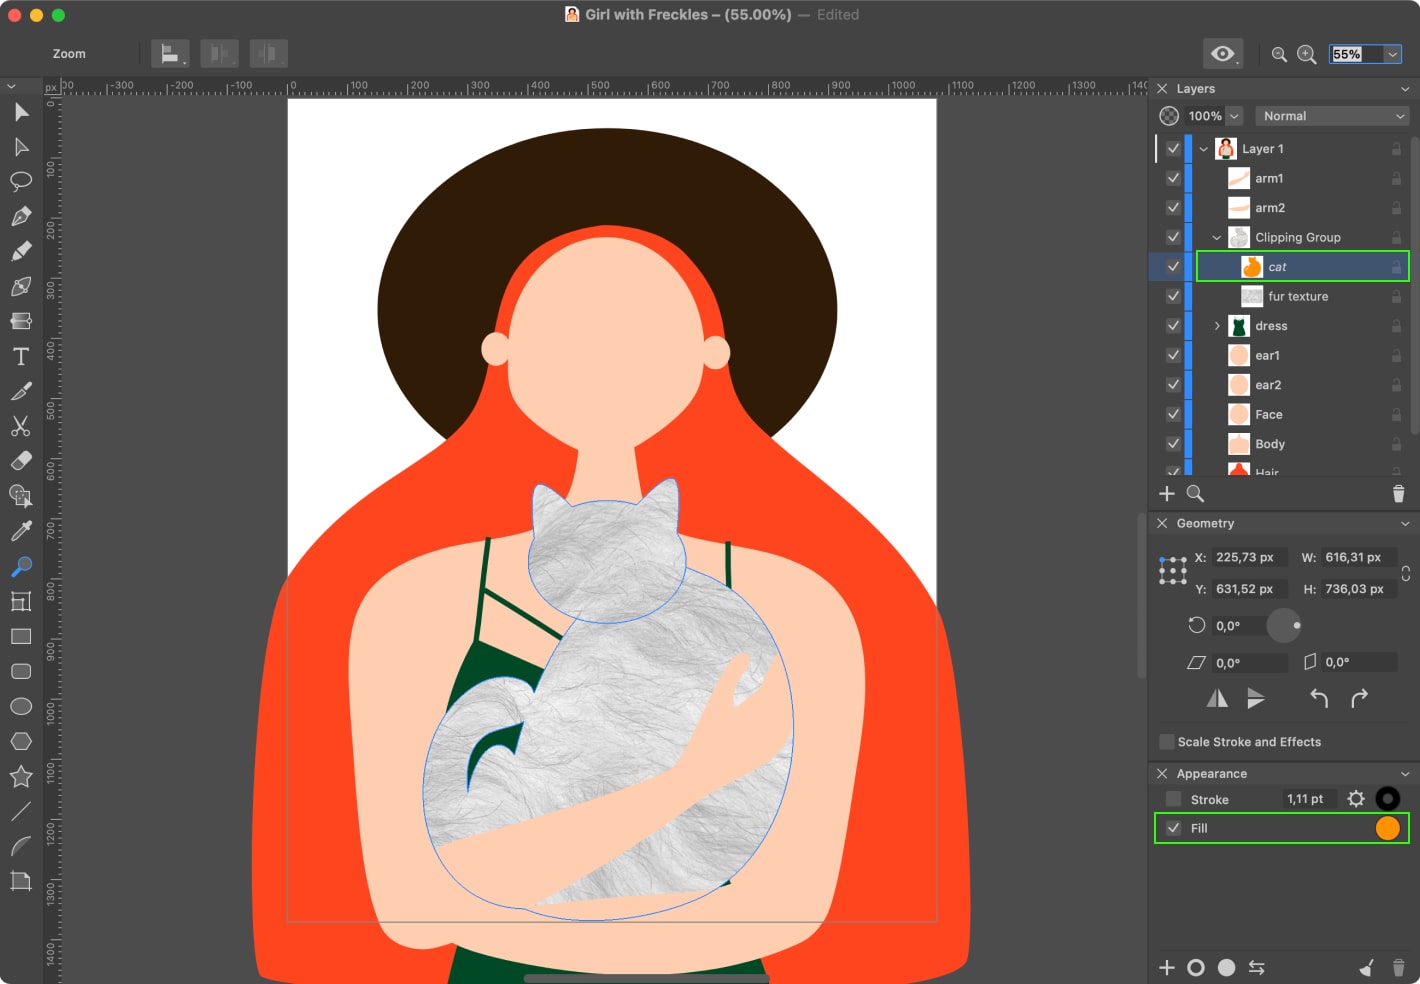
Once you’ve finished, select the layer with the fur texture in the clipping group. Set the Luminosity blend mode and 50% opacity. Now our cat has become red again.

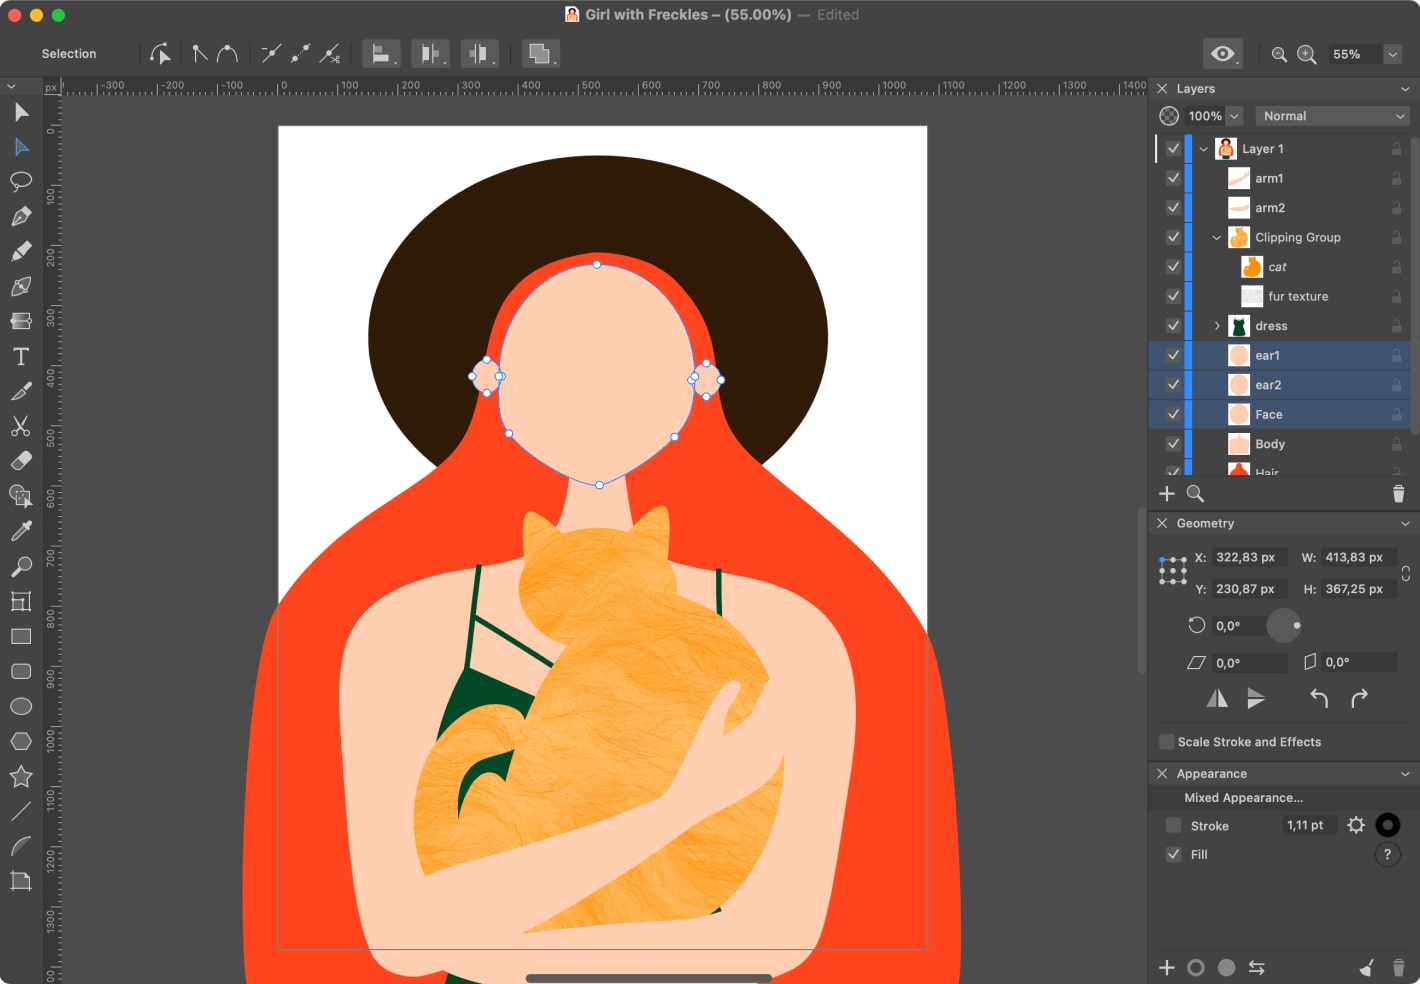
Next we will add texture to the other objects. Repeat the same Union and Expand operations with the face and ears, as described in step 6.
Apply the Clipping Mask and texture to the face with the same method as described in step 8.
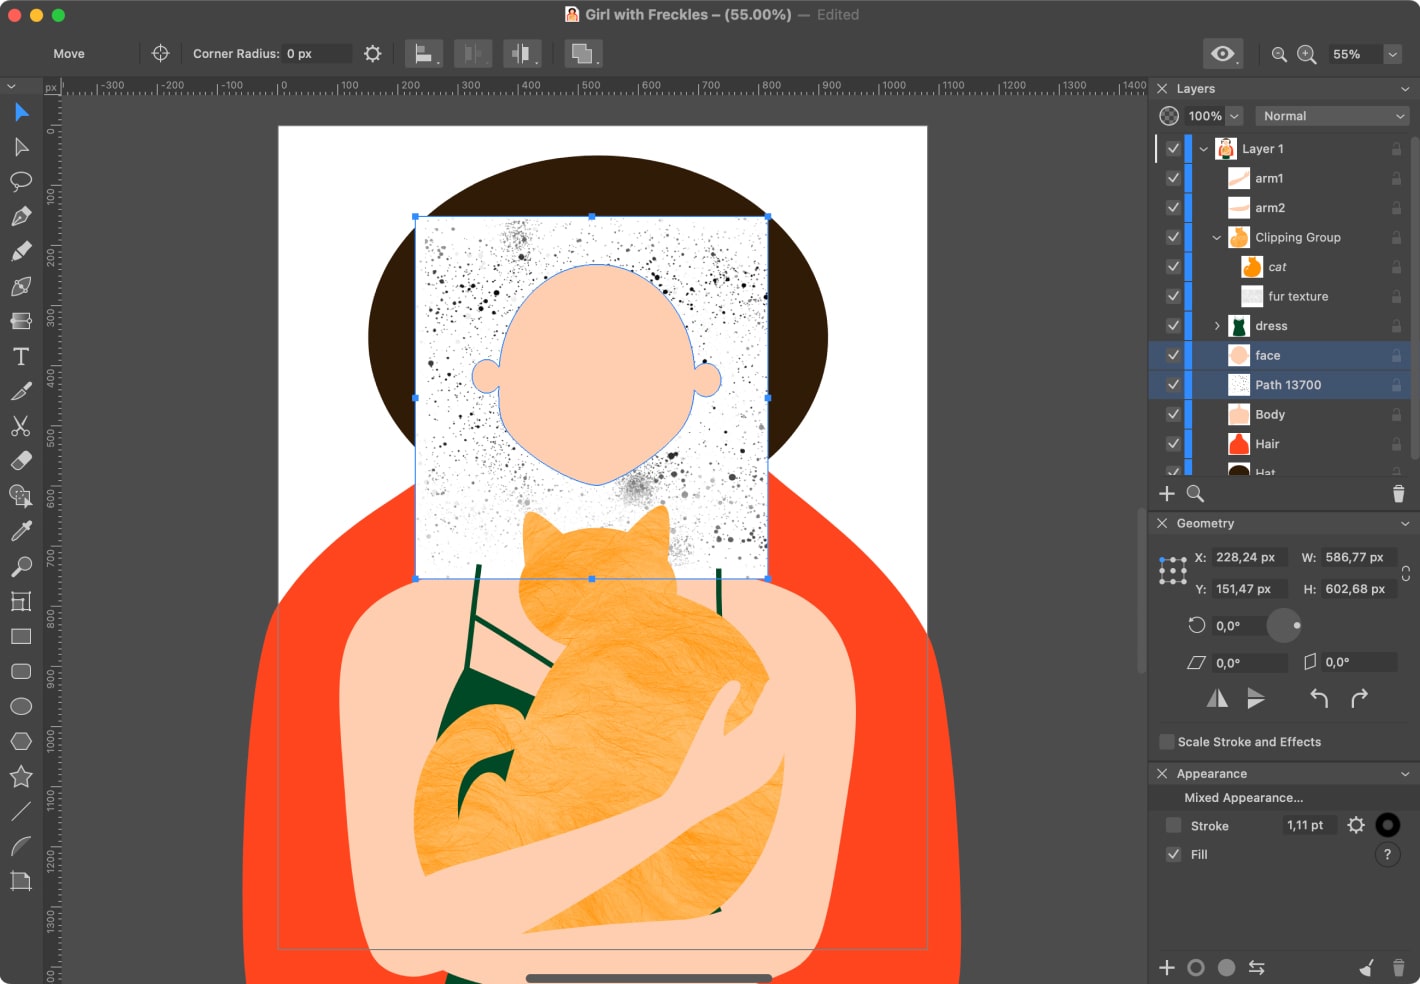
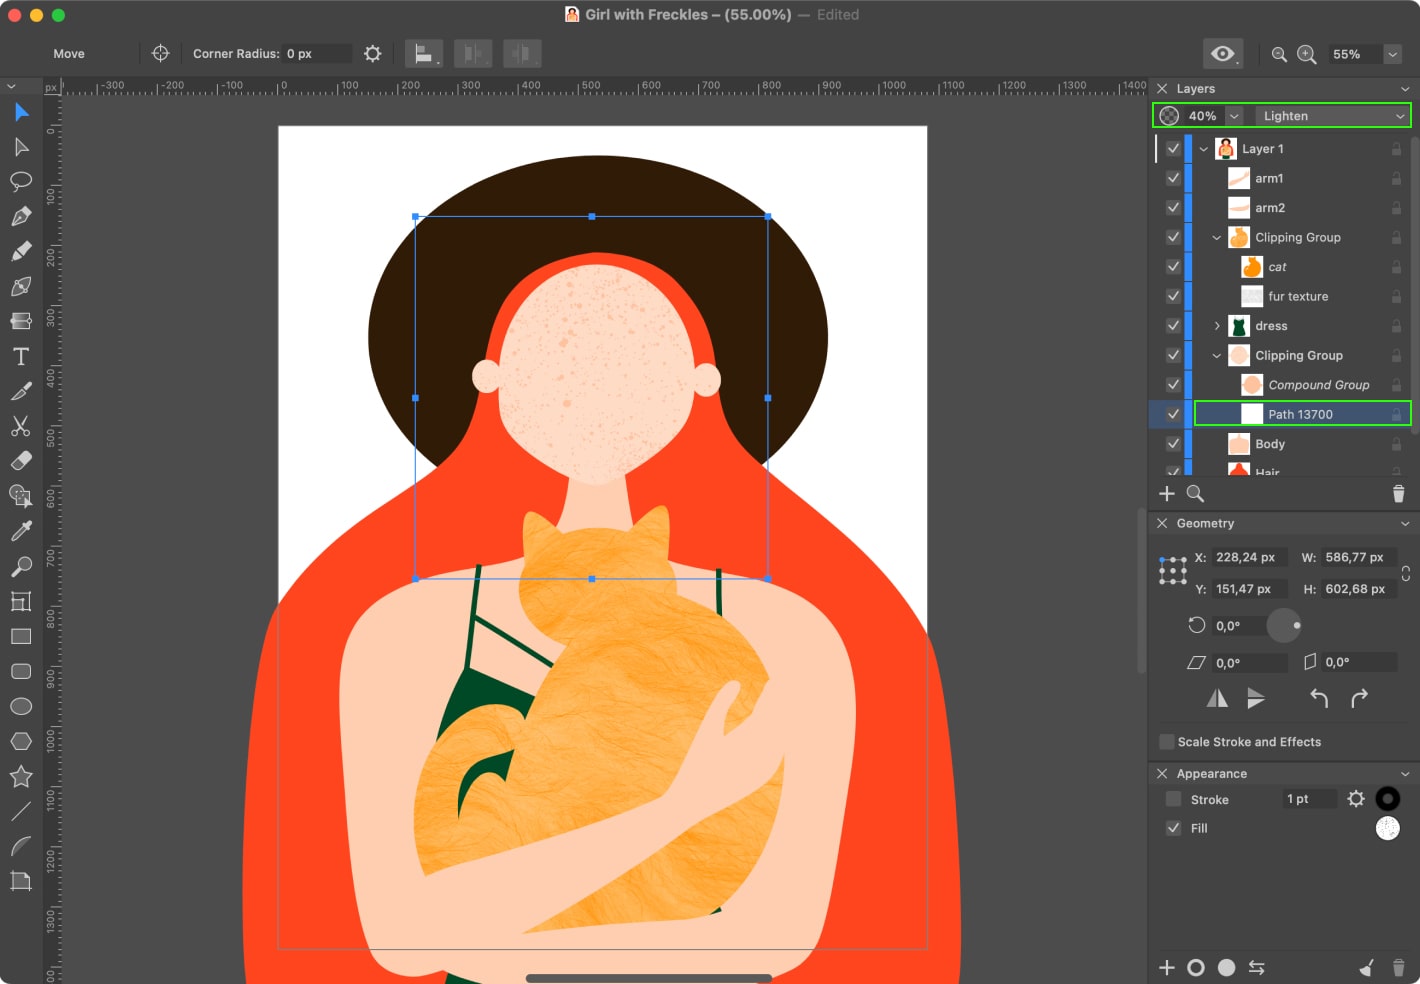
Enable the Fill checkbox with the face color as described in step 9. Then choose the layer with the grain texture, and set the Lighten blend mode and 40% opacity.
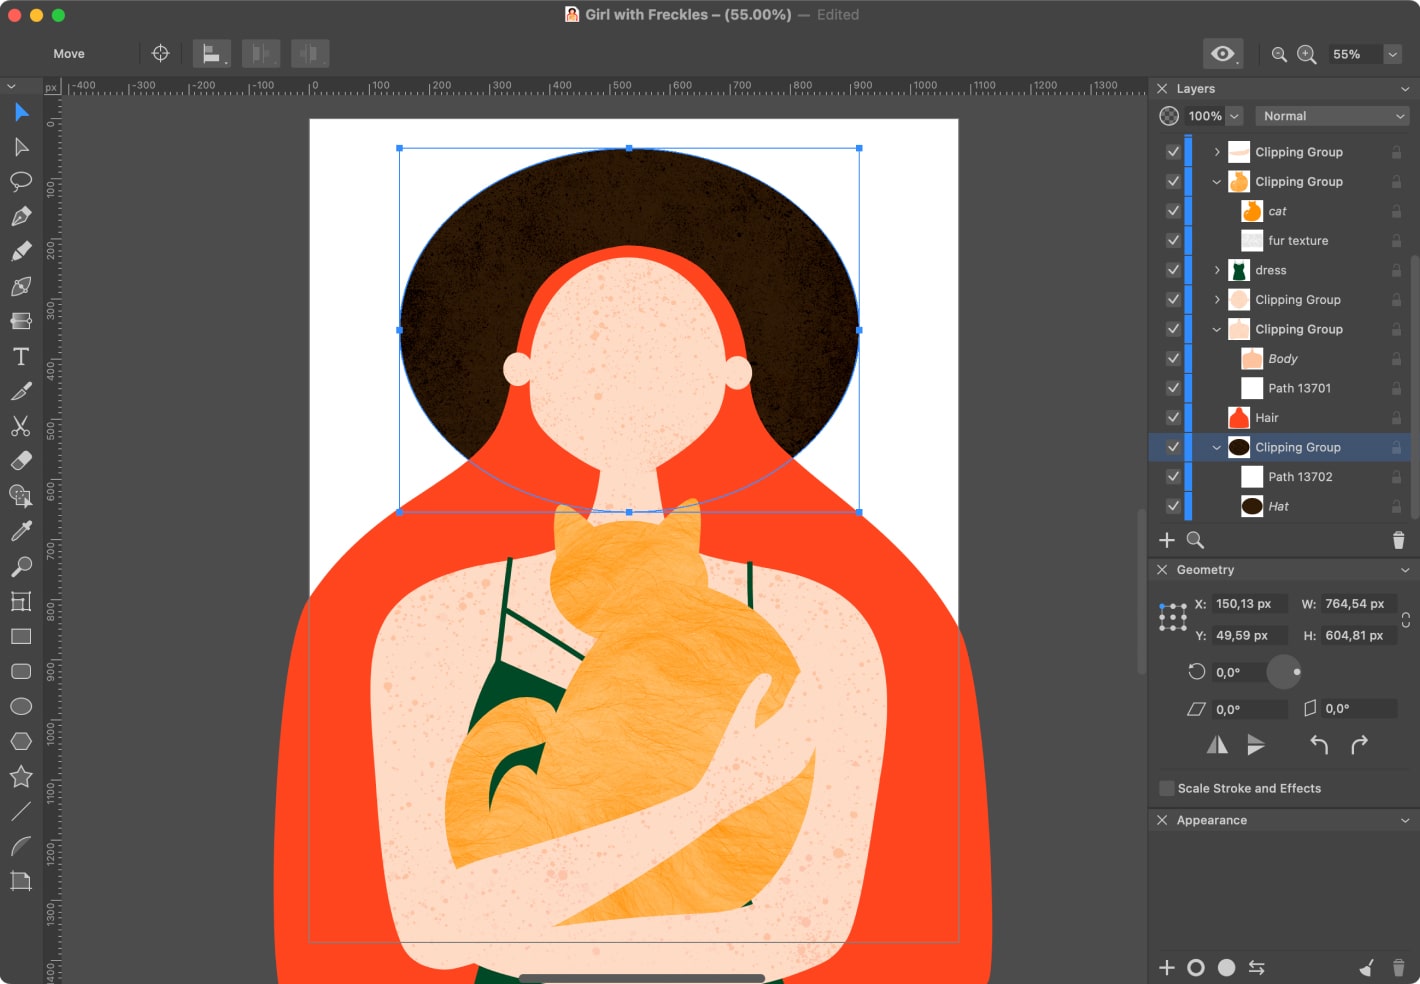
Add textures in the same manner as earlier, separately for the body, hands and hat.
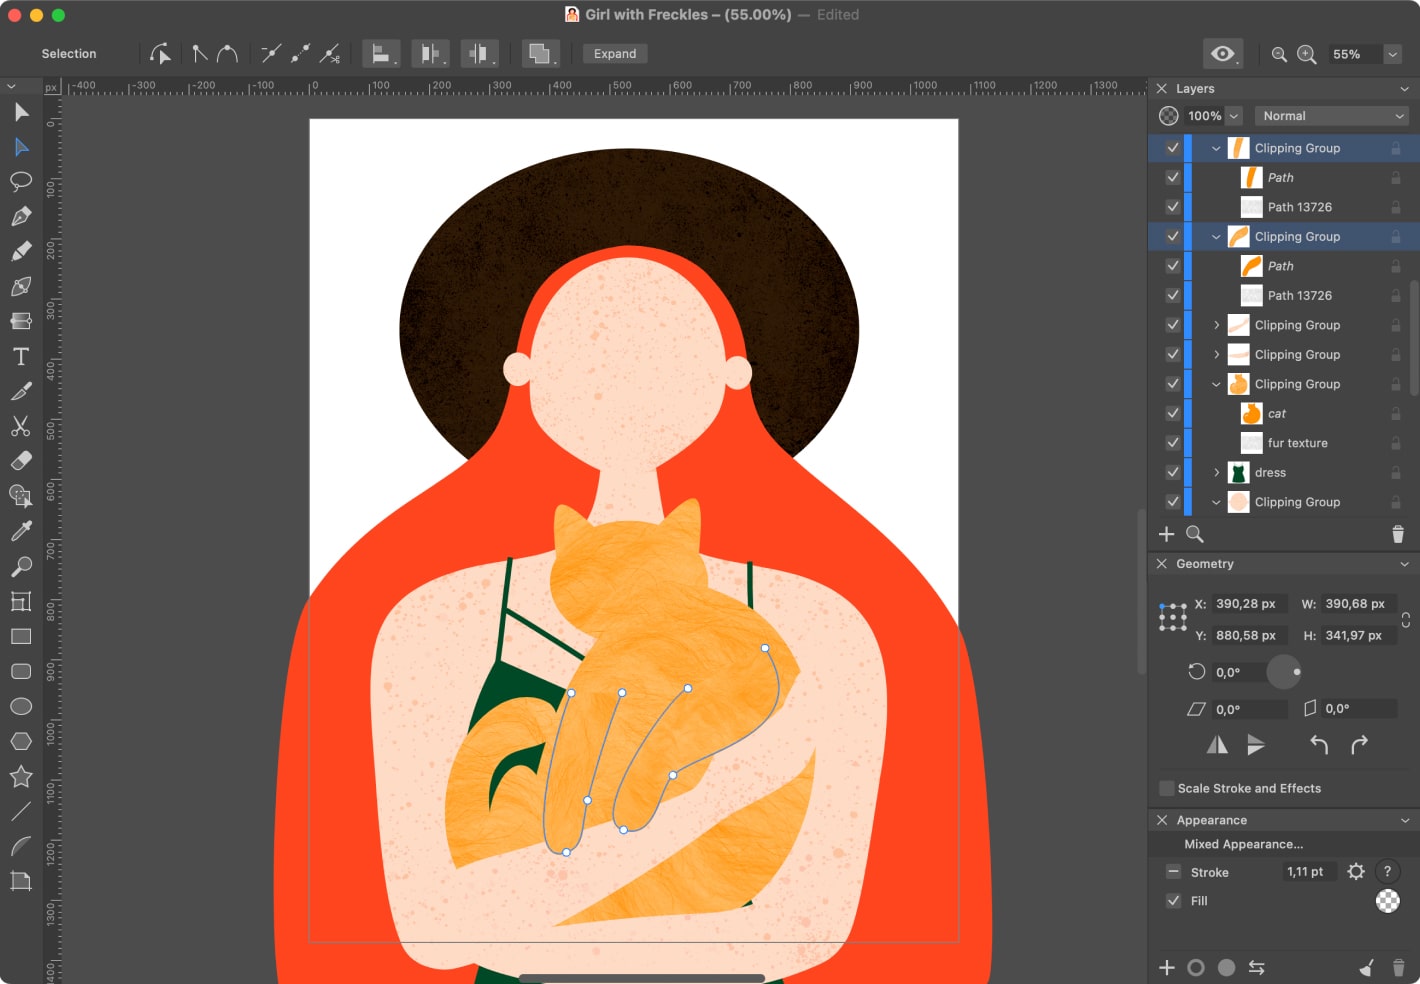
Draw the cat’s legs using the Pen tool. Make sure that they are situated above the hands of the girl in the Layers panel. Apply texture using the same method as described in steps 8–10.
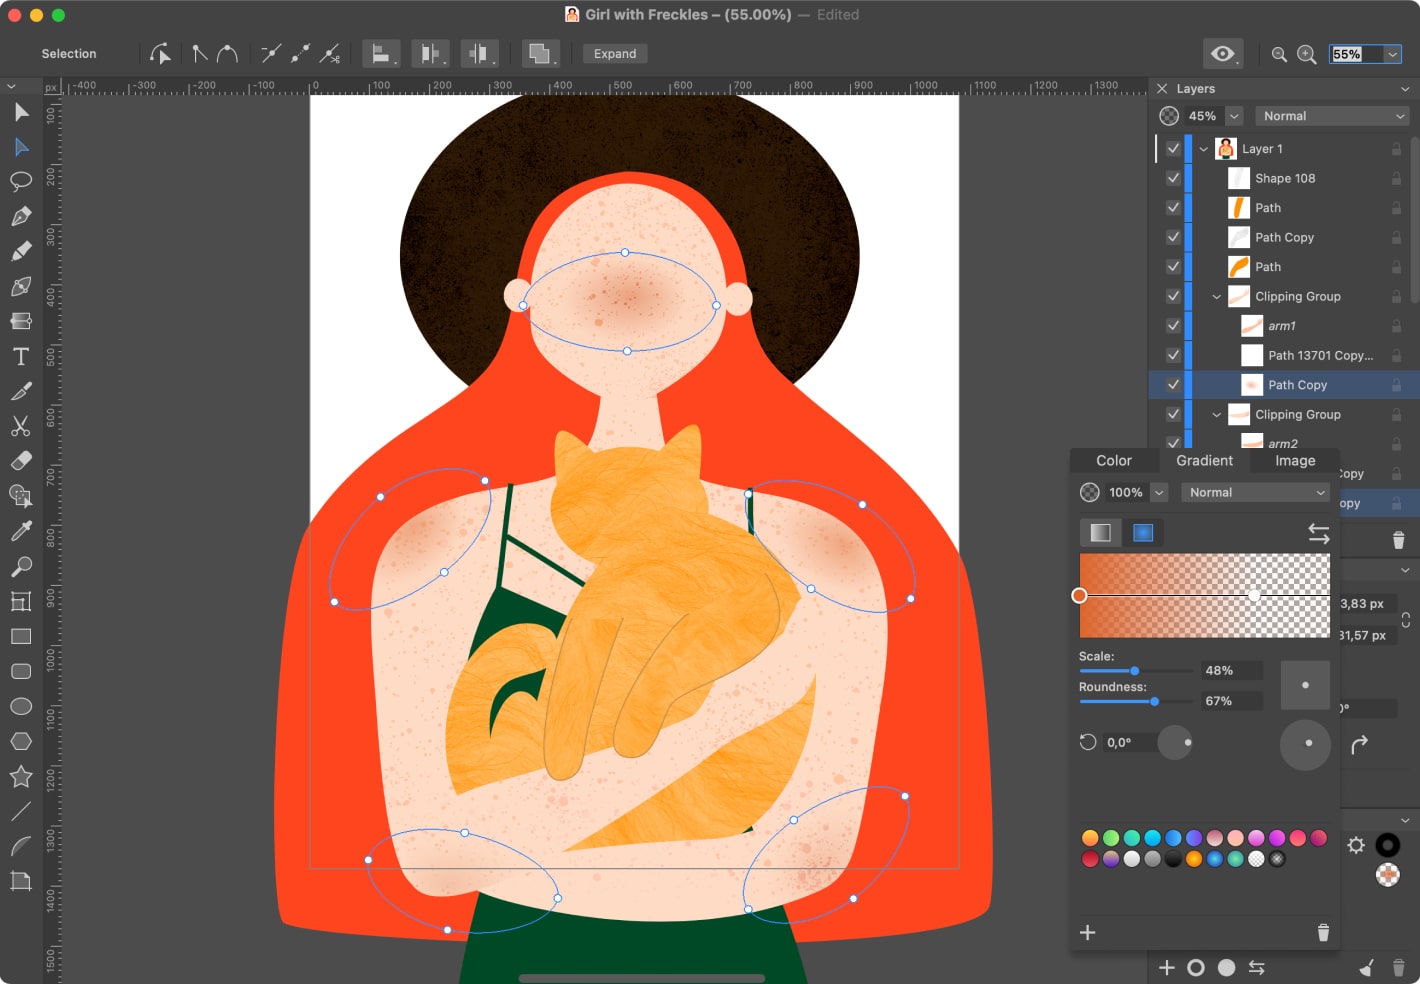
To enhance the realism of the freckled skin, let’s add slight redness to some areas of the body. Create five ellipses using the Ellipse tool. Adjust the radial gradient with the color #DD652A. Set the opacity of the color in the center of the ellipse to 100% and on the edge 0%.To ensure that the ellipses do not extend beyond the boundaries of the body, drag them into the appropriate clipping groups in the Layers panel.
Congratulations! Now that we’re done with the base elements, it’s time to move to the details. Draw the girl’s collarbones with the paths using the or . Adjust the Stroke thickness to 9 pt and color to #F2A67B.
Add all the hair details with the Stroke thickness 2–3 pt and color #9A2912.
Draw finger lines and nails with the stroke thickness 4 pt and color #DD4F35.
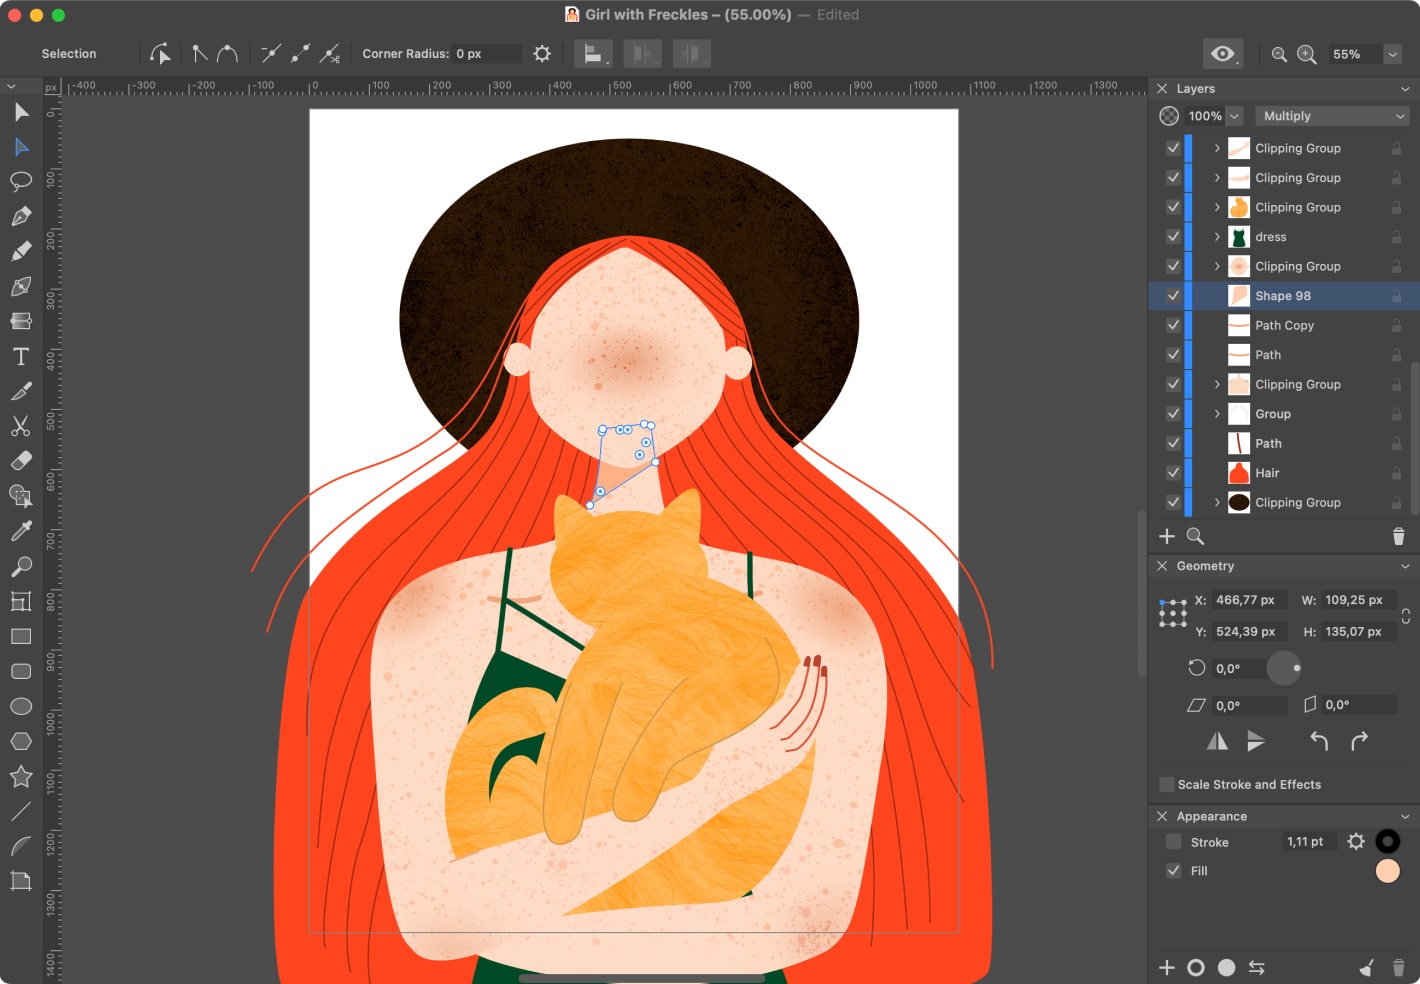
To add depth to the portrait, draw a shadow on the neck. Make sure that it is situated under the face layer on the Layers panel. Set the #FDCEB0 Fill color and Multiply blend mode.
Let’s add some details to the girl’s face. Create a new layer and name it “Face details.” In this layer, we are going to draw the girl’s eyebrows, eyes, nose, mouth and ears.
To draw the eye, select the Ellipse tool and, while holding down the Shift key, draw four circles: large, medium, small and the smallest. Place them the same way as shown on the screenshot. Use Fill colors as follows: white #FFFFFF for the large circle, #46745E for the medium one, black #000000 for the small and white #FFFFFF for the smallest. Using the Pen tool, draw her eyebrows and eyelashes.
When the eye is ready, group it and name it “Eye 1.” Do the same with the eyebrow and name it “Eyebrow 1.”
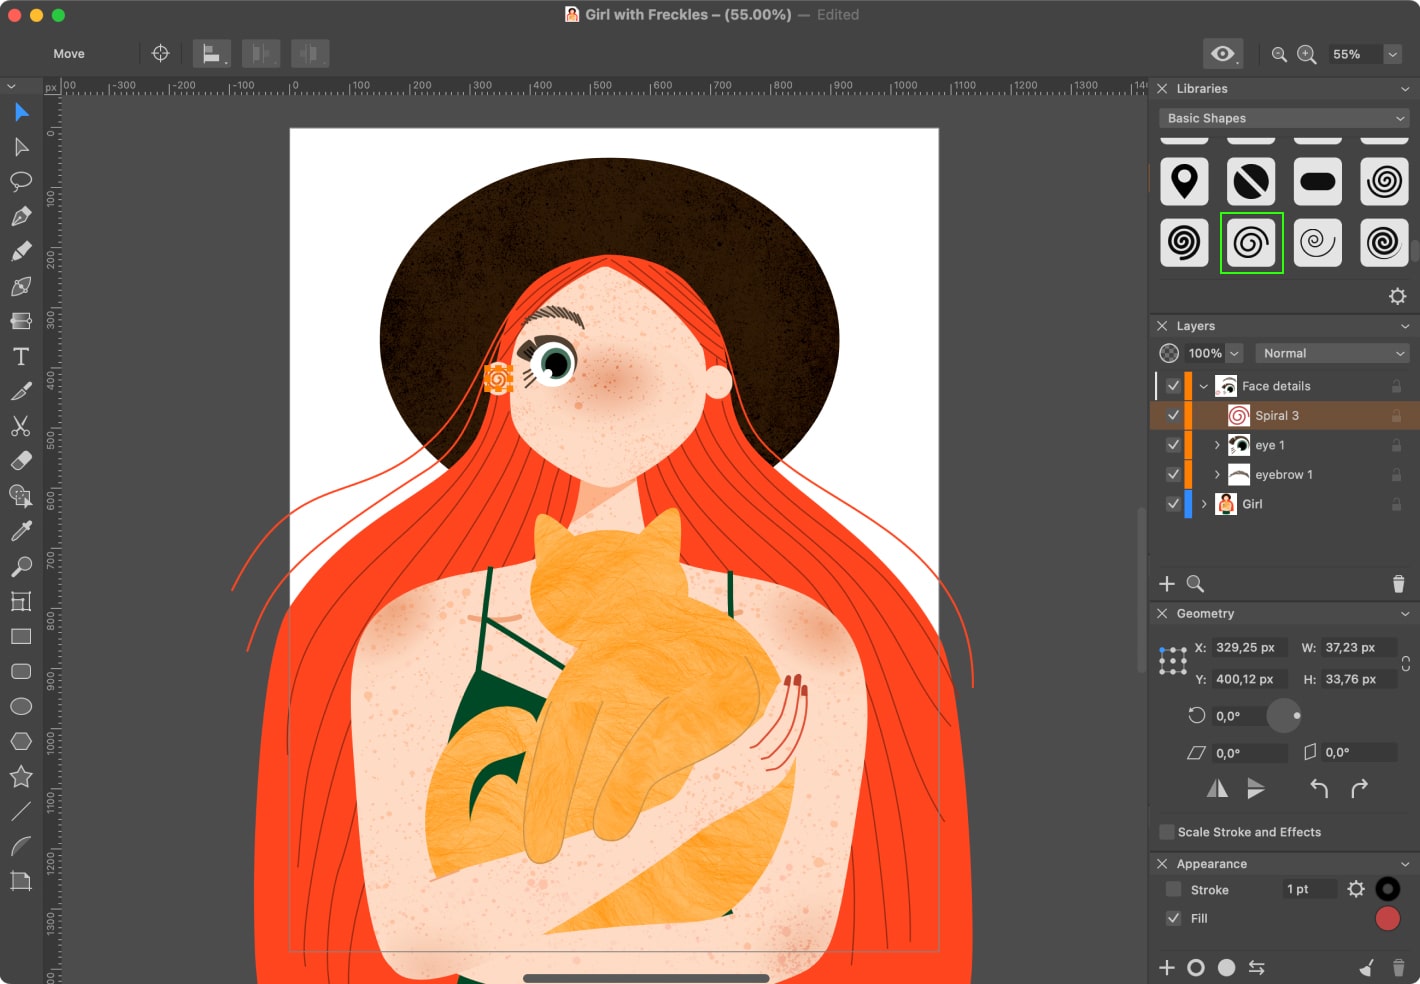
To create a spiral in the ear, open the Library panel in Window > Libraries on a Mac or Menu > Libraries on an iPad. Select Basic Shapes in the dropdown menu, and choose the spiral that you like the most.
Select “Eye 1,” “Eyebrow 1” and “Spiral 3” with the . While holding down the Shift key, copy them and use the mirror image in the Geometry panel so that we have two identical eyes, eyebrows and ears. After that, experiment a little with them, since a human's face is not completely symmetrical.
Draw a nose using the Draw tool with the Stroke thickness 4 pt and color #F2A67B.
Add a mouth using the Draw tool with the Stroke thickness 4 pt, color #923310 and the Fill color #DF6F6F.

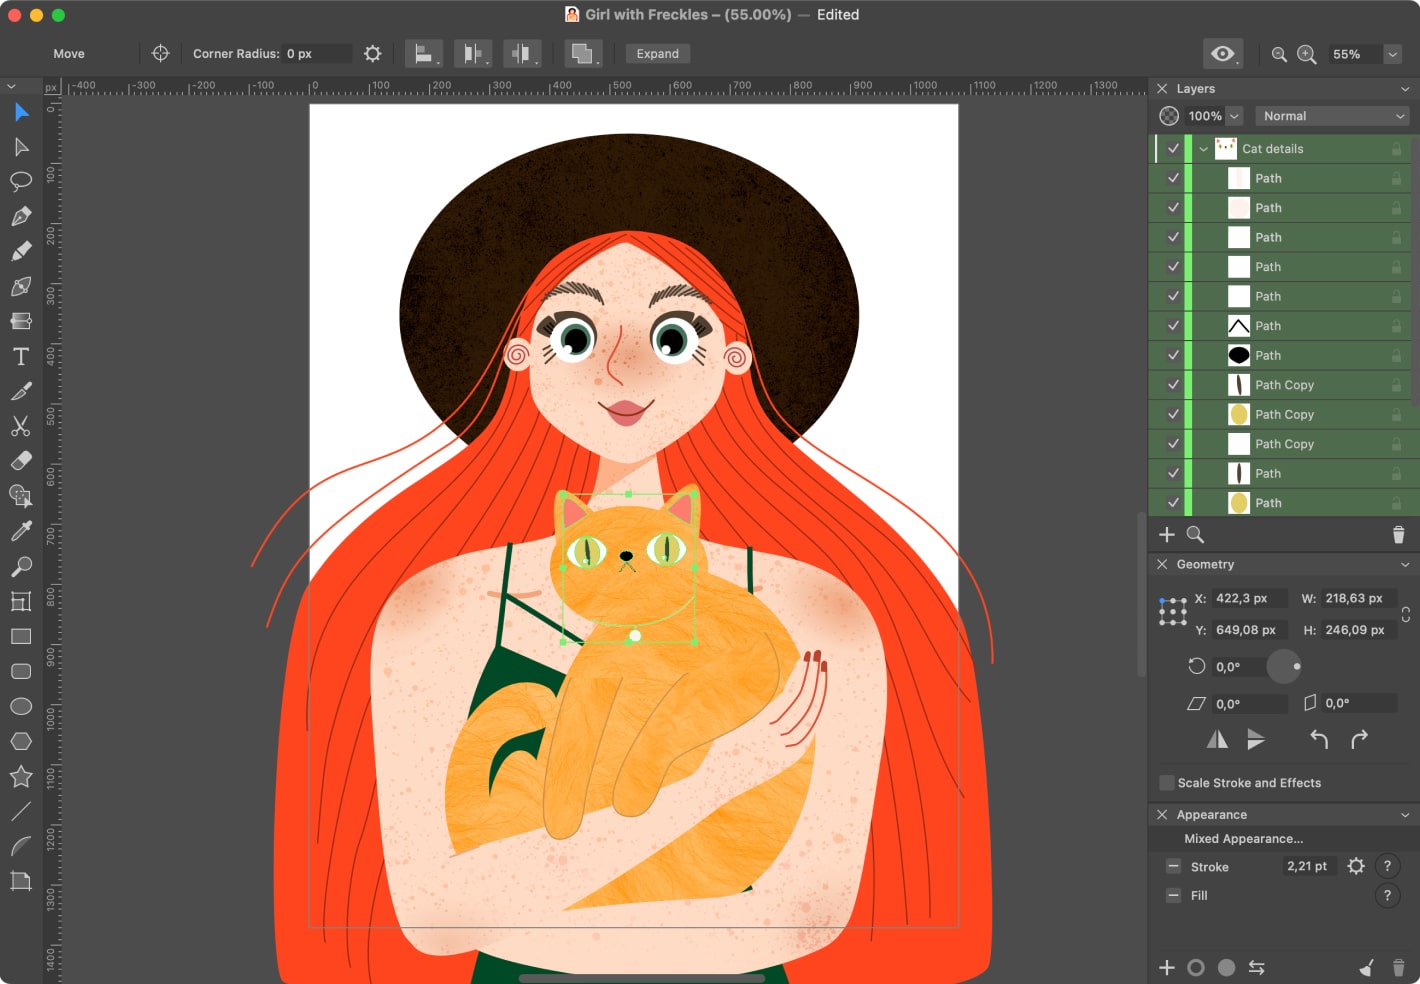
Create a new layer and name it “Cat details.” Draw the cat’s eyes, ears, nose and collar using the experience you’ve acquired from the previous steps.
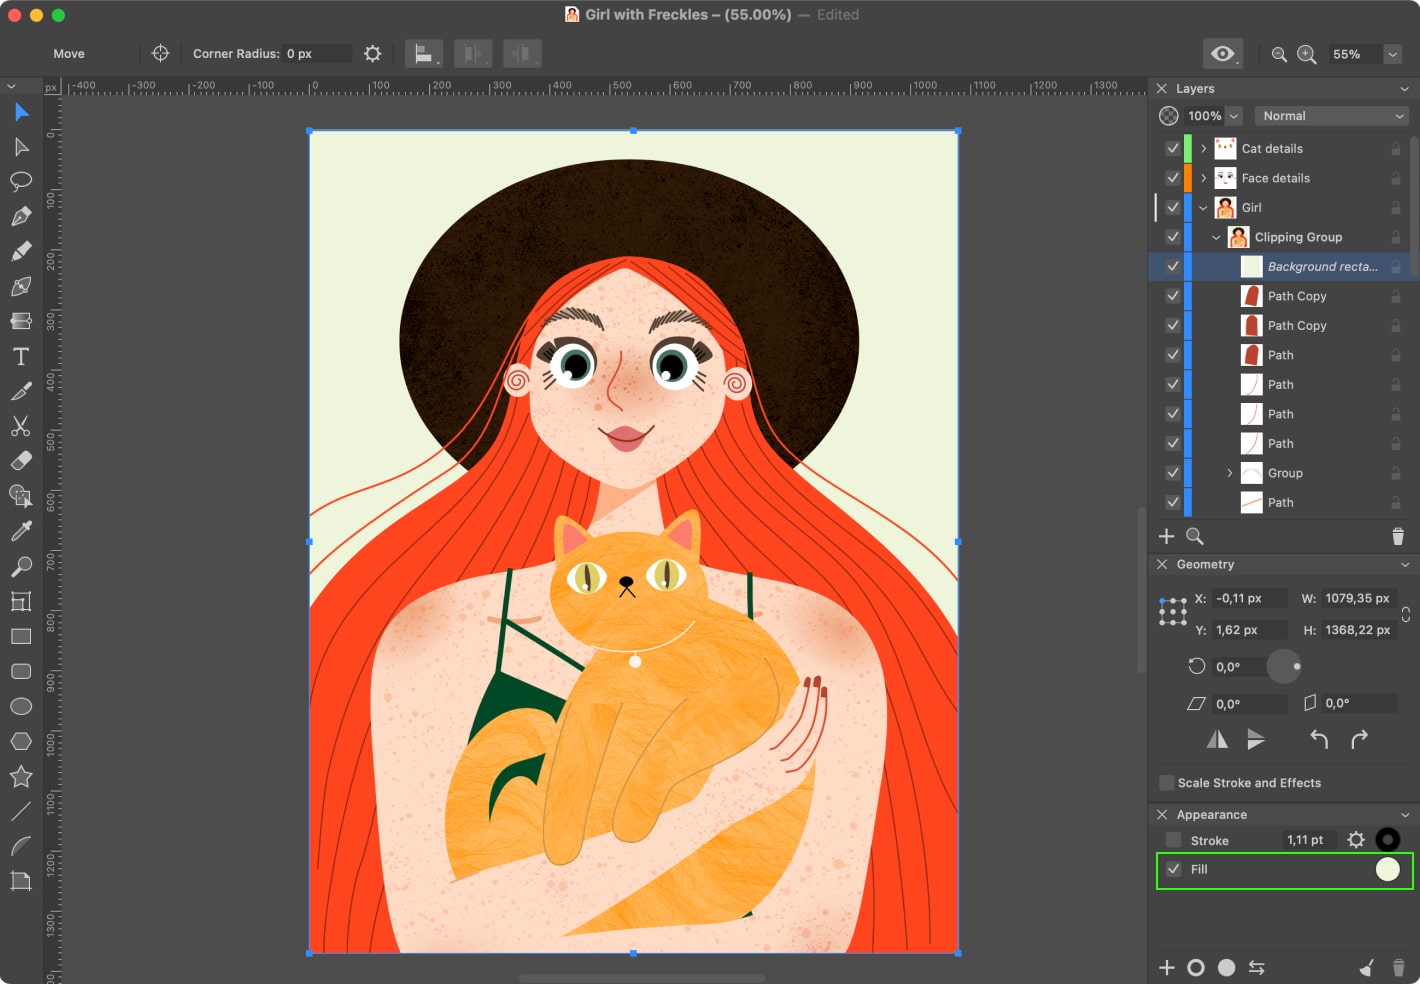
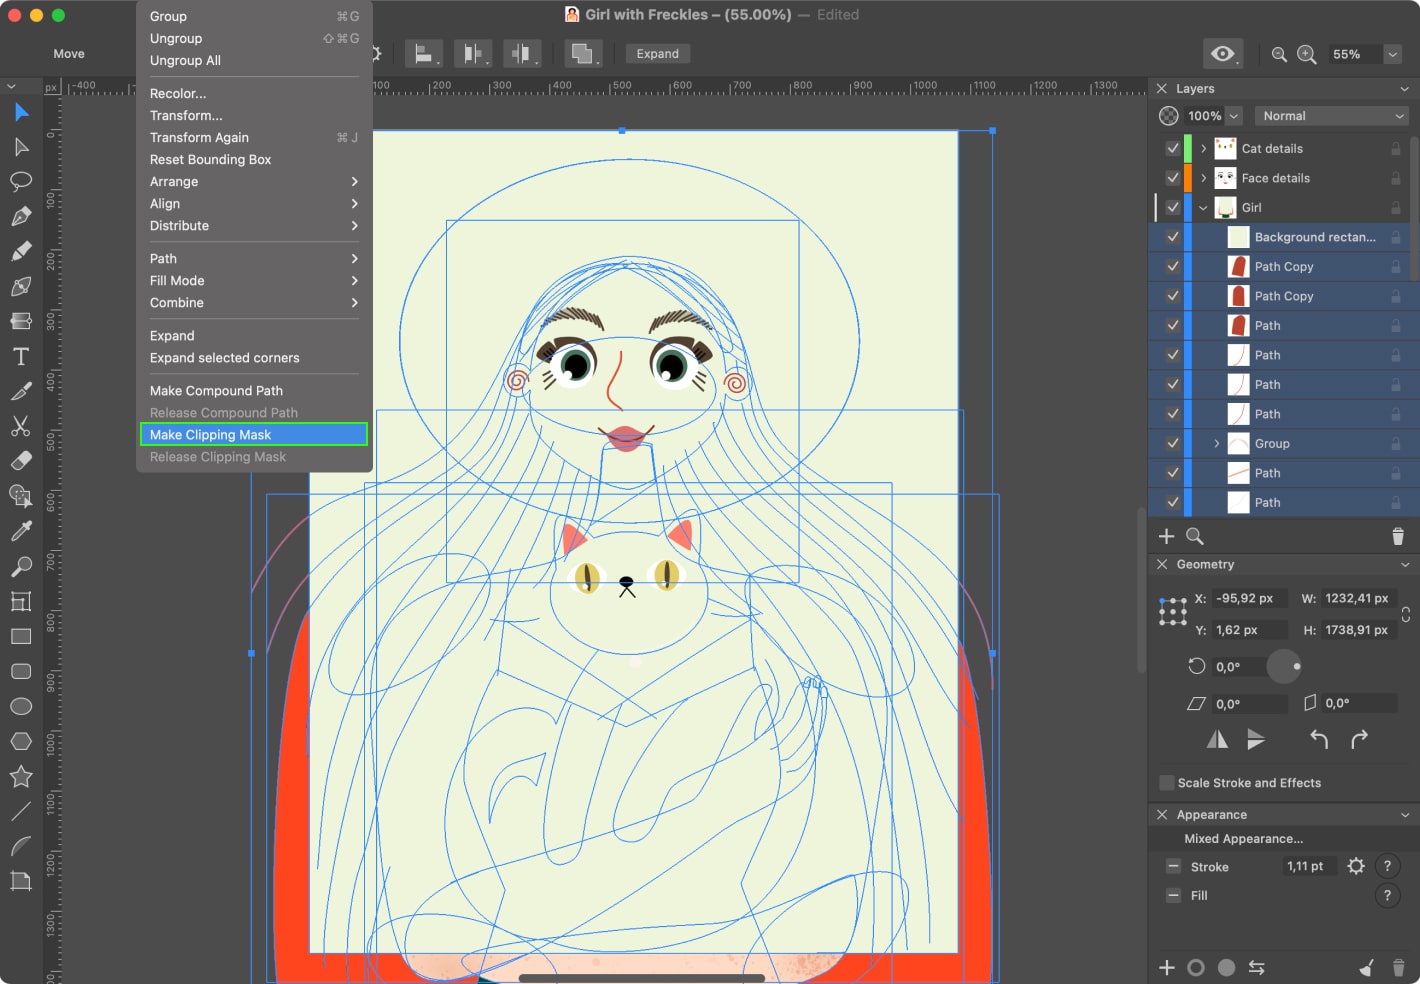
It’s time to add the background and trim off all unnecessary framing. Using the Rectangle tool, create a rectangle, size 1080 × 1350 pt, with the Fill color #EEF5DB. Select the rectangle and choose and in order to align it to the center of the sheet.
In the Layers panel, drag the rectangle inside the layer “Girl,” so that it is the topmost one.
Select all layers inside the layer “Girl” and and go to Modify > Make Clipping Mask on a Mac or Menu > Clipping Mask on an iPad.
Select the background layer. In the Appearance panel, enable the Fill checkbox with the background color. Voila! Your very own ginger girl with a cat illustration is ready!