Everything a Designer Needs to Know About Layers in Amadine
If you’re new to graphic design, you may not know what layers in design are, or how using layers opens up a world of options in creating new designs. If you’ve been in graphic design or digital art for a while, layers are certainly not a new concept for you, but this article will help you know how to use layers in the Amadine app. Read on to learn about how to take advantage of this basic but powerful digital art concept that will take your designs to the next level.
What Are Layers in Vector Drawing Apps and Why Are They Useful
Layers are the way all elements of a design are organized. In a digital canvas of art, when each element is organized as a layer, the artist can change or manipulate every individual element without affecting the other elements. This means that an artist can make changes to one small piece of an overall design, or delete an element altogether, while everything else in the design stays the same—all by working with separate layers. Working with layers gives designers ultimate control over their designs.
When you create a document, it will have one layer by default. As a graphic designer, you can draw all the elements on this one layer. Or, as you add elements, you can create a new layer for each element and place them over each other, adding layers for every new element. Though they are “stacked,” layers are transparent, so the only visible thing on a layer is the element or design the artist places there.
You can give layers meaningful names to keep track of the parts of the design they contain, and organize elements of your design into groups by type, color or other principle. You can also add sublayers inside a layer. This can be used to keep identical items together. Layers also allow you to manipulate objects that are inside as a whole by switching the visibility on or off, locking them or adjusting their transparency.
Now that you have a basic understanding of what layers are, we will show how to work with layers in the Amadine app.
Peculiarities of the Layers Panel in Amadine
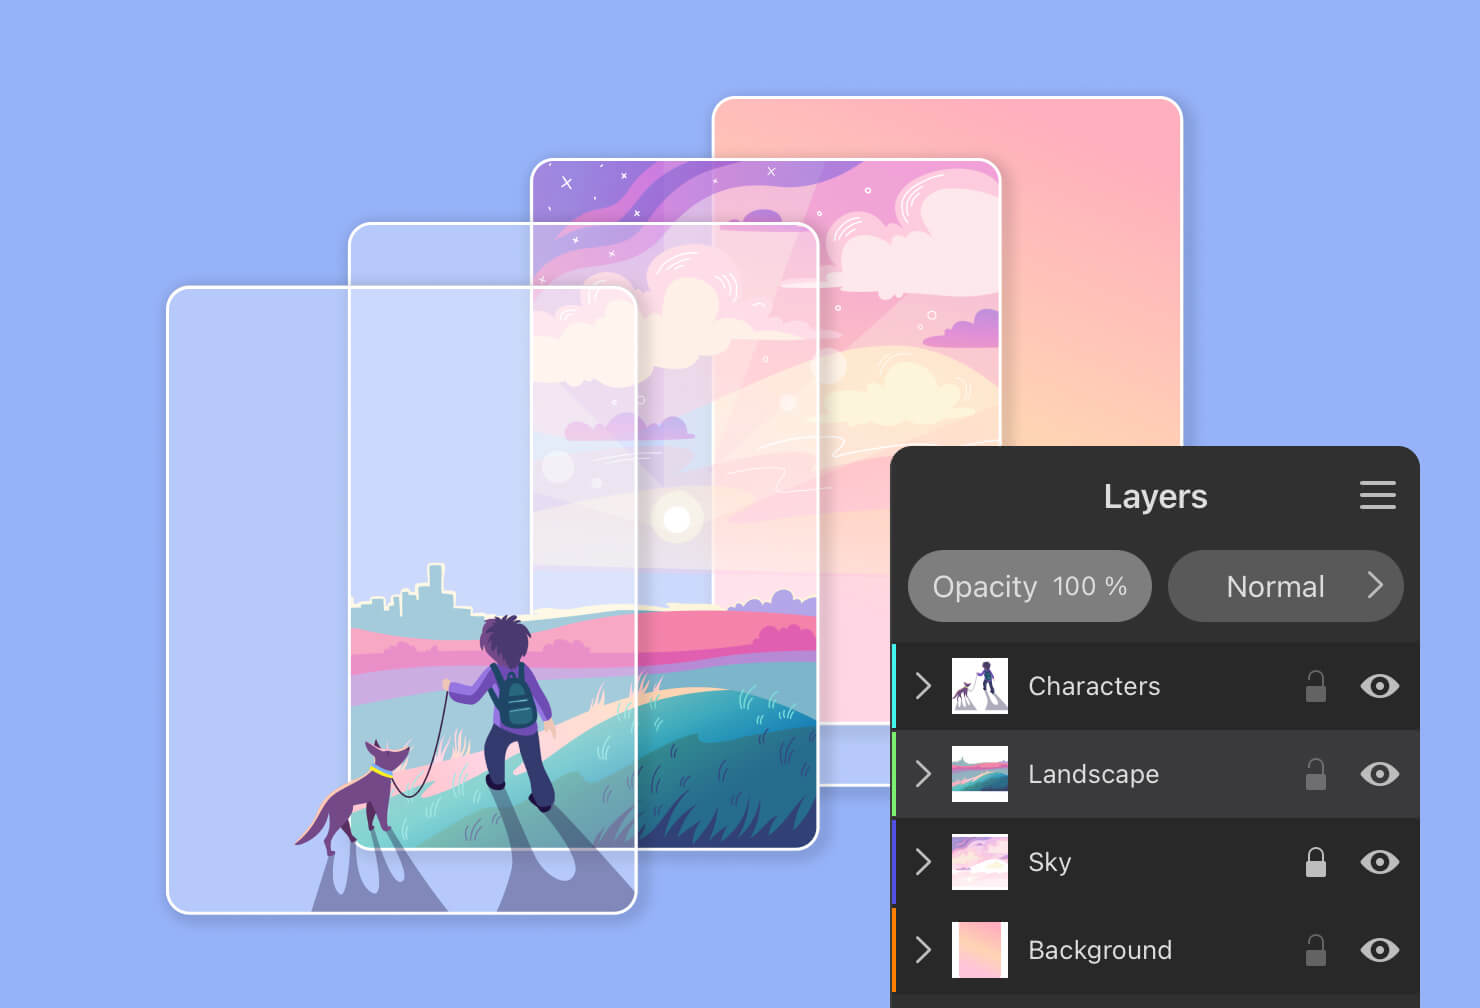
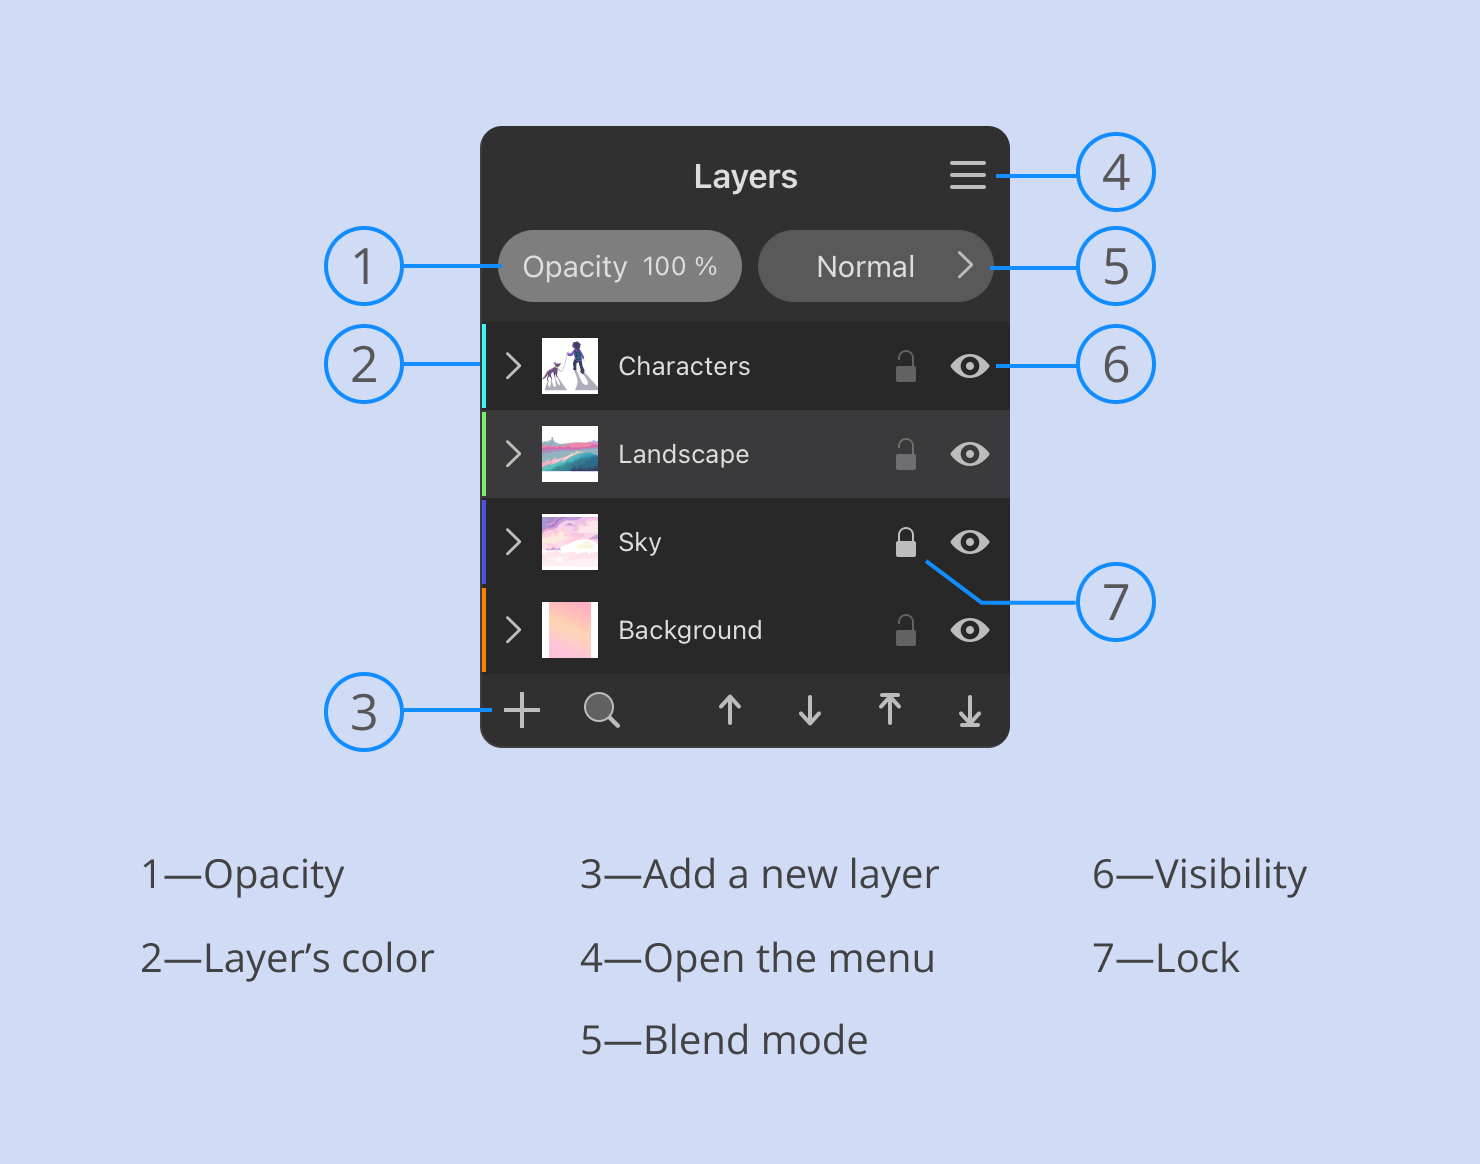
Begin working with layers in Amadine by accessing the Layers panel. This panel is a complete list of layers and objects that are in the document. This list is presented as a structure where layers appear as top level items. You can look inside of a layer and see objects and sublayers in it. The whole list from top to bottom represents exactly the same order in which objects appear in the document. If some object is behind others on the canvas, this object will be lower than others in the Layers panel.
To open the Layers panel, choose Window > Layers from the main menu on a Mac or if you’re working on an iPad, the Layers panel is situated in the Layer tab of the Inspector.
Linking Objects
To determine whether an object belongs to a specified layer, pay attention to the object boundary. When it is selected, the boundary has the same color as the layer in the Layers panel.
Amadine documentation provides more information about the Layers panel.
How to Create, Delete, Duplicate and Merge Layers
The basic operations may well prove as a time saver when dealing with complex designs and intricate illustrations.
Creating Layers
Once you have a sheet on an initial canvas, create a new layer by clicking on the plus button at the bottom of the Layers panel.
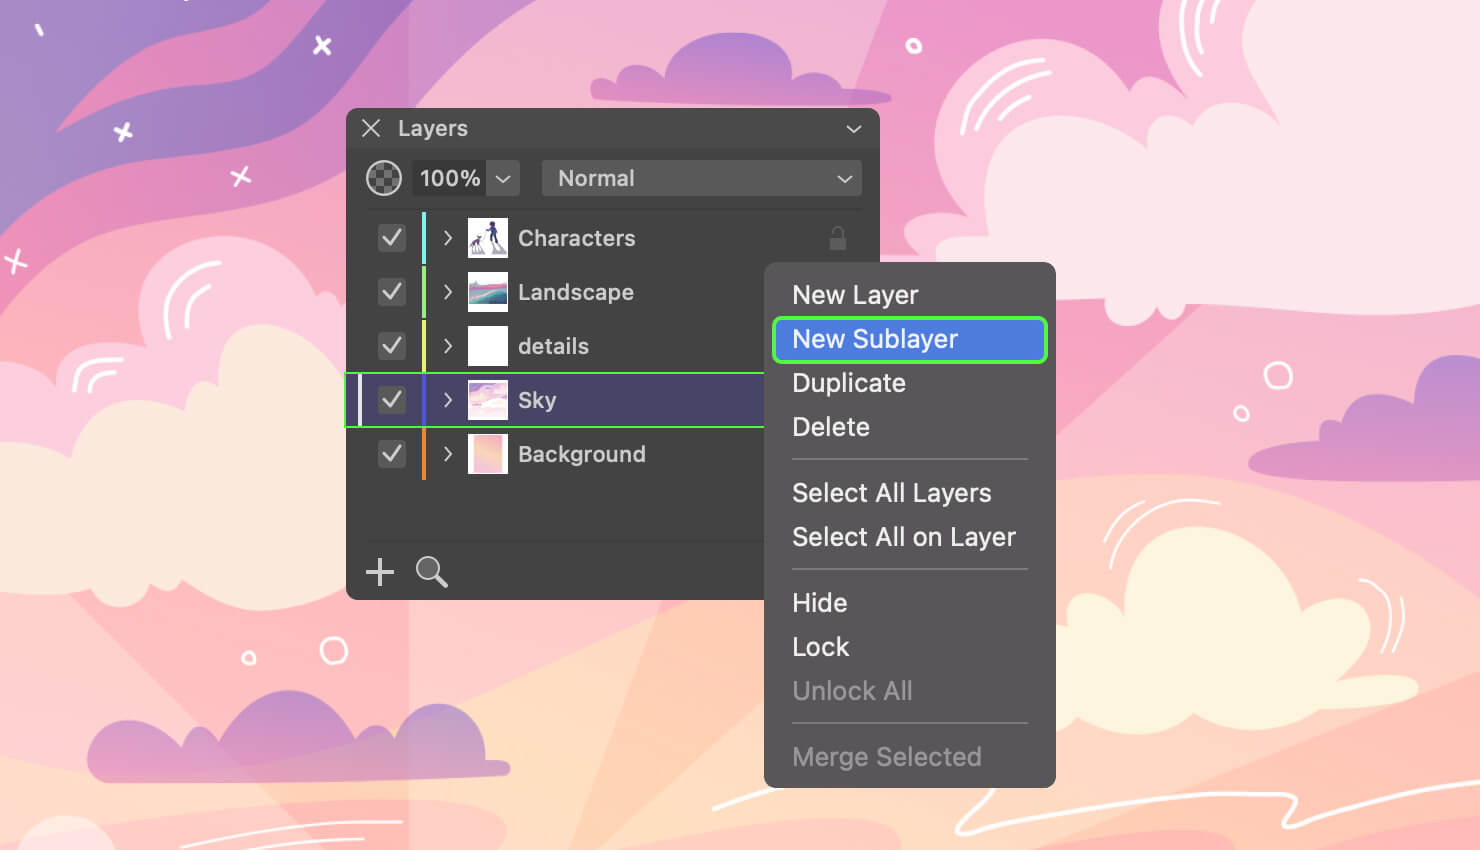
You can also create a sublayer to a layer. Open the context menu of the layer to which you want to add the sublayer. Then select the New Sublayer command from the context menu on a Mac. On an iPad, a sublayer can be created by dragging one layer onto another.
It’s also easy to duplicate an existing layer. To do this, select the Duplicate command in the context menu of that layer.
The Layer item in the main menu on your Mac provides commands to create and duplicate layers.
Deleting Layers
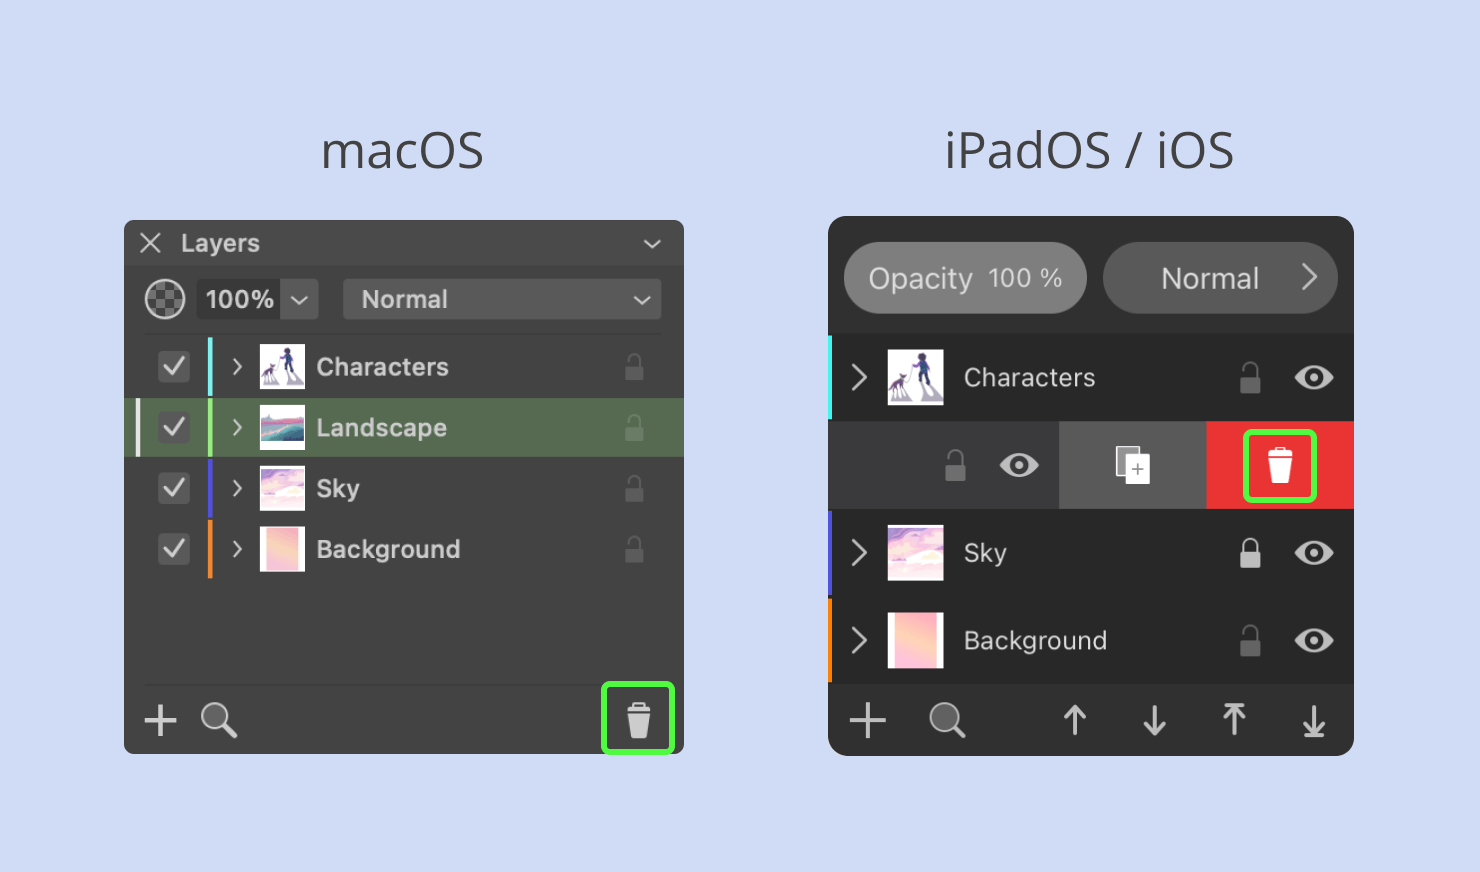
To delete a layer on your Mac, first select it by clicking on it in the Layers panel. Then click the trash bin icon. For iPad, you need to select a layer and tap Delete in the context menu. Or swipe the desired layer to the left in the Layers panel, then you’ll see a delete icon (trash bin) appear.
Important Note: When you delete a layer, all objects in it will be deleted as well. So make sure that you don’t need any of the objects that are in the layer you are about to delete.
Merging Layers
Layers and objects in the list have the context menu with the Merge command. Merge Selected merges selected layers. The result is a single layer that contains objects of the original layers.
It should be noted that in order for the Merge Selected command in the context menu to become active, two or more layers must be selected in the Layers panel. In order to make a multi-select on the Mac, you need to hold down the Shift key and select the necessary number of the layers in the Layers panel. For iPad, swipe to the right in the Layers panel for each required layer. Or tap Select All Layers in the context menu if there is a need to select all layers in one go (works for both Mac and iPad).
How to Arrange Layers and the Objects on Them
Layers continue to stack on top of each other as they’re added to the document. The stacking order on the canvas mirrors the order on the Layers panel. If two objects overlap on the canvas, then the same object would be the upper on the canvas and in the list. This is also discussed in more detail in the Layout Basics section.
The order of items in the Layers panel is important, because it defines whether an object or layer should be behind or in front of another object or layer. The Layers panel allows you to reorder layers and objects.
Reorder Layers
To reorder layers, simply click a layer and drag it to a new position in the list on the panel. You can also use drag and drop to place a layer inside another layer, or to move a sublayer outside its parent layer.
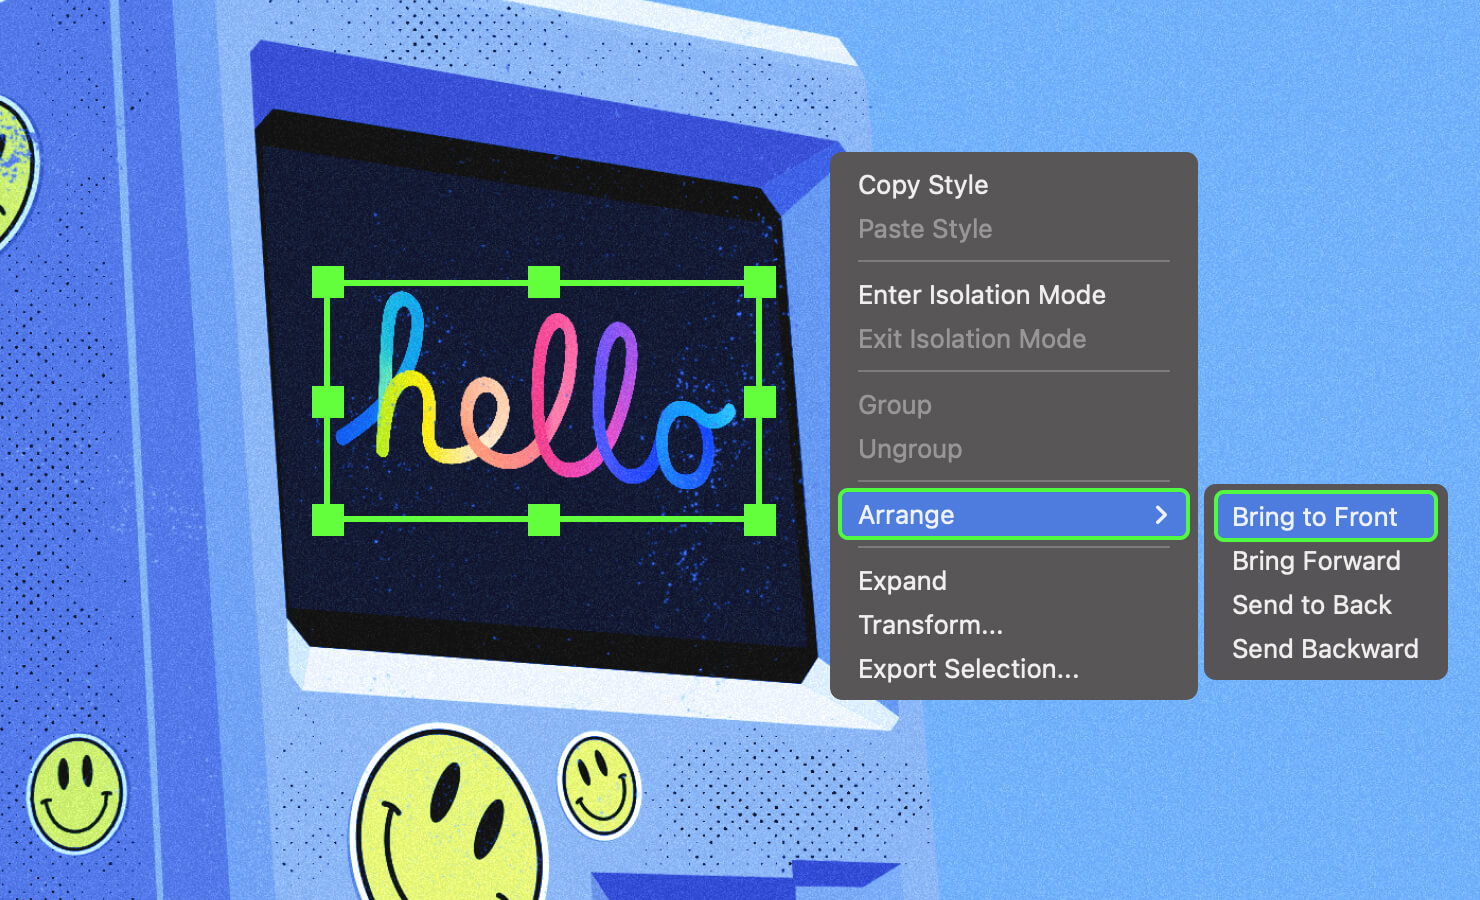
Reorder Objects
To change the order of objects in a design, just drag the object to a new position on the list. Or, if you’re working on a Mac, use commands from the Modify > Arrange menu. The same set of commands is available in the context menu of the object on the canvas. You can find this command in the Arrange tab of the Inspector when working on your iPad.
Move an Object to Another Layer
The Layers panel in Amadine makes it easy to move objects between layers. Simply drag and drop an object from one layer to another. The Layers panel lets you select several objects and move them together.
An alternate way is to cut and paste an object. On your Mac, select the required object in the Layers panel, then in the main menu select the Edit > Cut item or use the shortcut Command-X. Then select where it will be inserted in the Layers panel and click Edit > Paste or shortcut Command-V in the menu. We do the same for the iPad, Cut and Paste commands can be found in the main menu.
How to Blend Layers
Blending layers allows artists to finely control how colors in the upper layer interact with the ones of another lower layer. Blending gives a different look by mixing layers together. You can make a layer transparent, or change the opacity of the top layer in different degrees by changing the percentages, to create a blended or “mixed” visual effect.
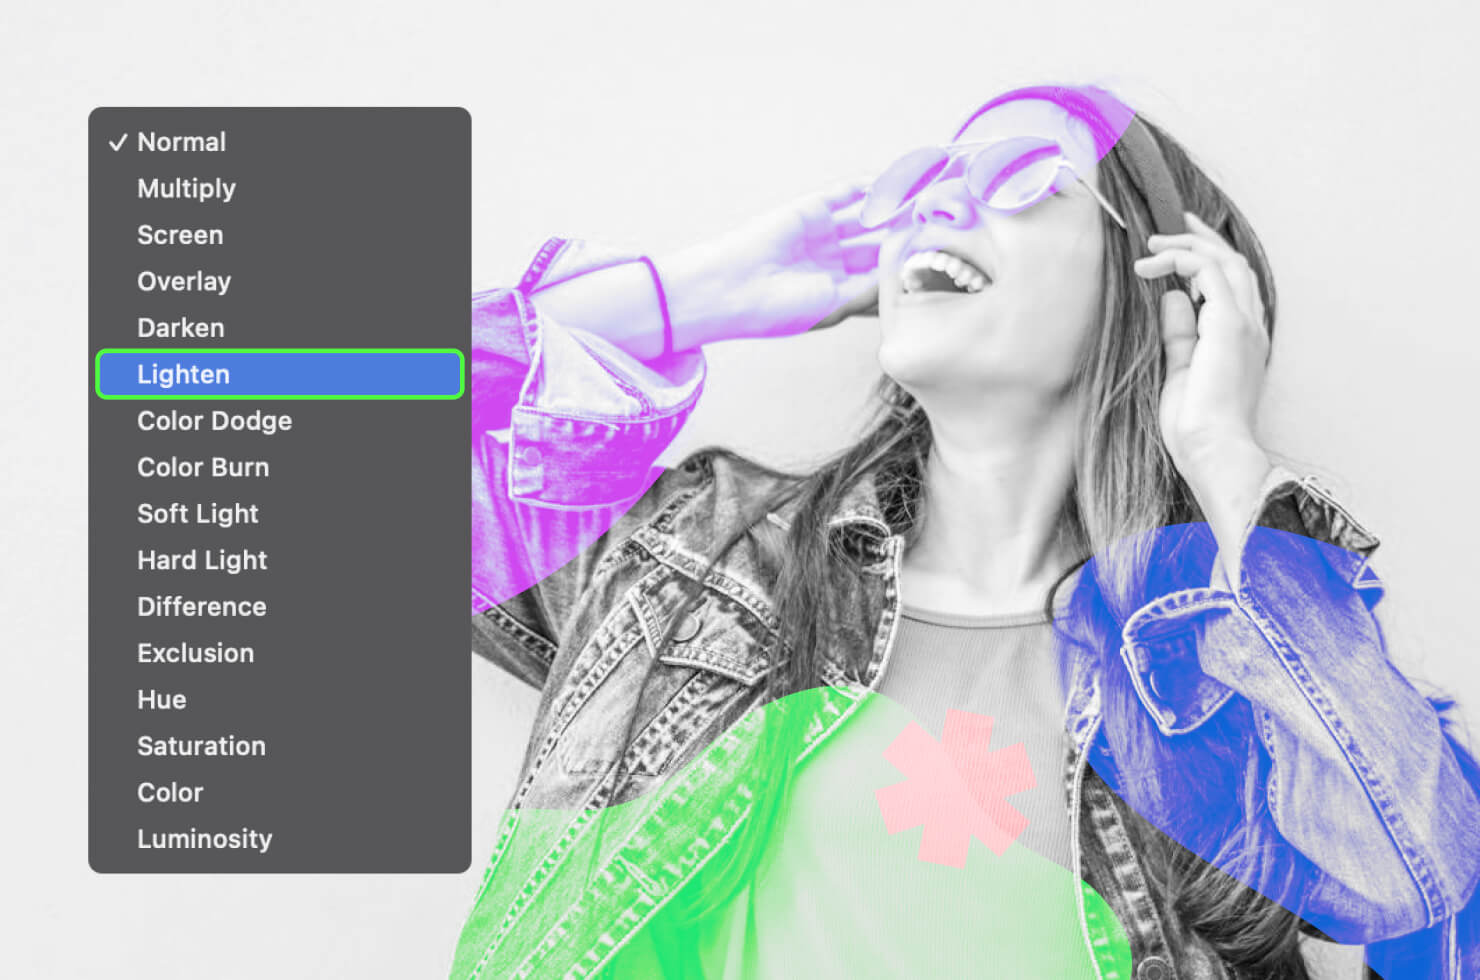
To select a blend mode, use a drop-down menu at the top of the Layers panel.
To see any visual effect from applying a blend mode or transparency, the upper layer should overlap the lower layer(s).
There are many options when blending layers, but overall it’s helpful to know that the default blend mode is Normal. If the top layer is opaque, then only that layer determines the color. Otherwise, the result depends on the color of the top layer pixel, on the level of its transparency, and on the color of the underlying layer pixel.
The rest of the blend modes, like multiply, screen and difference blend modes, calculate color in a more complicated way, but they always take the transparency into account. Here is a more detailed article on Blend Modes.
Conclusion
Knowing how to use layers, and understanding them can boost your design skills and allow you to control your art in new ways. Layers give you the power to organize, manipulate and perfect your designs by letting you work on individual elements without changing the entire overall design.
As this article has shown, the layers panel in the Amadine app gives artists a full set of tools for creating, arranging and blending different parts of your artwork. By practicing and trying out all the options with layers, you will discover new creative possibilities in your designs. Have some fun experimenting with layers, to see how they can make your workflow easier and elevate your graphic designs.