Effects in Amadine: Inner Shadow, Outer Shadow, Inner Glow, Outer Glow, Blur
As an artist creating designs in a vector app, you are likely looking for ways to add another dimension to your art, or embellish your designs beyond a two dimensional drawing. Being able to make designs take on a third dimension adds volume and can make your drawing look more professional. Effects in Amadine are just the way to do that. In vector drawing apps, effects are functions that allow a user to change the appearance of graphics, adding depth, light or other cool visual embellishments.
What Are Effects in Vector Drawing Apps?
Designers love using effects because they elevate the appearance of a design. Effects add photo-like qualities to a design, like a sunlit glow, a shadow, or a blur that alters the focus of an image. Previously only available to professional artists, now anyone can experiment with different artistic effects by playing around with the controls in vector graphics apps, like Amadine.
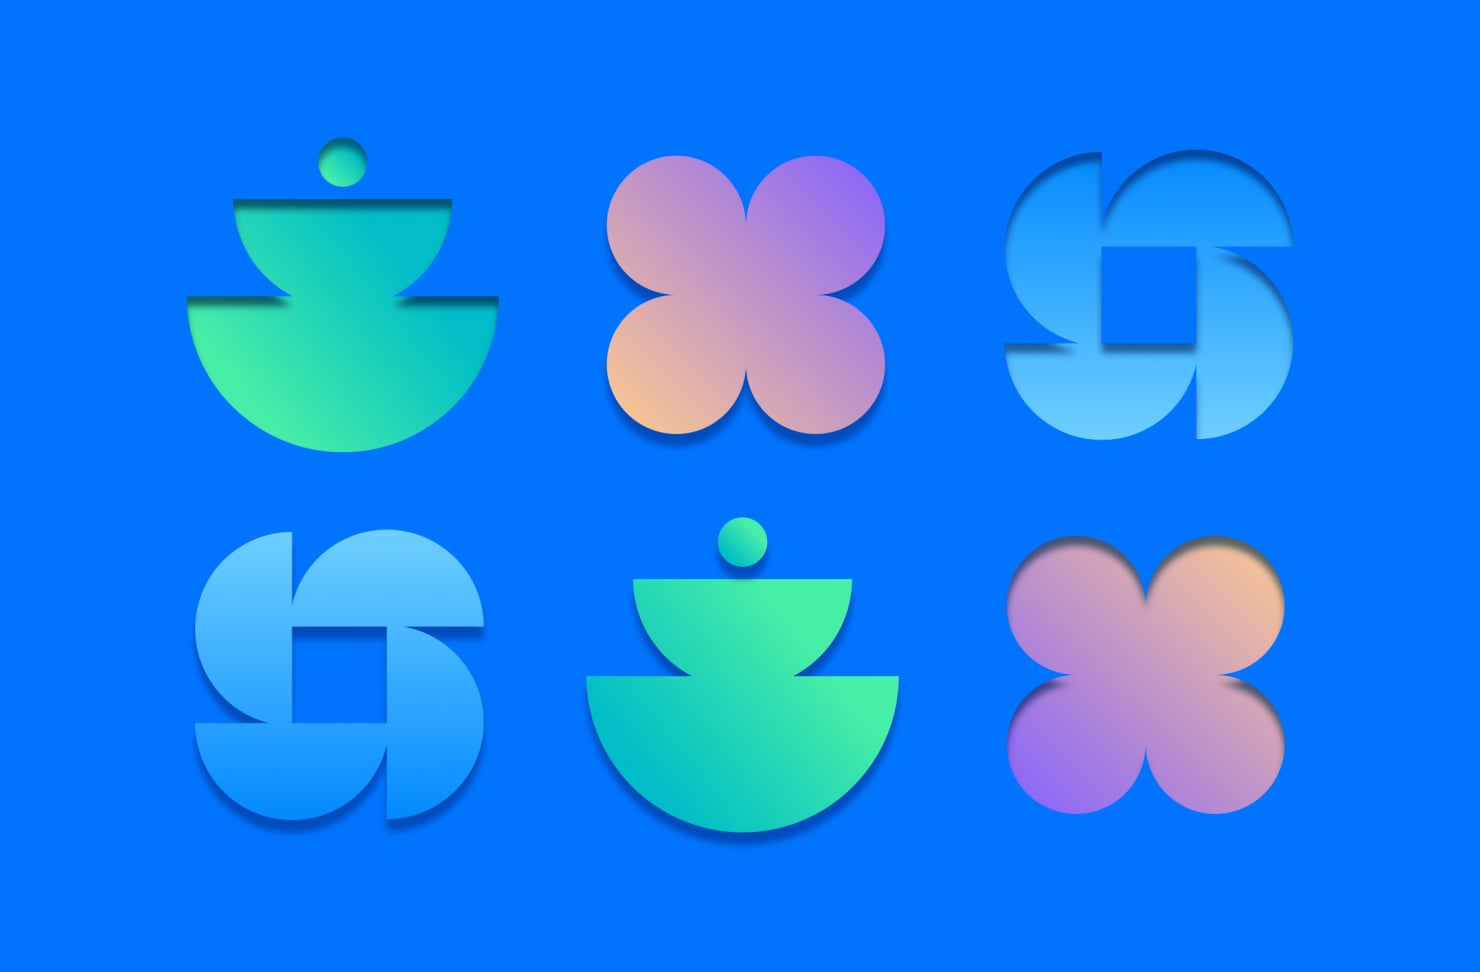
Amadine features effects that allow users to create an incredible range of visual results, both on a Mac and an iPad. The Shadow effect can provide an object with true realism and volume, and the image itself will become deeper. The Inner Glow effect alters the amount of light within an image, while the Outer Glow effect applies a soft light to the area around an image. The Blur effect can create an interesting way to vary contrast between an image and the background. Read on to discover how to apply effects to your artwork using the Amadine app.
Inner and Outer Shadow
Inner and Outer Shadow are effects used to give the art more realism. To give the drawn object some real life volume, simply apply a shadow. This helps to create an appearance as in real life; whether outside in the sun or indoors, objects almost always cast some kind of shadow.
As a rule, the inner shadow can give the visual effect of depth to the object, while the outer one can be used for giving volume to the object. The outer shadow also separates the object from the background, giving the effect of a real life object laying on a surface.
If you’re working on a Mac, check out the Help section to work with the Shadow effect. When working on an iPad, there are some helpful tips about accessing the Shadow effect.
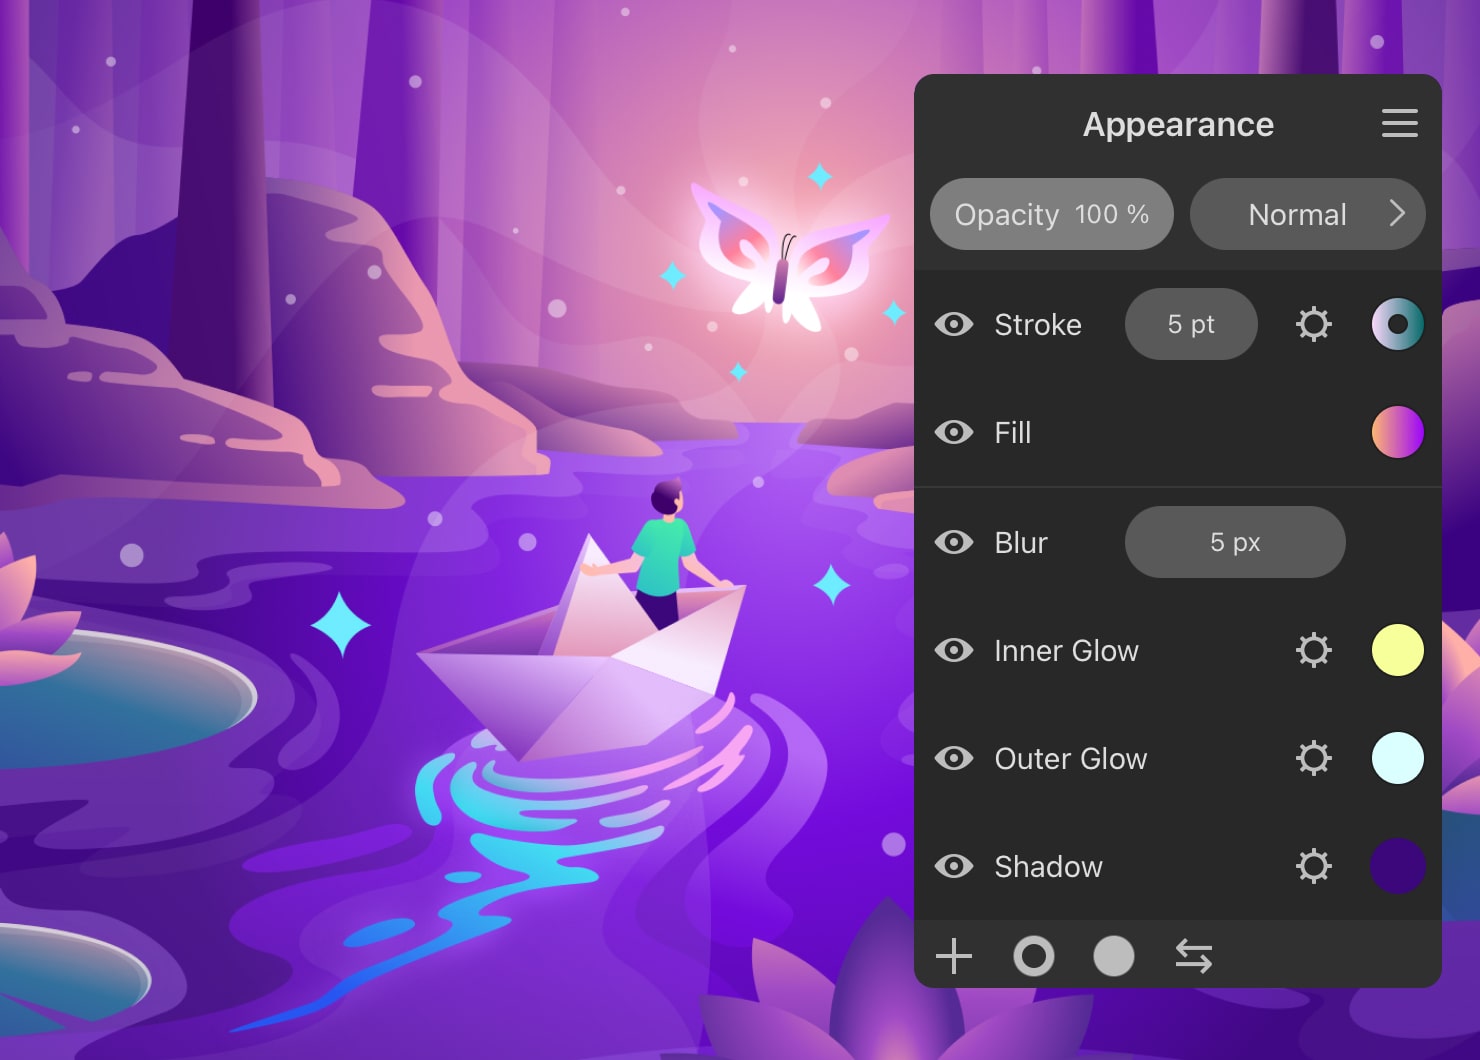
To play with Shadow effects on an iPad, click the plus button in the Appearance panel. Click the hamburger menu to find the Appearance panel. Then select Shadow or Inner Shadow. Next, click the gear icon of the effect, and set up its properties.
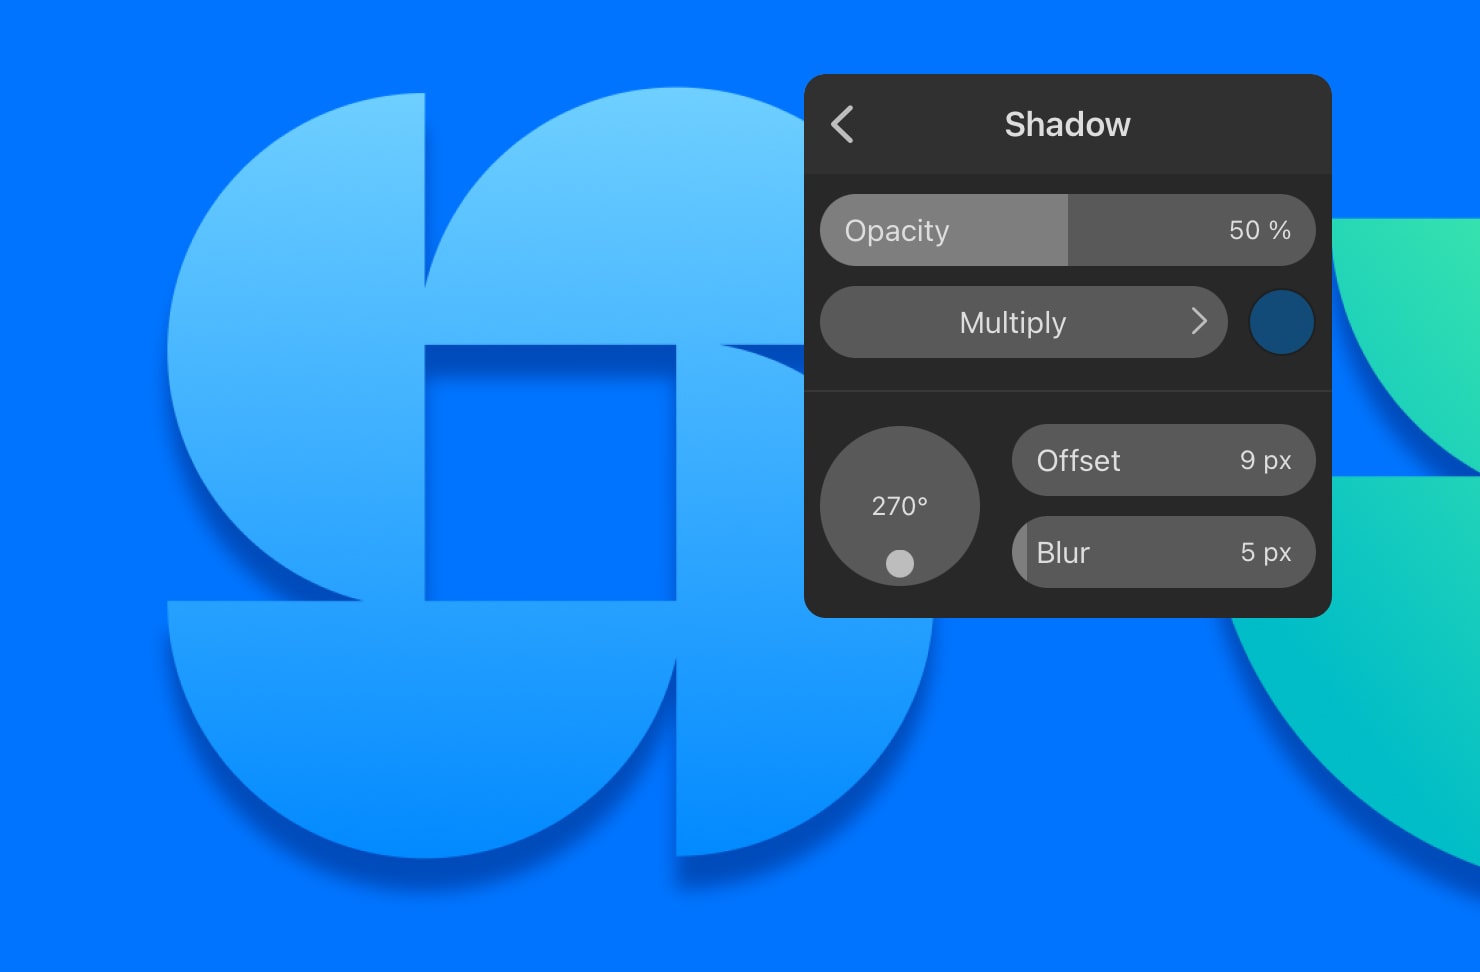
Parameters of the Inner and Outer Shadow
There are six shadow parameters that help users control the shadow’s intensity and other properties:
- Transparency—adjust to what degree you can see through the shadow.
- Blend mode—defines how shadow color mixes with the color of layers below it (see details about using blend modes).
- Offset—determine where the shadow will be. A positive value places the shadow on the right. A negative value moves the shadow to the left.
- Blur—the blur effect softens the edges of a shadow.
- Color—adjust the color of the shadow.
- Angle—play with the angle of shadows to imitate the direction from which light would hit the object.
Inner and Outer Glow
The Glow effect can make your object appear like it is emitting light. Inner and outer glow can add a “halo” appearance to objects. Designers love to apply a glow to text to add impact. To find the Glow effect, tap on the plus button in the Appearance panel, on the iPad or on a Mac.
Here are more details about controlling the Glow effect on a Mac. If you’re working on an iPad or iPhone, here are some helpful points to familiarize you with the Glow effect.
When you reach the Glow options in the Appearance panel, select Inner Glow or Outer Glow. Then tap on the gear icon of the effect and adjust its properties.
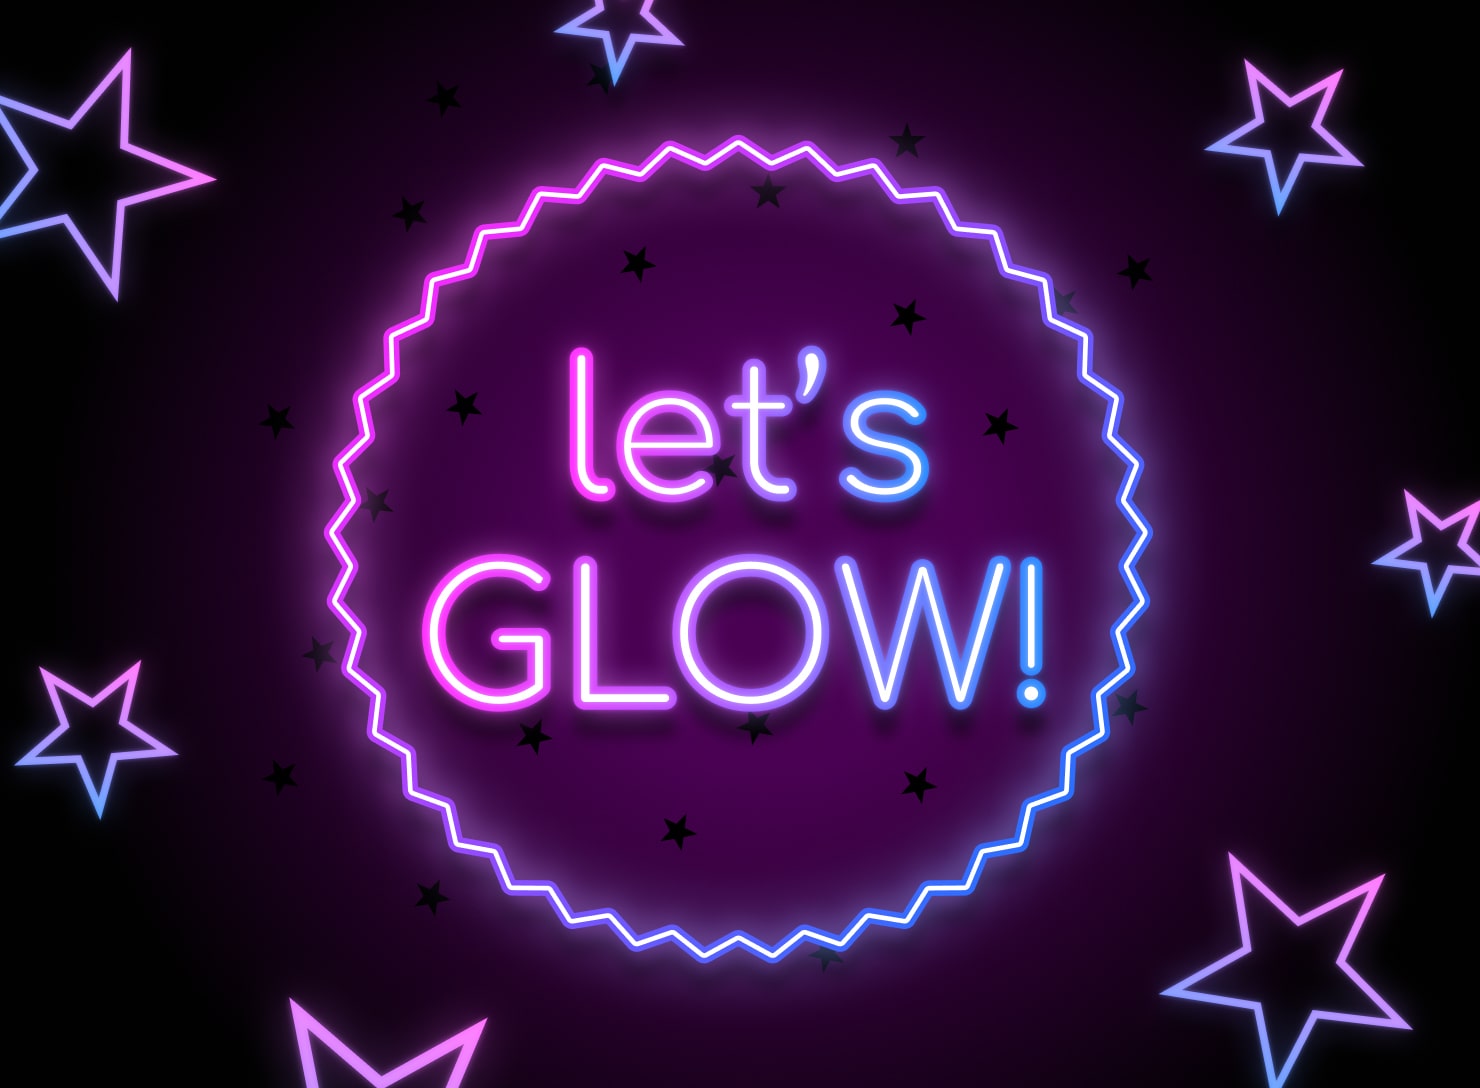
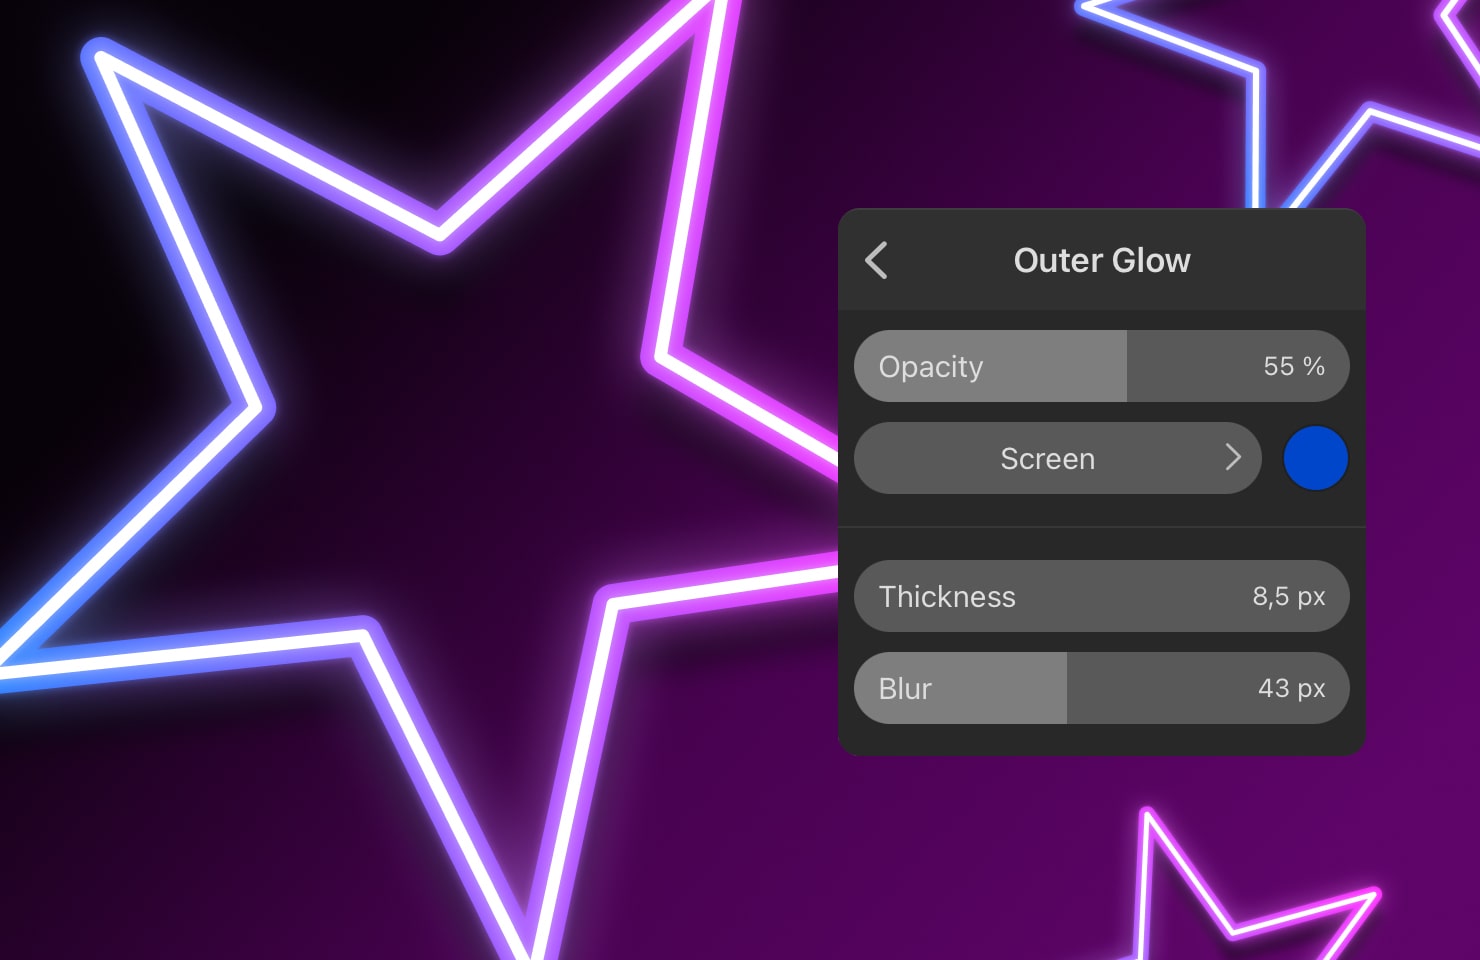
The Glow effect is so realistic, that it makes the pixels appear to be lit from within. For example, here is an illustration with a neon glow effect with a blur.
Parameters of the Glow Effect
In the Glow effect, there are four parameters to change the way your object looks:
- Color—choose a variety of glow colors, from shades that blend with the object to contrasting colors.
- Transparency—control the intensity of the glow color from opaque to see-through.
- Thickness—change the width of the glow effect to give a more spread out or constrained glow.
- Blur—adjust the sharpness of the glow edges, from “fuzzy” to clearly defined.
The Object Blur Effect
The object Blur effect is simple, yet a very cool one that is easy to apply. The effect of blurring images is mesmerizing! You can soften an image’s edges, or make something almost disappear. Blur allows you to blend colors and shades among the layers of an image in varying degrees, imitating the way a painter might layer paint or impose photographs over each other in varying degrees.
On the iPad or on the Mac, start with the Appearance panel, as shown below. Then select Blur. You can always adjust the blur width. You can read more details about the Blur effect in Amadine. And if you’re working on an iPad, check out these helpful tips for using the Blur effect.
Life hack: You can create something like mesh gradients by creating circles of different colors and setting a high width of blur (more than 30 pixels).

Using Blur with Opacity, you can achieve the effect of light, glow or fire—in short, anything that glows.
Blur can imitate bokeh effect, as photography can capture. Bokeh is a word with Japanese origins, defined as “the way the lens renders out-of-focus points of light.” The word comes from the Japanese word boke, which means “haze” or “blur”, making a lot of sense for this particular effect.
Blur can also be used to create a focus effect, as in a photograph. For example, if a person in the foreground is clear and sharp, while the background is blurred behind, the result is a portrait-like appearance. This can add a professional quality to images, and imitates the way you might use sophisticated camera settings.
Here is an example of an illustration with a bird. The bird looks in focus because the clouds are blurred behind it. Shown below, the central shape is in focus, and the blur effect has been used to lessen the emphasis on the sky in the background.

Using Effects in Amadine: Conclusion
As you can see, effects are cool, and give you the ability to make your images more realistic, futuristic, hyper-real, dreamy or contrasting. Experiment with different Shadows effects to make your designs seem 3D. Play around with the Glow effect to see if you can create art that seems to be lit from behind. The Blur effect is fun to try, to create portrait-like images, or make your artwork seem “dreamy” by blending layers together.
As a professional, student, or someone who is creating vectors for the first time, all the tools are in your hands! Amadine makes it easy and quick to give your artistic designs more interest by playing around with these incredible effects.