Flowing Text in Amadine: Why You Need It as a Designer
As a designer, you’ll no doubt deal with designs that need to incorporate a lot of text, and often you may want to break up the text into columns, in order to make it fit the page. But, how do you make sure the right amount of text ends up in each column? This can seem like a complicated task. This is where flowing text comes in. This feature makes it easy to break up text into boxes that fit perfectly in a layout.
By using the flowing text feature, you can split text so that it flows into multiple text boxes. So, excess text that doesn’t fit in one box can simply “flow” to the next text box. This makes it easy for readers by breaking up heavy text, and is a great way to simplify text management in design. In this article, we’ll show you how to use flowing text in documents you create in Amadine.

How Flowing Text Is Used in Design Projects
Flowing text is really useful when creating flyers or brochures, or any document where the layout lends itself well to columns of text. You’ve probably noticed that menus often contain text that is in columns. Flowing text is the best way to create those categorized columns you see in restaurant menus. You can apply flowing text to basically any Amadine document that has more than two lines of text.
Creating Flowing Text Boxes in Amadine
The key to creating flowing text is to link text boxes together to form a sequence, or chain. This allows text to automatically flow from one text box into the next, in order of the sequence.
Amadine offers all the capabilities needed to create flowing text. You can add and remove text boxes, and link text boxes together in a sequence called chain. You can also link chains of text boxes, or unlink them, and insert a text box into a chain.
Create the First Text Box
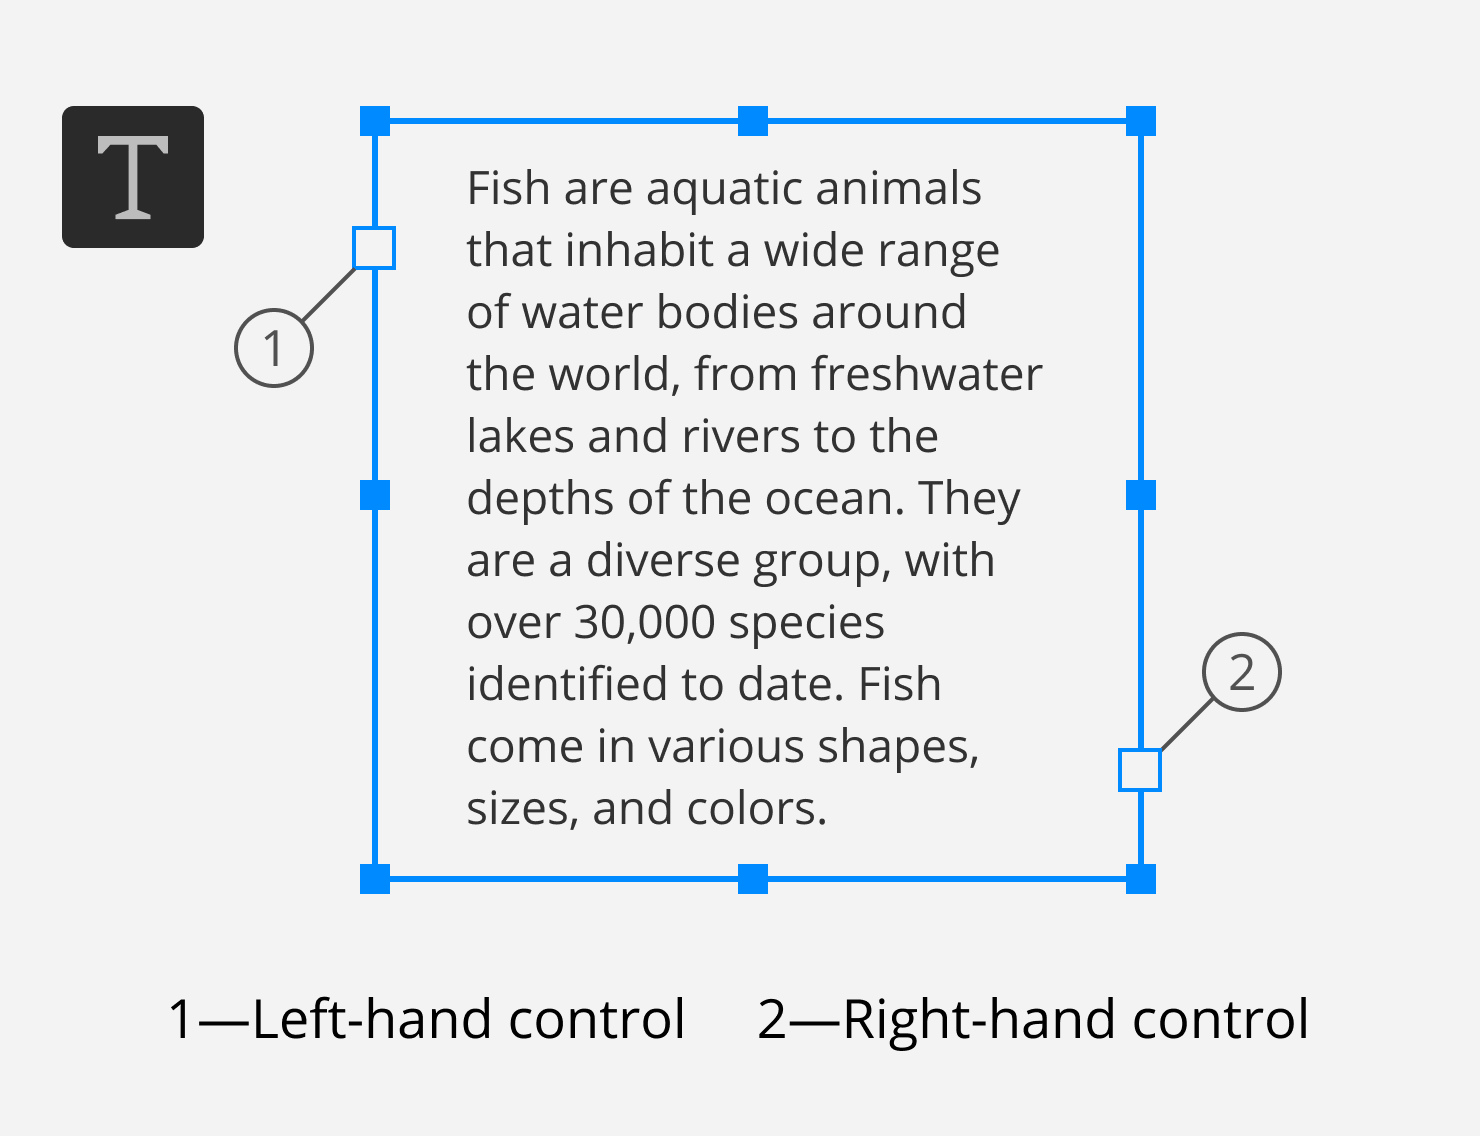
Start designing flowing text in Amadine by first creating a text box. Usually, text boxes for flowing text are a rectangular shape, to fit columns of text. Follow these easy steps to create a text box in Amadine:
- Press the T key or click on the Text tool
 in the Tools panel. Make sure that the Text Box mode
  is activated in the Control panel.
 - Place the cursor on the canvas to define the location of a corner of a new text box.
- Holding down the left mouse button, move the cursor to start drawing the text box.
- Release the mouse button when the text box is the proper size. As a result, you will have a text box containing the default text.
- Type in or paste new text.
Adding and Removing Linked Text Boxes
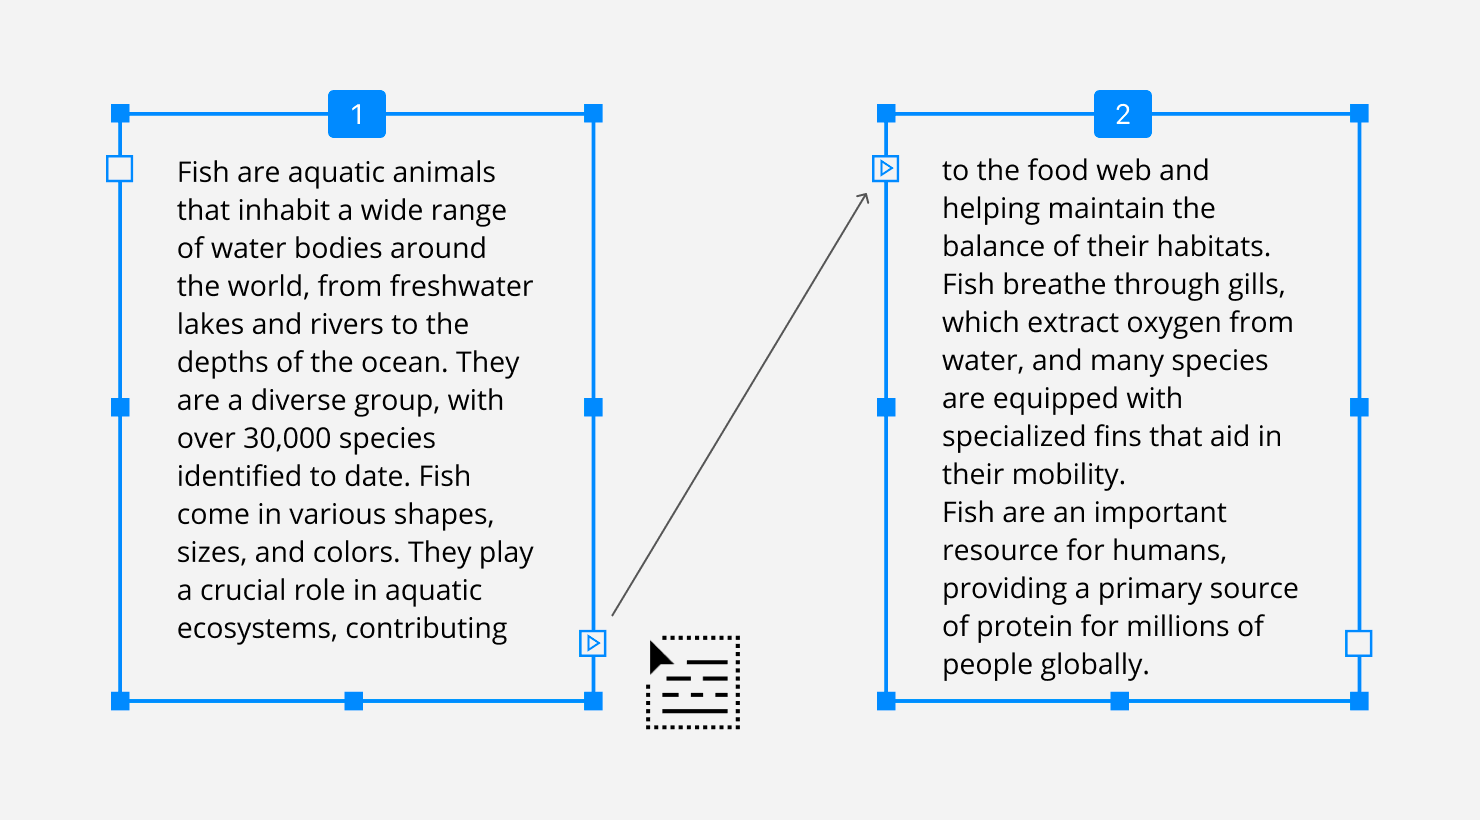
After creating the first text box, you can create more text boxes and link them together. Amadine makes this task easy. To create a chain of linked text boxes, add the first text box, as explained above. Click on its right-hand control. The cursor indicates that you can create a linked text box. Draw the second text box. Alternatively, you can click on the control and then click on the canvas. In this case, the second text box will have exactly the same size as the first one. The size of each linked text box can then be changed as needed. You can continue adding them in order to create a chain of multiple linked text boxes.
Linking Separate Text Boxes
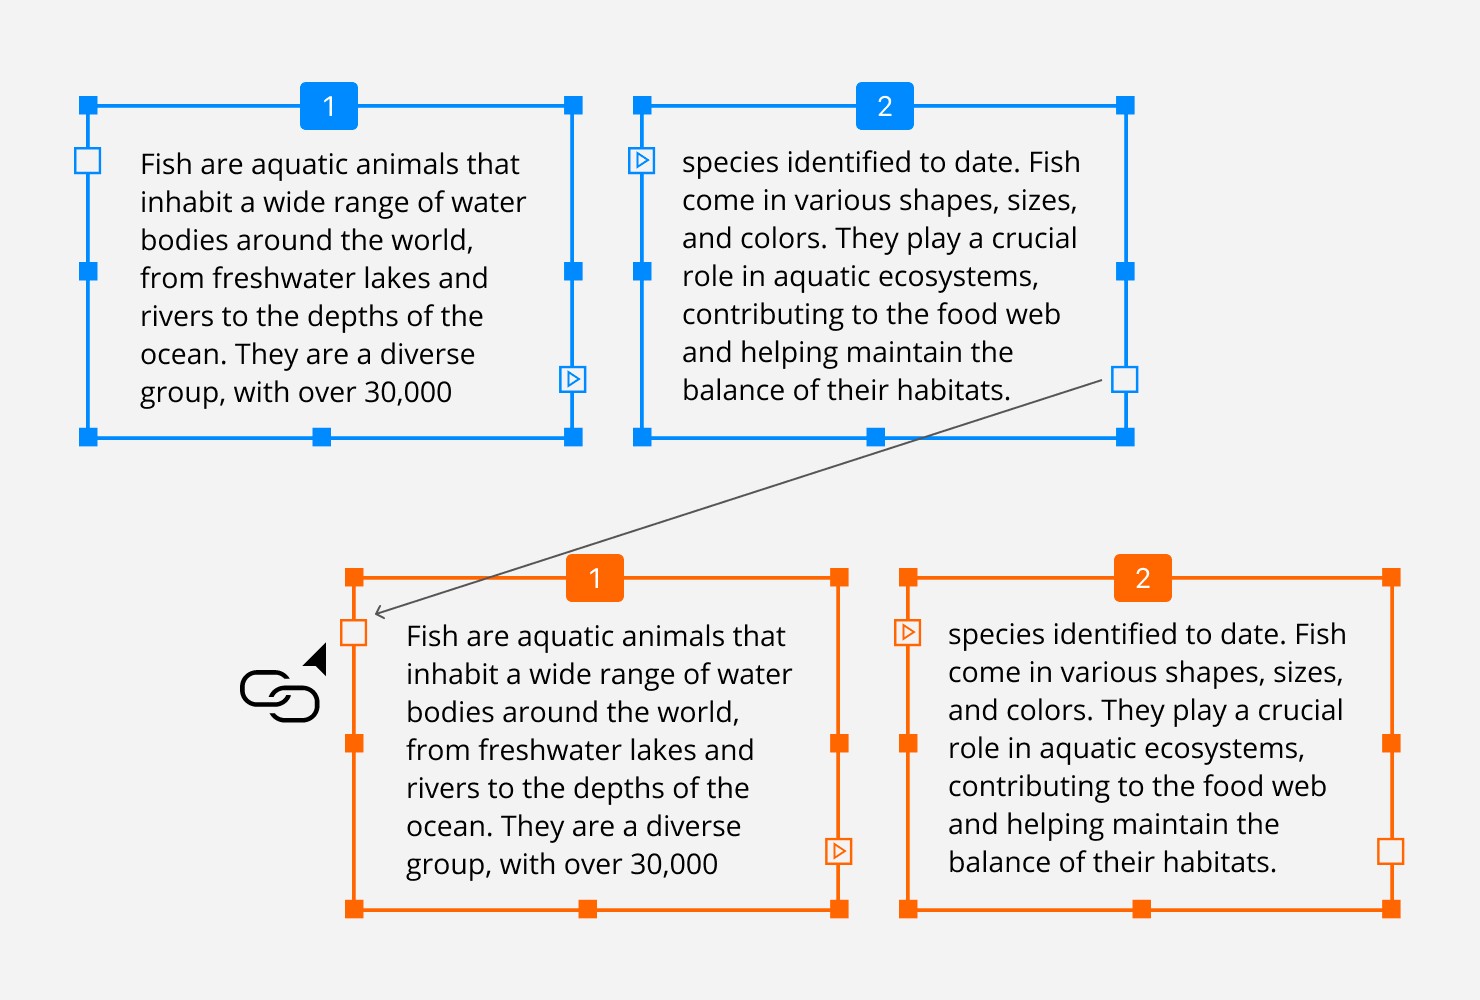
To link two text boxes, use the controls on their sides. You can link the control on the right-hand side of one text box to the control on the left side of another text box. Or vice versa. It is only possible to link either two blank controls or a red plus and a blank control.
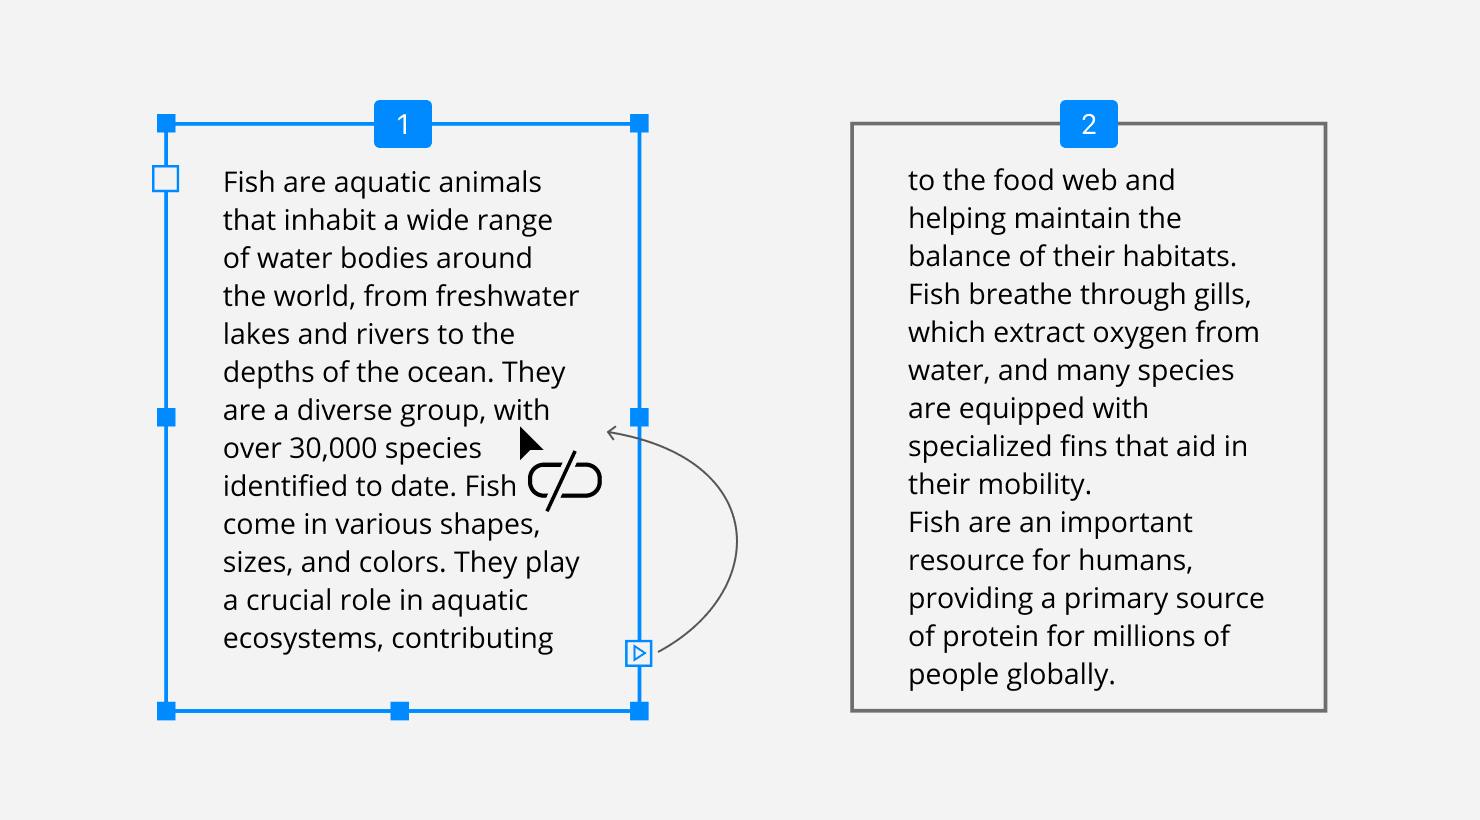
In order to link two text boxes, click on a square control of one of the text boxes. To make this text box the first in the chain, choose its right control. To make it the second, choose its left control. Once you place the cursor over another text box, the cursor's icon will change to indicating that the text boxes can be linked. Click to complete the operation.

Unlinking Text Boxes
To unlink a text box from the preceding one, click on its left control. To unlink from the following text box, click on the right-hand control of the current text box. Then click on the text box to finish. Alternatively, the second click can be made on a text box that you want to unlink from the current one. The cursor's icon indicates that unlinking is possible.
Removing a Text Box From a Chain
To delete a text box from your design, just delete it as you would do with any object. If a text box is located in the middle of the chain, Amadine will automatically relink the text boxes before and after it.
If you want to remove a text box from a chain but preserve it in the design, unlink this text box and relink other text boxes if necessary.
Linking Two Chains Into One
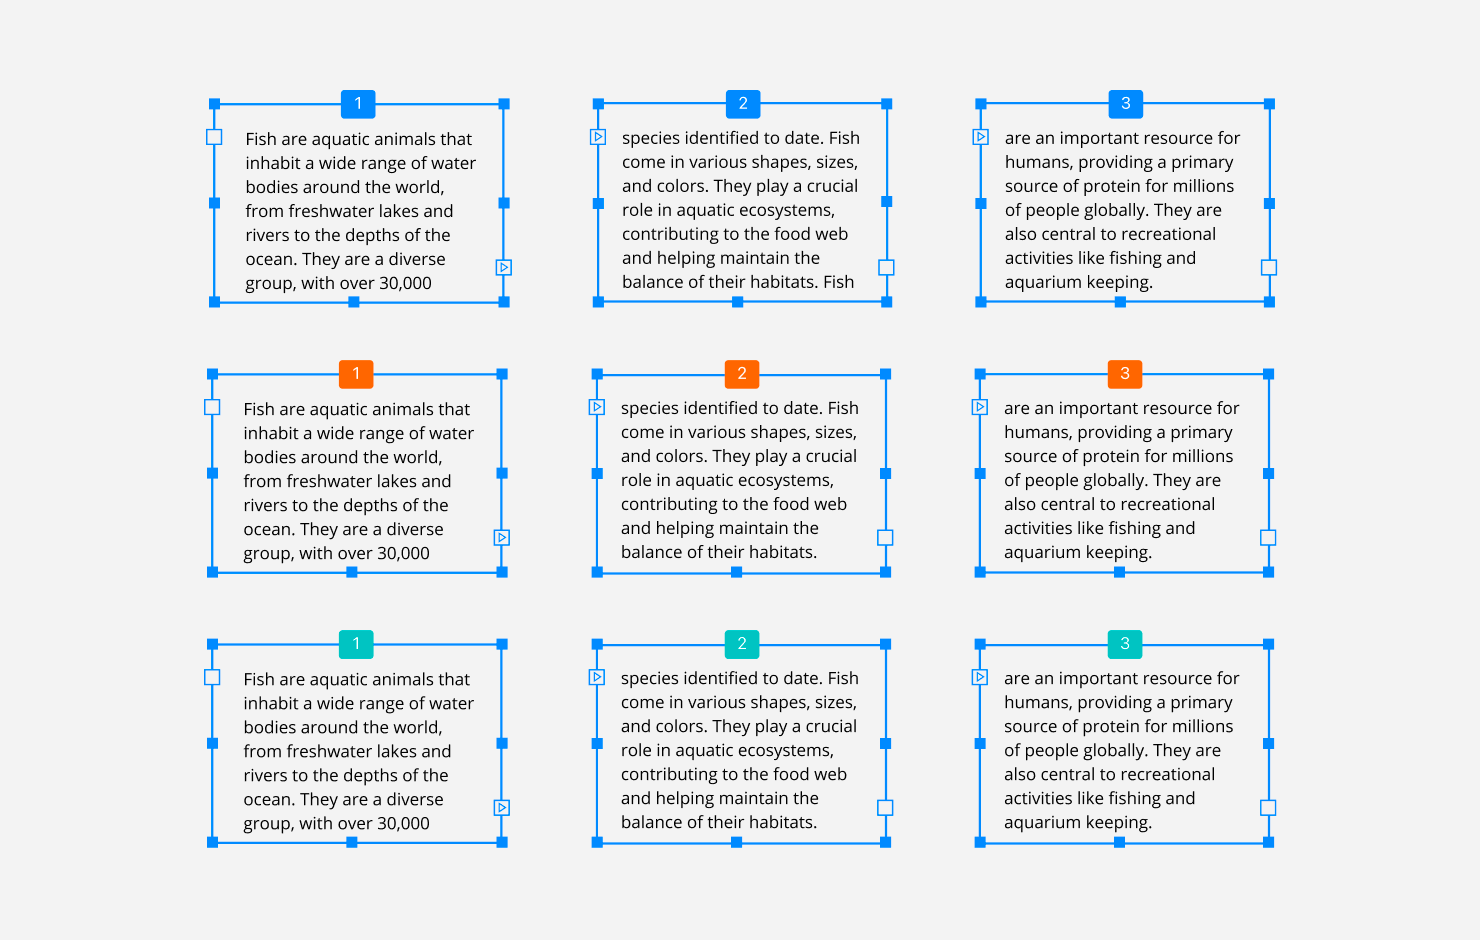
If there are multiple sequences of linked text boxes in the design, numbered tags in one sequence will have different colors and numbers from the boxes in another sequence. This is a helpful way to quickly distinguish between different chains of text boxes.
Here is an example of three chains of text boxes, each marked by their own color.
In order to link two chains of text boxes, link the last text box of one chain with the first text box of another chain. This requires the same actions as you take to link individual text boxes.
Inserting a Text Box in the Middle of a Chain
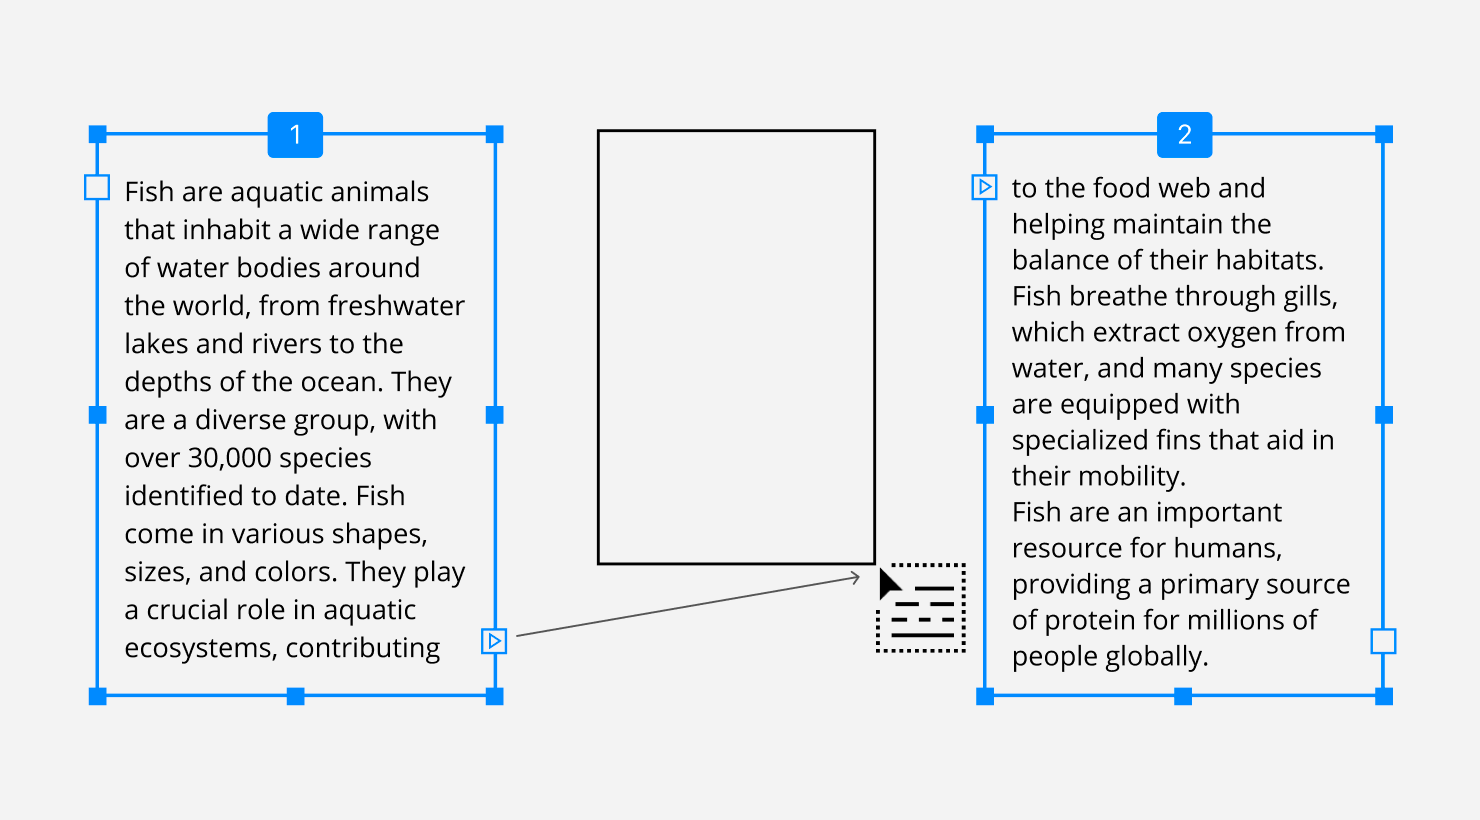
To add a text box in the middle of a chain, after a particular text box, click on its right-hand control with an arrow directed outside. Then draw a new text box. The new text box will be automatically linked to the preceding and following text boxes.
To insert a text box before a particular one, use its left control.
Conclusion
Learning to use flowing text is important to be able to make any of your layouts containing a lot of text look professional. Whether you are designing a newsletter, a brochure, a flier, or a menu, Amadine makes it easy to create flowing text. By simply creating text boxes, linking them together, and making chains of these linked boxes, you can design a page where the text is neat, organized and easy to read.
Check out the tutorial videos, and see how simple it is to start experimenting in Amadine with flowing text boxes in your own layouts.