Working With Images—Part 2
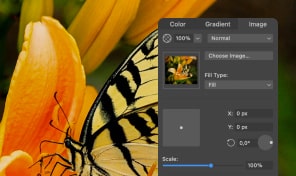
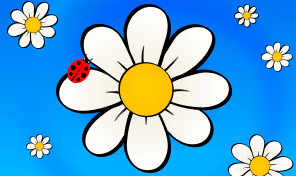
Let’s add an image for the puzzle. You can find the background image for the download in the form of the Amadine document in the Art Samples section of the Amadine website. You need to export it into PNG format and use it as shown in the video. The image must take up exactly the same area as the puzzle. To do this, let’s draw a proper rectangle and fill it with the image.
Now we get to the pieces of the puzzle:
- choose several pieces and move them to the top of the list in the Layers panel;
- duplicate them and place the copies onto a new layer;
- each of the duplicates must be filled with its own copy of the background image;
- for every movable piece, we have to create a copy of the image. Then they go to a separate layer.
Texture application time. From the first part of the tutorial, you already know how to fill a shape with an image. Make each piece of the puzzle to display a proper part of the image using clipping groups. As soon as the image is dropped on top of the shape, the shape’s outline crops it.
Now the movable pieces are ready to be moved aside and rotated. Lastly, let’s make all the pieces that are already in the puzzle transparent, and it’s done!