How to Use the Recolor Panel in Amadine
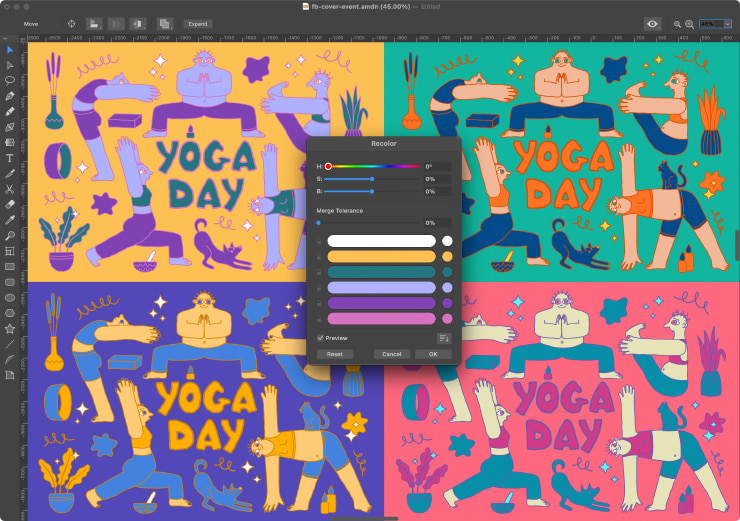
How many times have you created the design of your dreams and the one thing in the way was to change the color of this tiny detail… only to find out there are a dozen of details of the same color. No need to worry—starting from version 1.2 Amadine has the Recolor panel, which allows you to change the colors of your illustration with next to no effort.
The purpose of the Recolor panel is to change colors of one object or even many objects simultaneously. This helps out with choosing the optimal color scheme or lessening the number of colors in the illustration by substituting several similar colors with one shade.
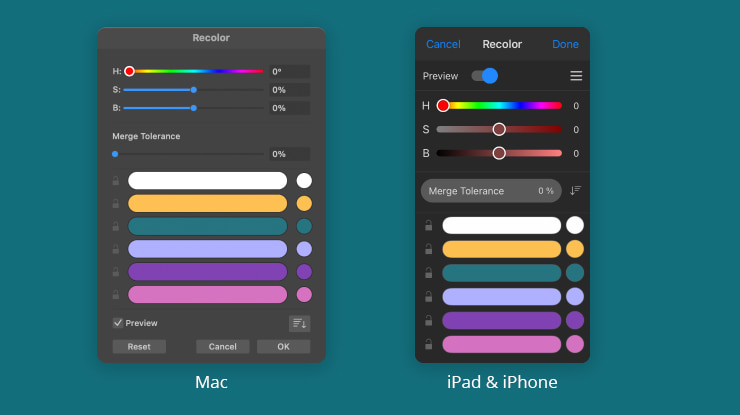
You can find the Recolor panel in Modify > Recolor… on your Mac and in the menu of the Appearance panel on your iOS devices. Here’s how the Recolor panel looks like on Mac and on iPad.

Main Features of the Recolor Panel
You can manipulate the colors directly by choosing them by clicking on your Mac or tapping on your iPad. You can also choose several colors by pressing the Cmd key on your Mac or by swiping over the colors horizontally on iOS devices.
The Mac version allows one to find the numeric value of the input color in hexadecimal format, by placing the cursor over the color.
The stroke and fill colors will be listed in the panel, along with base colors and raster effects. Gradient colors will also be listed. You need to note that the panel cannot recolor an image used to fill a shape.
You can sort the colors in the list by hue or brightness. Amandine has four options in the app: hue, hue reversed, lightness—light to dark and lightness—dark to light.
Recolor panel menu has a list of the following commands to use:
- Merge will help you merge selected colors.
- Split will split colors displayed in the same line, so it’s quite opposite to the previous one.
- Lock keeps the colors unchanged. It simply repeats the function of the lock icon.
- There’s also Unlock to stop the lock option.
- Restore makes the corresponding output and input colors identical. It can also split input colors, which were merged.
- Reset All restores the original object colors.
The Hue, Saturation and Brightness sliders affect all of the output colors. If you don’t want a certain output color to be modified, lock it using the lock icon.

Direct Setting of an Output Color
The output color can be pre-defined directly by the user. Click/tap on the output color to see the Color panel. You can then copy and paste the value into the field with the Hex color representation. You can also use the eyedropper to pick the output color. If you wish to make the output color the same as the input color, you need to choose the Restore command from its context menu.
Color Merge
When you have a multi-colored illustration, which color palette needs to be reduced two or three times, the Merge colors option will be the savior. It lets you show input colors with a smaller number of output colors by merging the close shades of one color. The raster graphics editors usually offer posterize function for reaching the same effect. Colors can be merged both manually and automatically, as well as by using both of the methods.
As soon as the colors are merged, they get to show in the same line thus having the same output color.The new output color is one of the input colors used before the merge. Here’s the demonstration of how this works.

Automatic Color Merge
Automatic color merge can be performed by dragging the Merge Tolerance slider to the right, increasing the percentage of merged colors in the design. When it is set to 0%, the automatic merge becomes impossible and turns off. When you increase the tolerance, more different colors get into the same group. If some particular color needs to stay preserved, lock it to prevent it from merging with any other.
Manual Color Merge
Manual color merge can be performed by dragging one of the colors on top of another. This way the input color on top which you drop other colors will become the output color. In other words, if you need the output color to be some shade of purple, you need to manually drag all the needed to change colors, say red, blue and lilac onto the purple.
There’s also another way to merge colors by selecting several of them in the list and choosing the Merge command after that from the menu. If you then wish to separate the merged colors (for example, if the lilac from example above should stay lilac after all) you can select Split in the menu or drag the lilac color to a new line.
That’s it for using the Recolor panel in Amadine for Mac, iPad and iPhone.