What Does a Clipping Mask Do?
A clipping mask is an object on canvas, the outline of which masks the visible area of another object below the first one and along its borders. You can treat such a mask as an infinite surface with an orifice through which you can see a masked object. The size and general form of the orifice is defined by the clipping path. At the same time, the ability to edit the object is preserved because the object is positioned under the mask but not corrupted in any way. When you use Clipping Mask, the order of objects in relation to one other is of the highest importance (it depends on the positioning of which layer clips which). Modify > Arrange commands are used to change the order.
To familiarize yourself with the topic, it may help to remember the crop tool, present in any photo editing software. A rectangular clipping mask can achieve practically the same effect, but it is much more flexible. It can have any shape and can also be applied to multiple separate objects, situated on several different canvas layers. In addition to that, you can still edit the mask and masked objects after the mask has been applied.

How to Use a Clipping Mask?
You can use Clipping Mask to hide parts of the objects or to make only the needed area visible. The following instruction is applicable to the vector graphics software Amadine, since the way it works is more or less common to all the graphics software. The Clipping Mask is shown as a command in the menu bar.
To apply a clipping mask to an object:
- Create a vector object that will be used as a clipping mask. Only the shape of its path matters.
- Place the clipping path over the object you want to mask.
- Select both the mask and object.
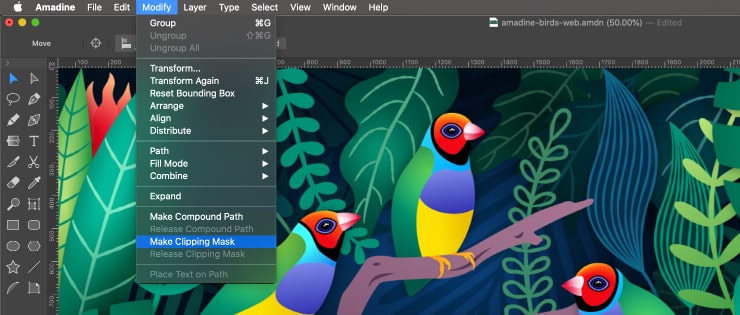
- Choose the Modify > Make Clipping Mask command from the main menu.
The result is a Clipping Group object that includes both the clipping path and masked object.
Only a vector object can be used as a clipping path. If you try to create a clipping mask out of a raster image, the rectangular boundary of this image will be used to create a clipping path. You can mask any artwork. A clipping mask has no fill or stroke in itself, but you can apply both of them to it using the vector graphics app tools. A clipping mask doesn’t retain any style that the original object could have.
If you want the mask to maintain its original style, fill and stroke, make advantage of the technique described further.
You can create a Clipping Group using the Layers panel while keeping the styles of the object(s) and mask. Open the Layers panel and make sure the object and its future mask are visible before proceeding. Drag the item from the panel and place it on the thing that will be the mask. Both items will be added to a Clipping Group that Amadine creates. Add more objects to the group if necessary by dragging them over.
Different Ways of Editing Applicable to a Clipping Mask
As previously mentioned, the good thing about Clipping Masks is that they are editable, both as a clipping mask and separately from the objects they mask.
Editing Clipping Masks
To edit a clipping mask, you can modify the clipping path using vector editing tools, such as Pen Tool, Selection Tool, Lasso Tool and several others, usually available in vector drawing apps. If you wish to outline the visible part of the masked object, you can apply a stroke to the clipping path.
Editing Masked Object
If you wish to edit a masked object, find and select it in the Layers panel. You need to open the selected Clipping Group to access the objects inside of it. After the Clipping Group has become visible, you can modify the masked object using regular methods and tools. Alternatively, Clipping Group editing can be performed in Isolate Mode.
Loosening Objects from a Clipping Mask
To loosen an object from a clipping mask, you need to select the appropriate Clipping Group in the Layers panel or on the canvas. Then choose Modify > Release Clipping Mask from the main menu for Amadine. The typical command will be the same for most of the popular software. Please note that, in this case, the clipping mask will become an invisible object since it has no stroke or fill.
The Areas of Clipping Mask Use
- Photography Art─to create the most artistic collage or imaginative photo editing
- Illustration─to make some part of the picture stand out in the needed form
- Printing─to make your printed material stand out and be eye-catching
- Advertising─to achieve striking visual effect
- Design─to bring forth the needed design element
To learn how to use Clipping Mask more effectively, watch the video tutorial in Amadine.