How to Add New Fonts to Amadine on Your iOS and iPadOS Devices
The latest iOS and iPadOS systems provide creative enthusiasts with the ability to add custom fonts to their iPhones and iPads. All the creative minds and avid birthday card creators—be they designers, teachers, professional or amateur presenters—rejoiced in single ecstasy now that one is not limited to Apple’s system fonts.
The formats of the custom fonts, generally available on iOS and iPadOS, are the following:
- TrueType Font (TTF)
- OpenType Font (OTF)
- TrueType Collection (TTC)
All the documents created on mobile devices can now have the font you wish them to have. What’s the catch?

Note on Installing Extra Fonts for Use in Amadine
Amadine does not have an internal font import feature. Instead, it relies on fonts installed system-wide on your device—whether from iCloud or other sources. This approach is advantageous, as it ensures your fonts are available not only in Amadine but also in other apps, making it easier to move projects between different tools without losing text styling.
To install custom fonts, you can use apps such as iFont or Font Diner, as will be shown later in the article. These apps create a configuration profile for the font, but due to iPadOS security restrictions, they cannot complete the installation directly. You will need to open the Settings app on your device and install each font profile manually.
After installing new fonts, it’s a good idea to close and restart Amadine—or even restart your iPad/iPhone—to ensure the updated font list is recognized when you open a project.
You Need Special Software
The whole variety of apps can make use of the custom fonts on iOS and iPadOS, including Amadine for iPads and iPhones. No more mess with the font replacement when sending your presentation to your iPad or messing with the leaflet title, sent to print from your iPhone.
Download of the custom fonts requires a piece of software to get it and make it accessible for the apps. This task can be managed by a range of apps. Almost all of them install fonts through their profile, but several apps do this differently, so that the fonts get placed into the list of fonts in the system settings. We’ve decided to describe both of the possible ways. We’ve chosen the easier one to master, taking no pain in searching and getting the fonts to your device—iFont, for the one working through the profile installation. And the adding to system fonts can be performed via Font Diner app.
As a bonus, some fonts include icons, which can be used for interface design and help you out with mundane work. Take a look at our dedicated materials on the Google Icons and SF Symbols installation and use on Macs and iPads. Let’s look more closely at both of them!
How to Use iFont

iFont allows you to install, compare and view typefaces. There are also individual glyphs and technical details about the fonts.
After having installed iFont onto your device from the App Store, you need to choose the place from which to download your font. The options are plentiful: Google Fonts, dafon.com, 1001FreeFonts, Open Files, etc.
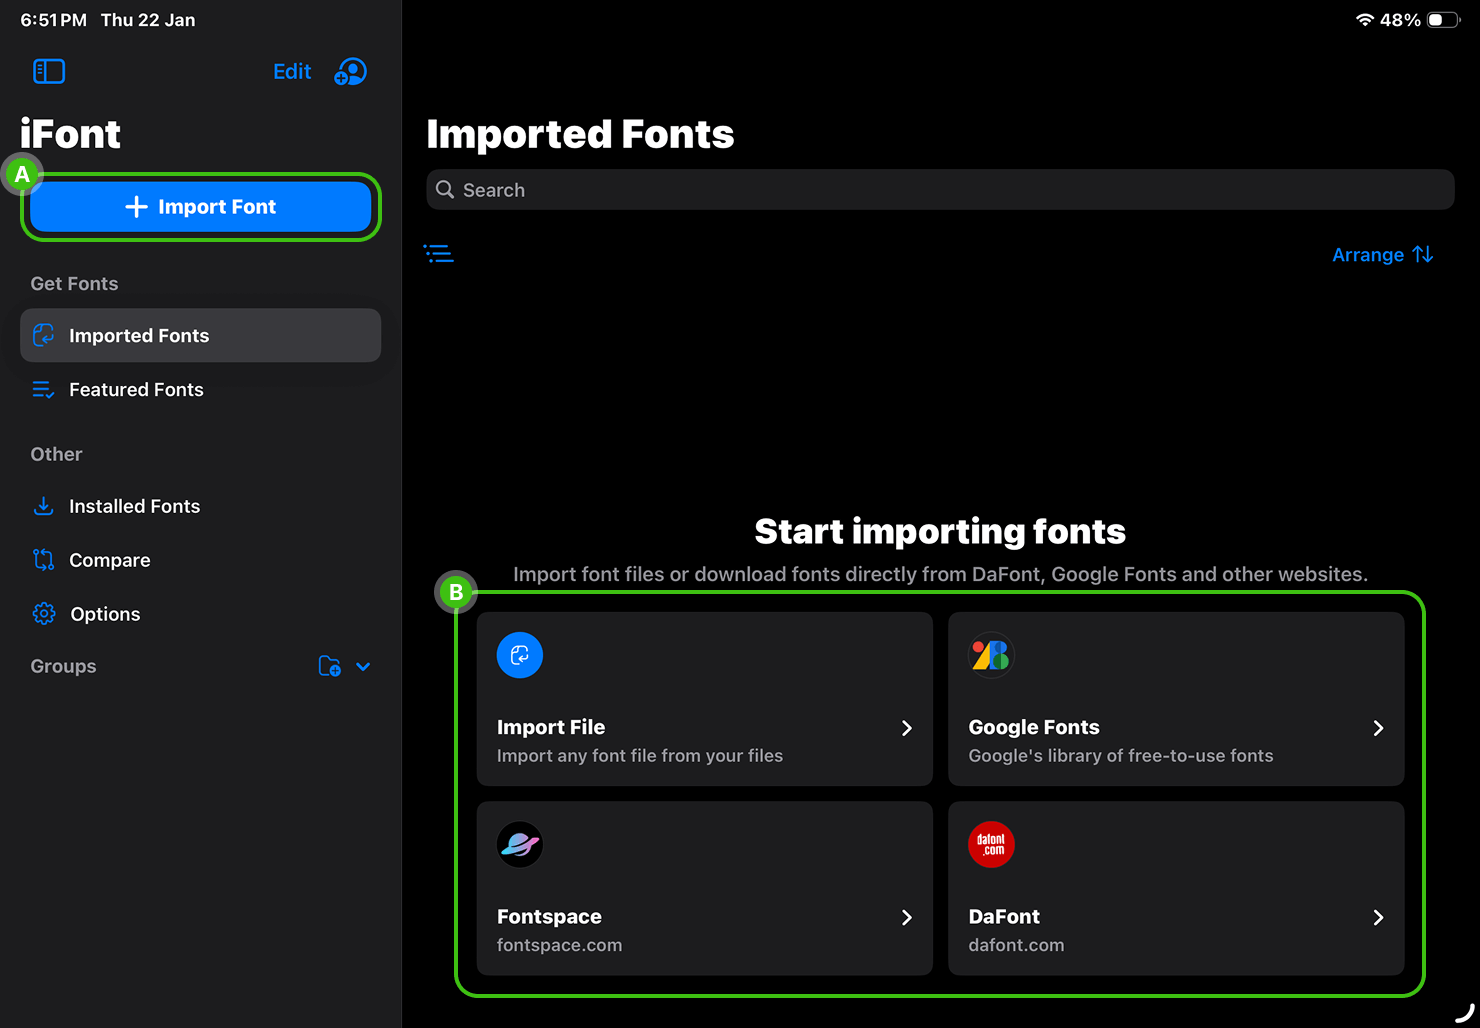
Import or Select a Font Source
Tap Import Font (Label A) or choose a source from the list on the right (Label B). Select a font library—Google Fonts, for example—to proceed to the next screen.
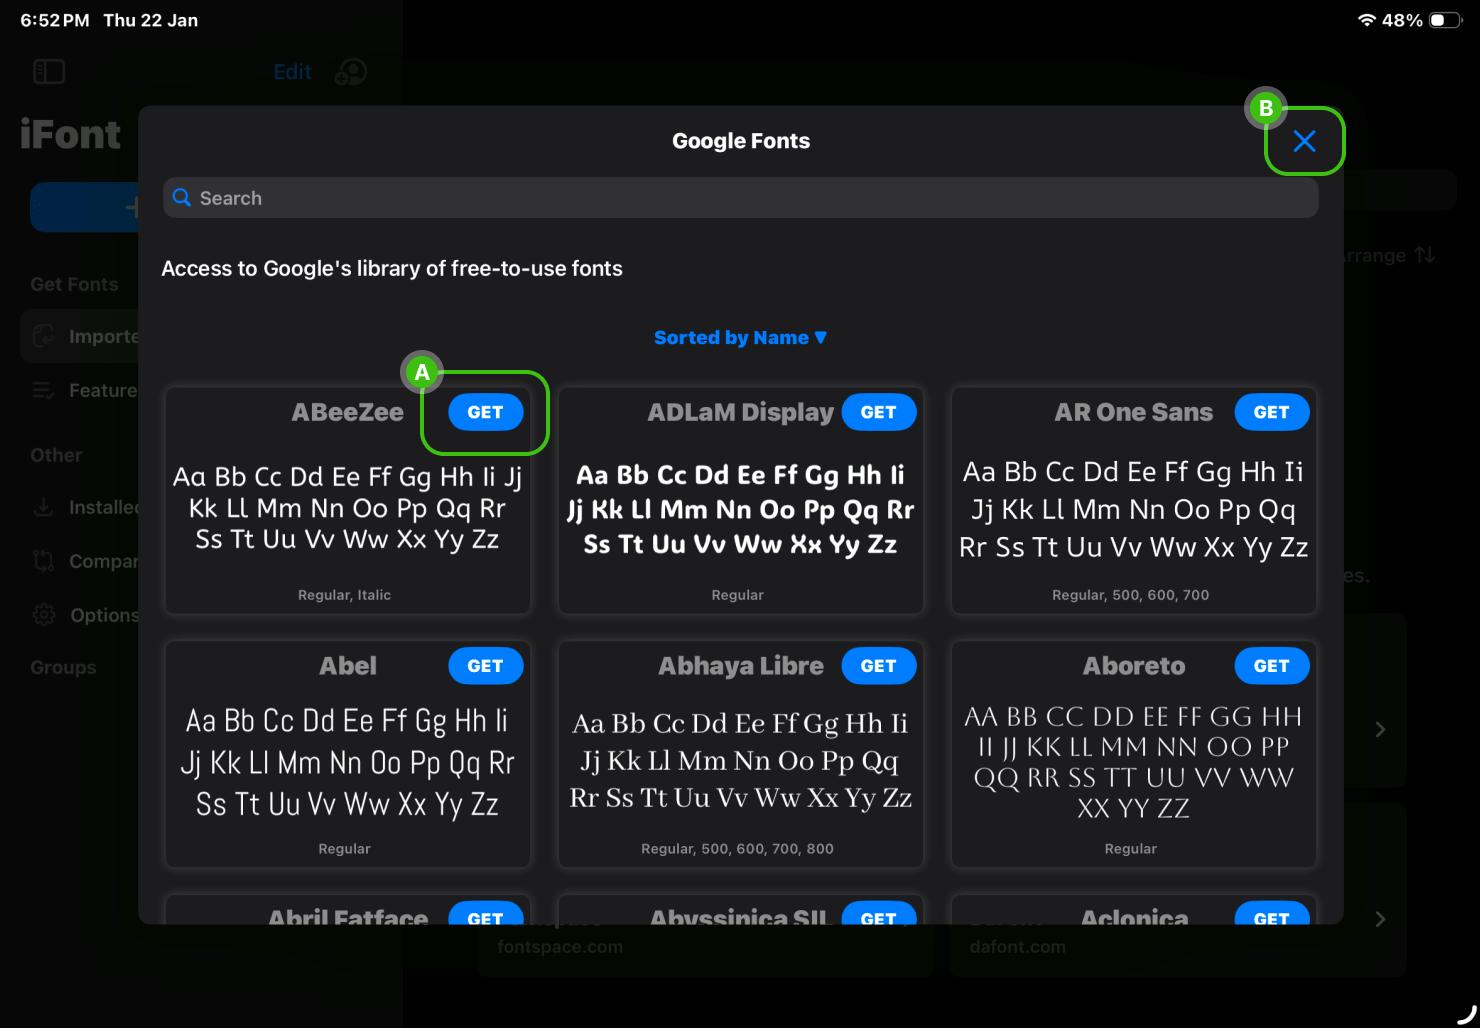
Choose Fonts to Download
Browse the available fonts and tap Get (Label A) next to the ones you like. Once you’ve finished selecting fonts, close the window by tapping the X in the upper-right corner (Label B).
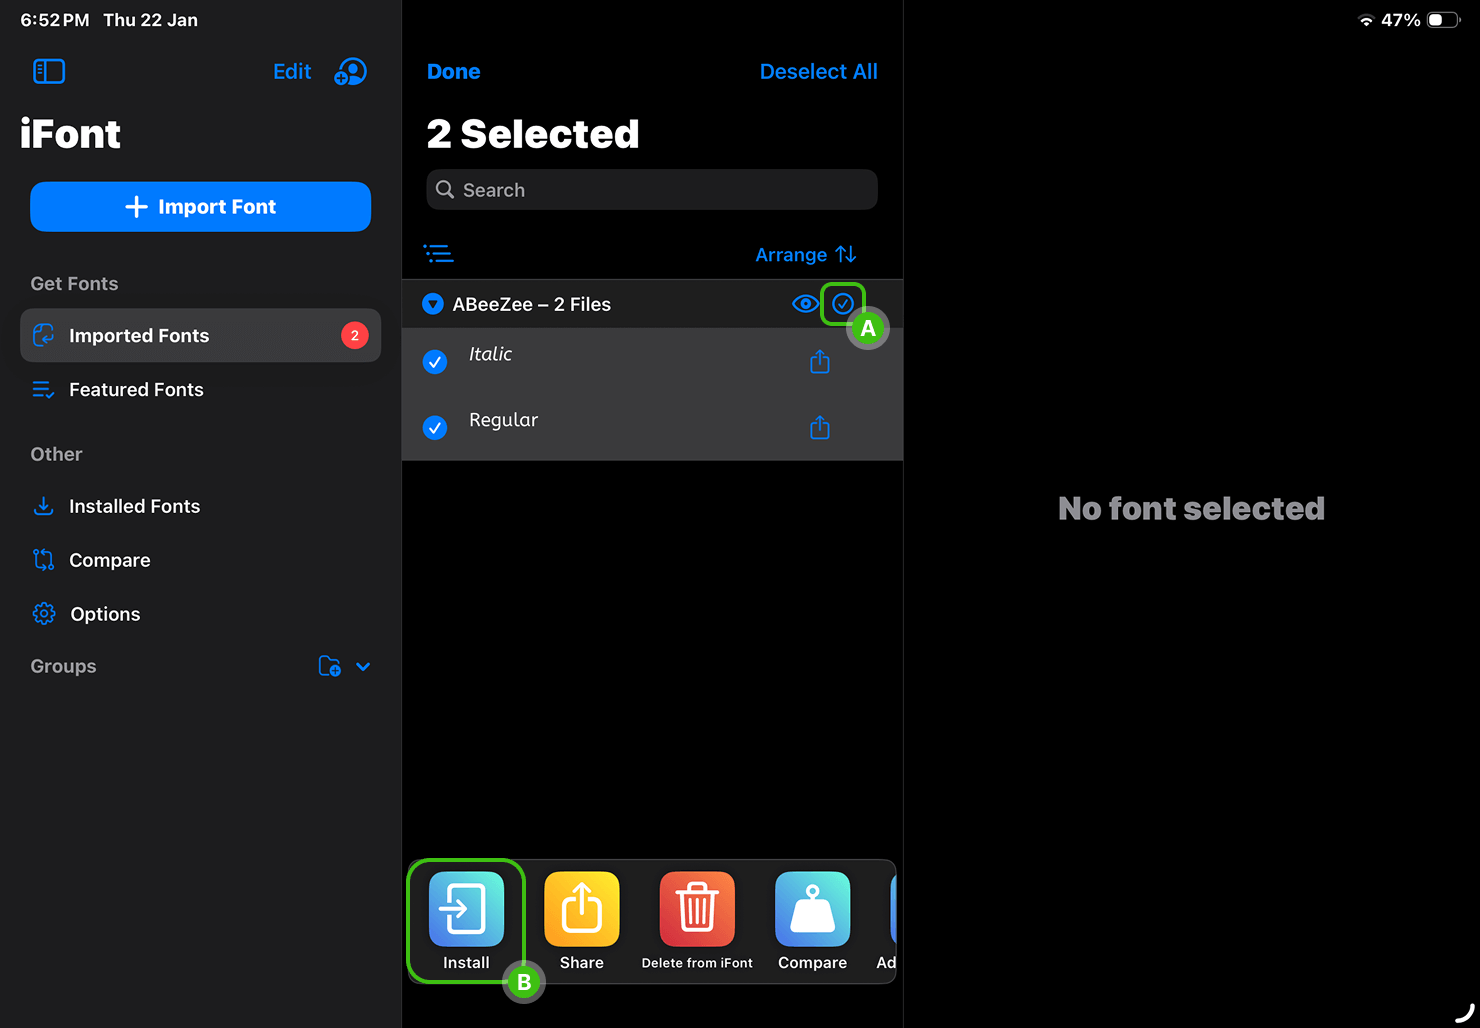
Download and Install Fonts
You’ll now see a list of the fonts selected in the previous step. Fonts can be installed individually or all at once. To install them together, tap the checkmark (Label A), then tap Install (Label B).
Follow the On-Screen Instructions
iFont will guide you through the remaining steps automatically. Tap Continue (Label A) to move forward.
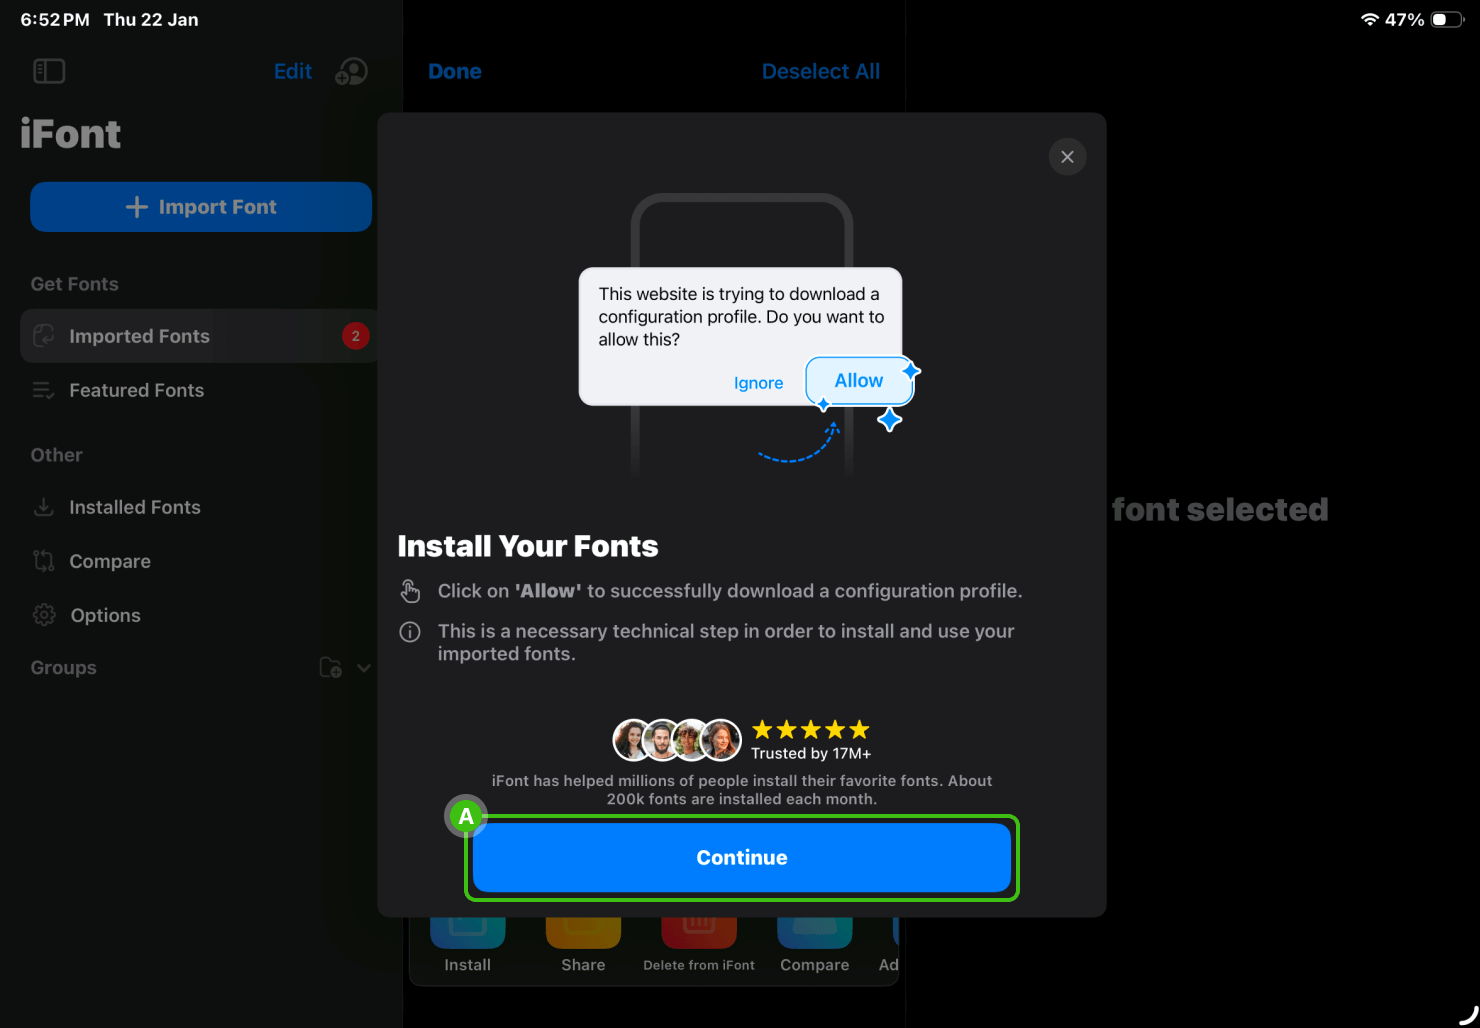
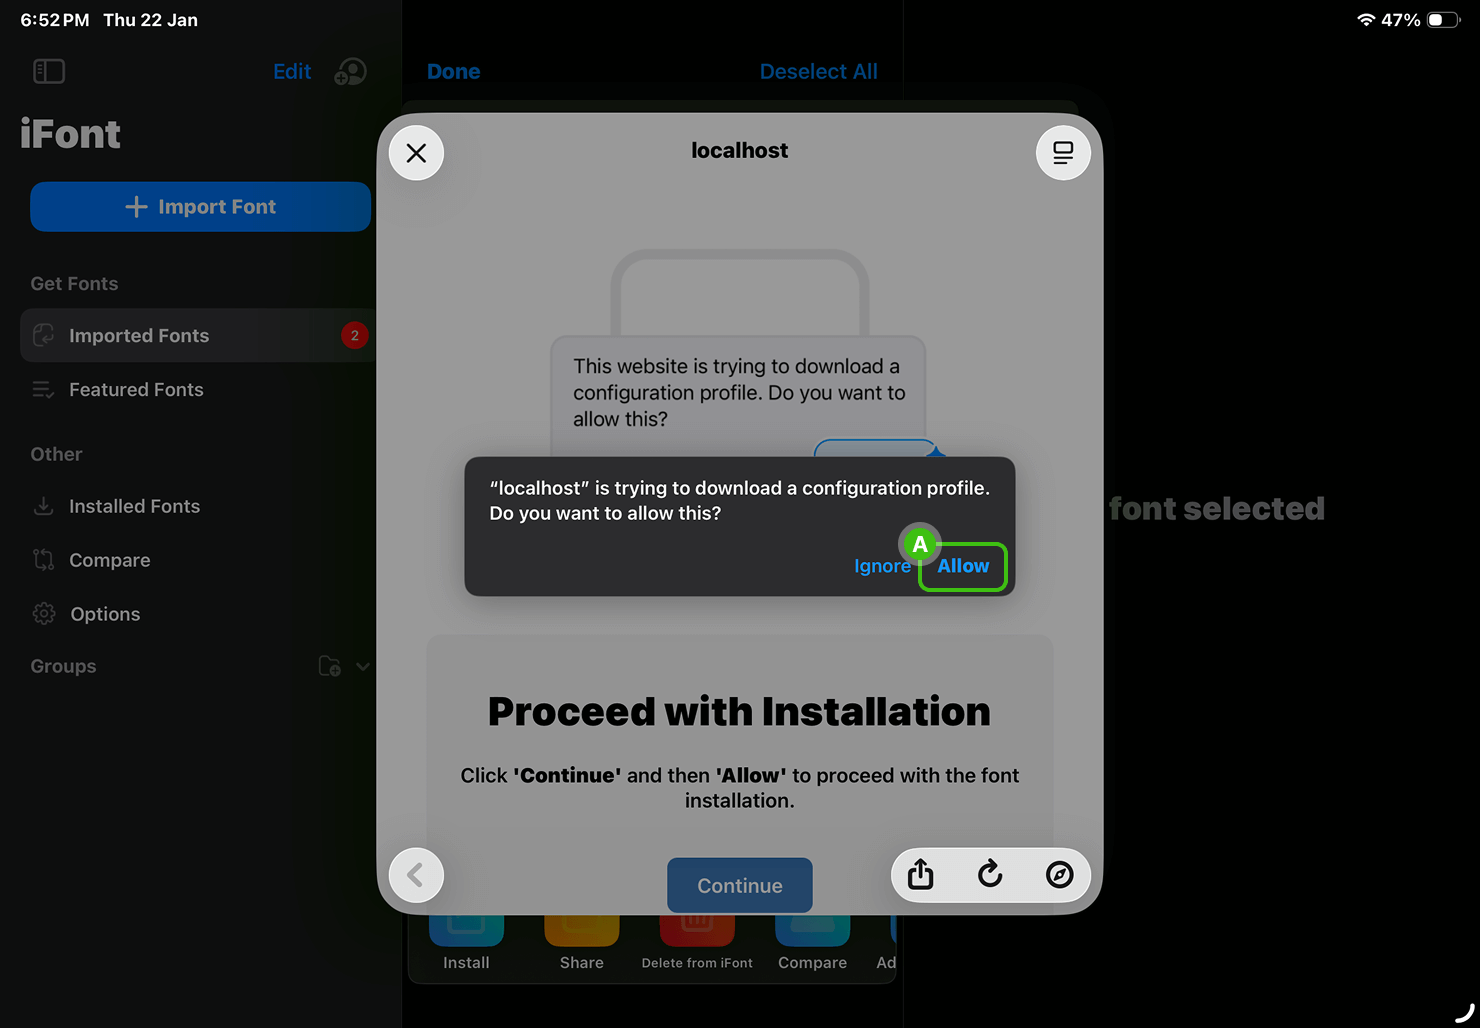
Allow Network Download
Since the font files are downloaded from the internet, iPadOS will ask for permission. Tap Allow (Label A). This is a standard and safe system request.
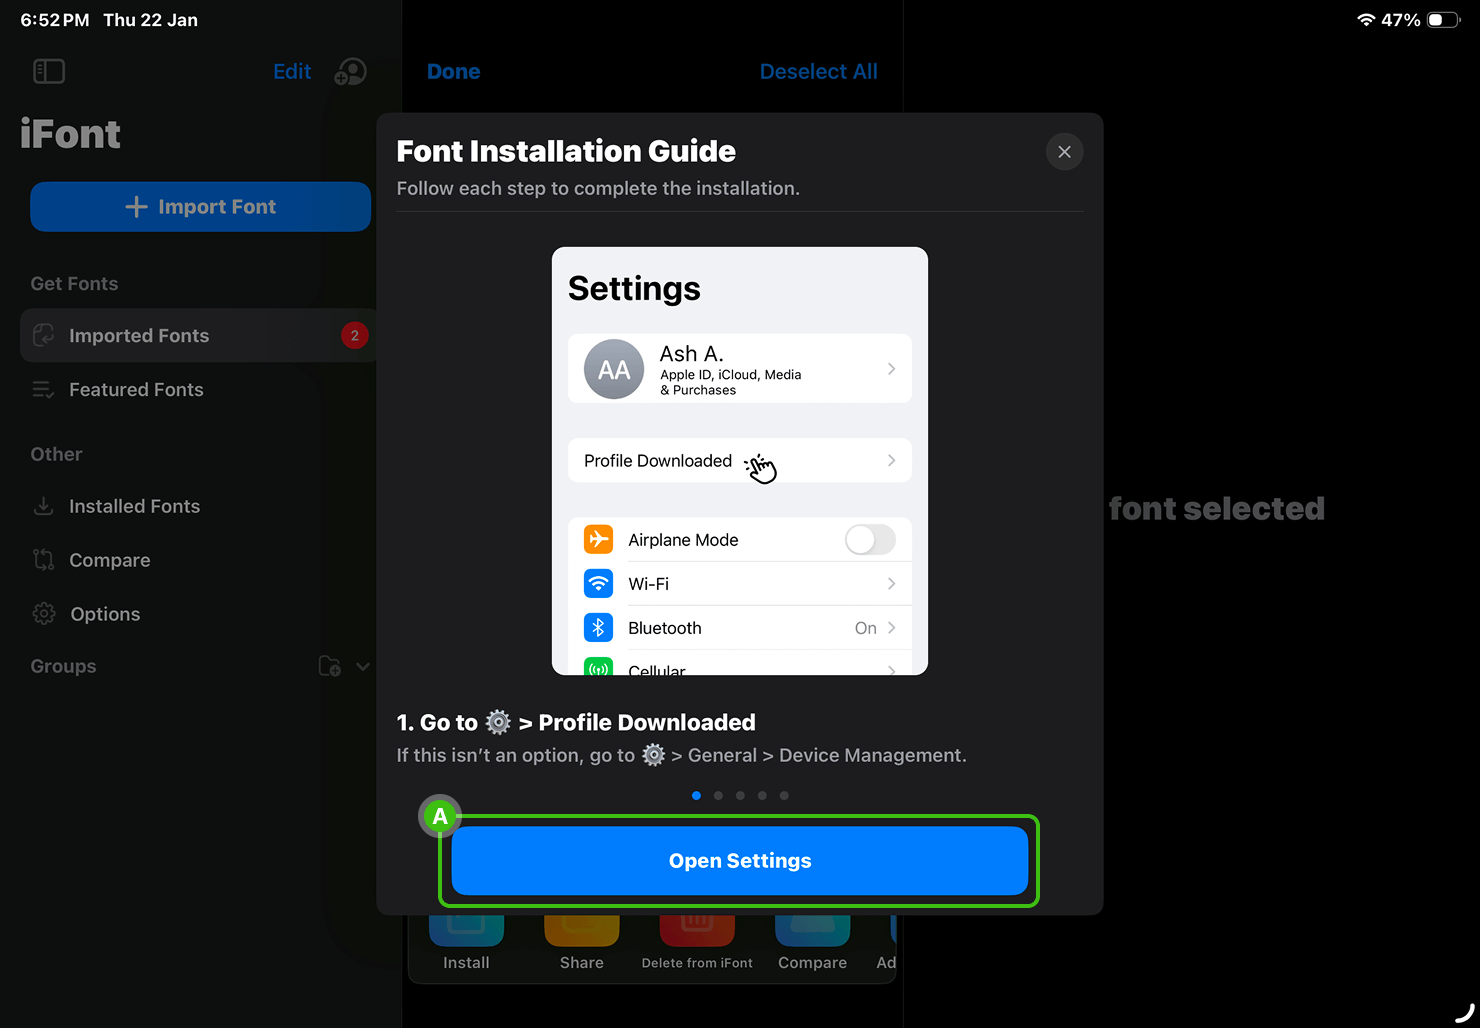
Open System Settings
iFont will prompt you to open system settings. Tap Open Settings (Label A), then navigate to Profile Downloaded.
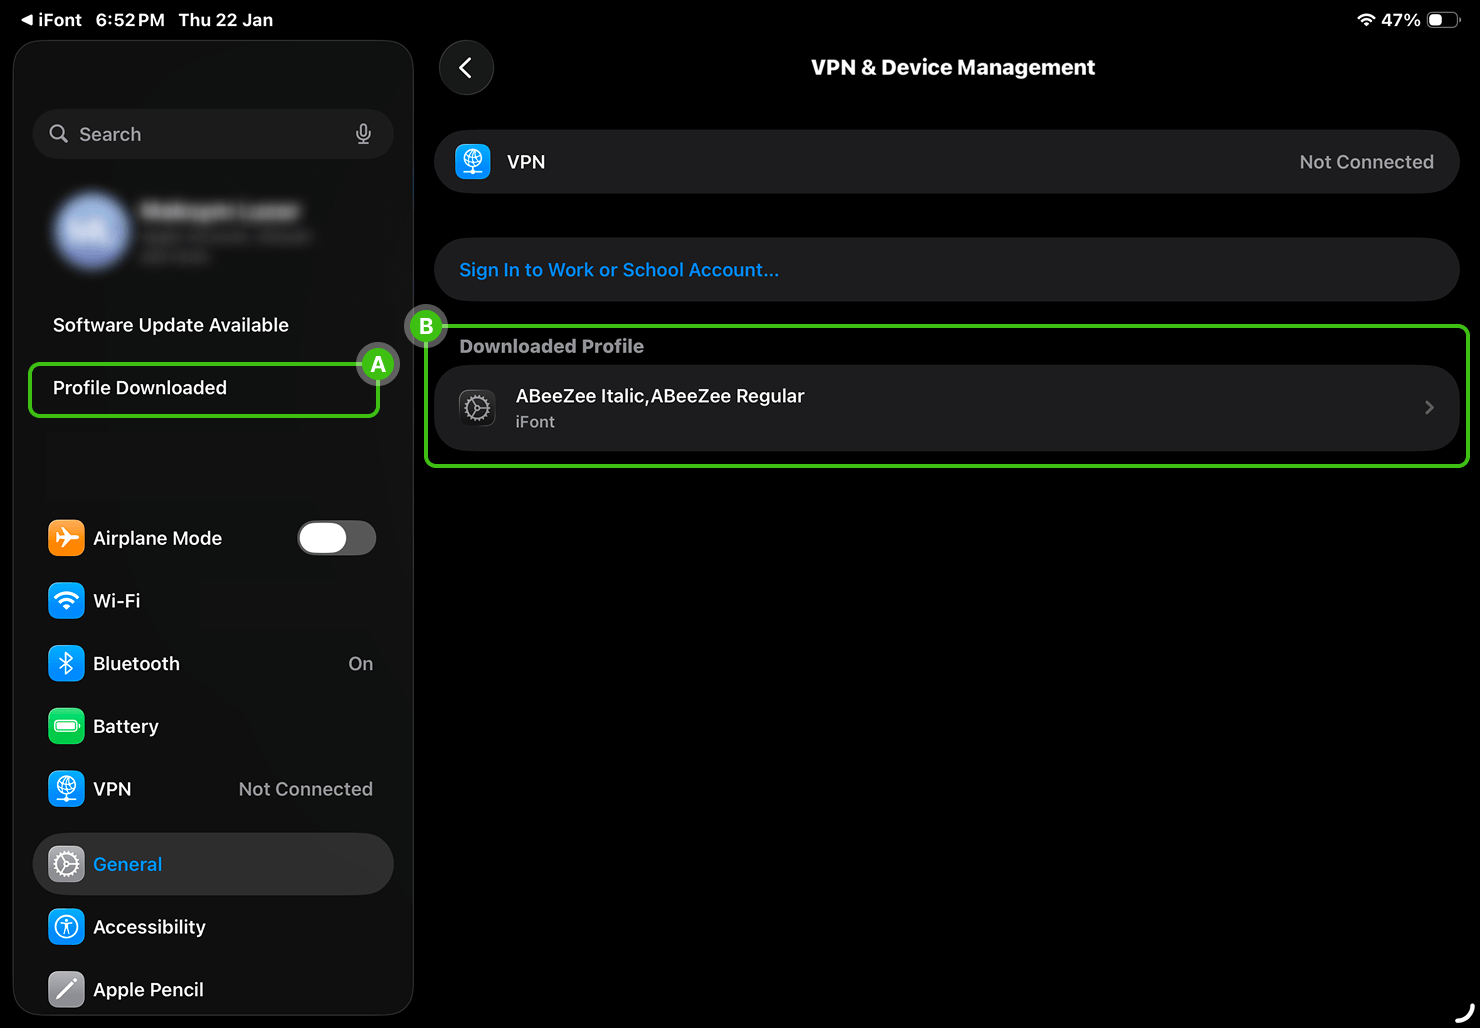
Install the Font Profile
Open Profile Downloaded (Label A), locate the font profile you just downloaded, and tap it (Label B).
Confirm Installation
Tap Install (Label A) to finalize the font installation.

Restart Apps and Use the Font
Restart the app where you plan to use the font to ensure it appears correctly. You can preview fonts in iFont by tapping the notepad icon beneath a font—type a sample text and export it as an image to preview it in third-party apps.
Done! The installed font is now available in compatible apps, including Amadine on your iPhone or iPad, and ready to be used in your next design project.

How to Use Font Diner

Font Diner is an app concentrated on retro fonts for any of your craziest retro-style works. It has around 400 typefaces for the most sophisticated designers. 23 of them are totally free for personal use, the other collections cost 4.99 USD per year. The app provides direct compatibility with iOS and iPadOS and offers a basic set of free fonts and a variety of paid sets. Let’s see how to use it to install Amadine compatible fonts.
First, you agree to use the font set for personal use only. You are informed that these fonts will be available for use by other apps—exactly what we need! After agreeing to the installation, you will be informed of its success and warned that fonts will only be available from the apps that support Custom Fonts. Voila! The fonts are already available from Amadine.
To delete the installed fonts, find them in Settings > General > Fonts and delete the ones you don’t need:
