What Is an Isometric Grid and How to Use It in Amadine
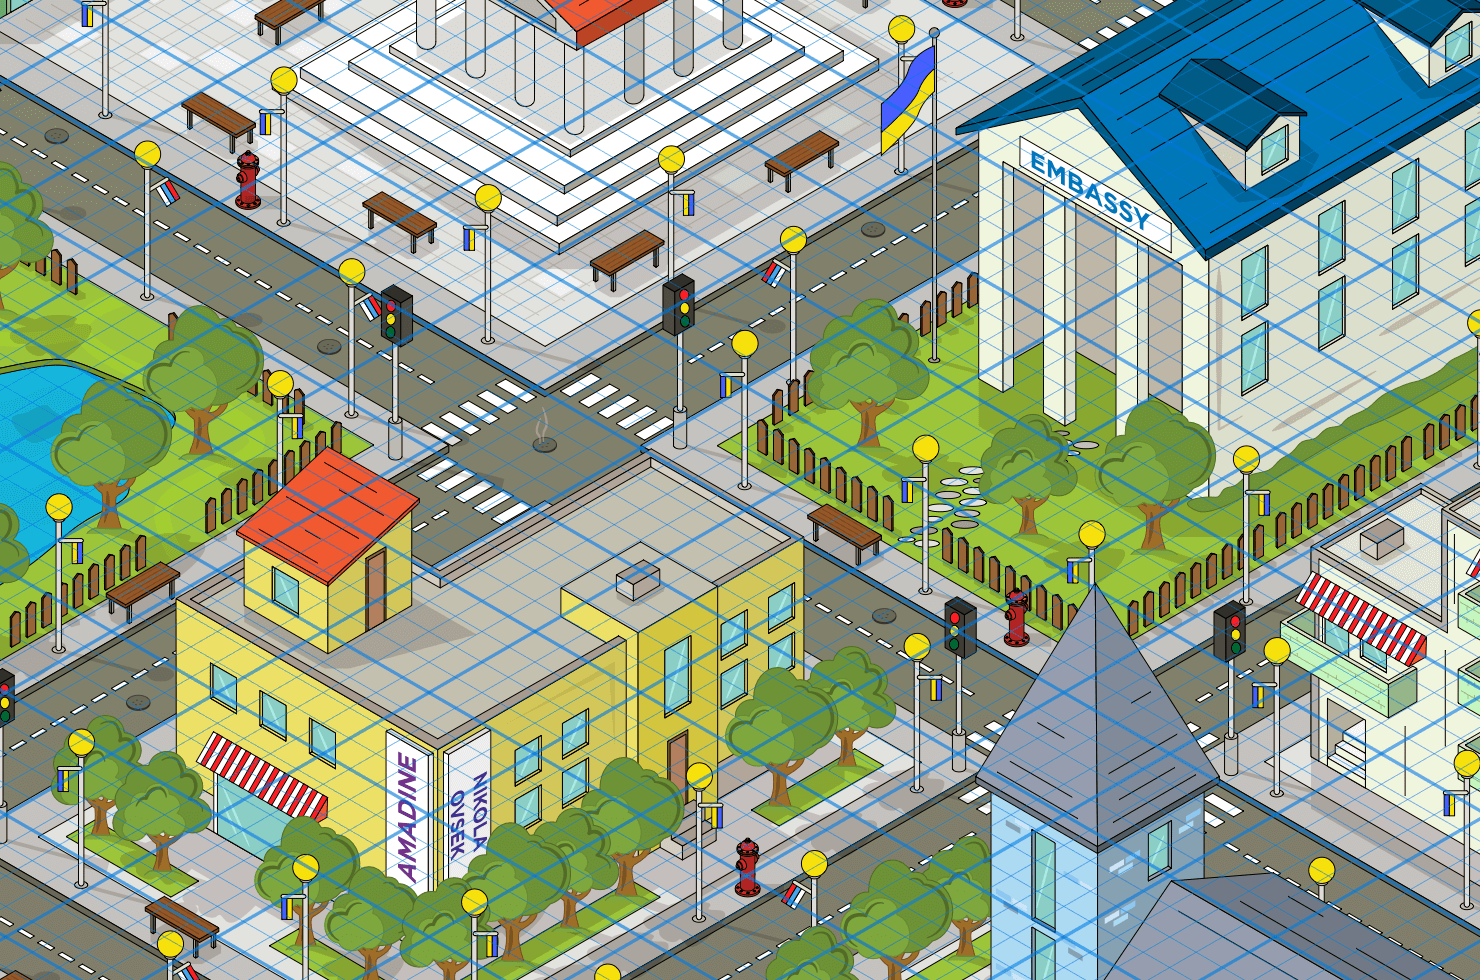
Whether you’re sketching app icons, designing user interfaces, or drawing digital illustrations, learning about the isometric grid can help you give depth and dimension to your designs. An isometric grid gives artists a way to create 3-dimensional designs on a flat canvas or screen. Using this unique vector grid system allows anyone to create designs with depth and volume.
Interestingly, what once defined isometric visuals in the 1990s has come full circle. While early games relied on 2D isometric grids to simulate depth, many modern titles now build fully 3D environments and deliberately constrain the camera to recreate that same isometric look. This shift is not just nostalgic—it’s technical. Working in 3D simplifies lighting, object interaction, and scalability, while still delivering the clean, structured aesthetic designers associate with classic strategy and simulation games. In essence, today’s “isometric style” is often a carefully engineered illusion—one that blends the efficiency of 3D workflows with the timeless clarity of isometric projection.
In the Amadine app, you can use isometric grids to level up your designs to a more professional quality. Amadine’s isometric mode streamlines the process, so you can simply focus on creative design, rather than working on angles and calculations.
Understanding Grids in Graphic Design
Grids give a substantial aid for graphic design. They are essentially a measuring system that provides structure for placing graphic elements like images or text. Designing on a grid gives you a way to measure visually, keeping everything in a layout lined up and spaced appropriately.
By creating a mathematical relationship between every element on a page, a grid makes everything scale proportionally, so designs are consistent across multiple screens or pages. For example, if a button on the grid is 3 squares wide and 3 squares high, the button size stays consistent whether it is viewed on a large desktop computer or on a tiny phone. Or if photos are placed 8 squares apart, then no matter how much you enlarge the squares, the spacing between the photos stays the same.
Grids also allow snap functionality. This means that objects become perfectly lined up along with grid lines automatically by “snapping” into place. In Amadine on iPads, the canvas can be rotated and the grid gives a sense of where the top and bottom of the design are. Otherwise, with a large zoom, a designer can lose orientation.
In some vector layouts the use of a grid is more obvious, like magazine pages with columns of text and images that line up with the columns. But in other designs, like a creative advertisement or promotional poster, it is less apparent that a grid was used to place elements. But either way, by designing with a grid system, viewers will still have a sense that everything is balanced and organized. A grid creates harmony, thanks to spatial relationships between all graphic elements.
Grids vs. Guides: What’s the Difference?
Before we delve into how to use isometric grids, it’s helpful to understand the difference between a grid system and a guide system. Grids are made of repeating patterns of equally spaced lines placed horizontally or vertically, or both.
Grids are best used when a user wants to:
- build an overall layout structure,
- keep uniform spacing,
- make sure elements stay proportional when scaling up or down.
Guides are lines that a user drags onto the layout. They are manually placed in order to align specific objects.
Guides are used when a user wants to:
- align an item that may not line up with the grid,
- adjust the precise position of specific elements.
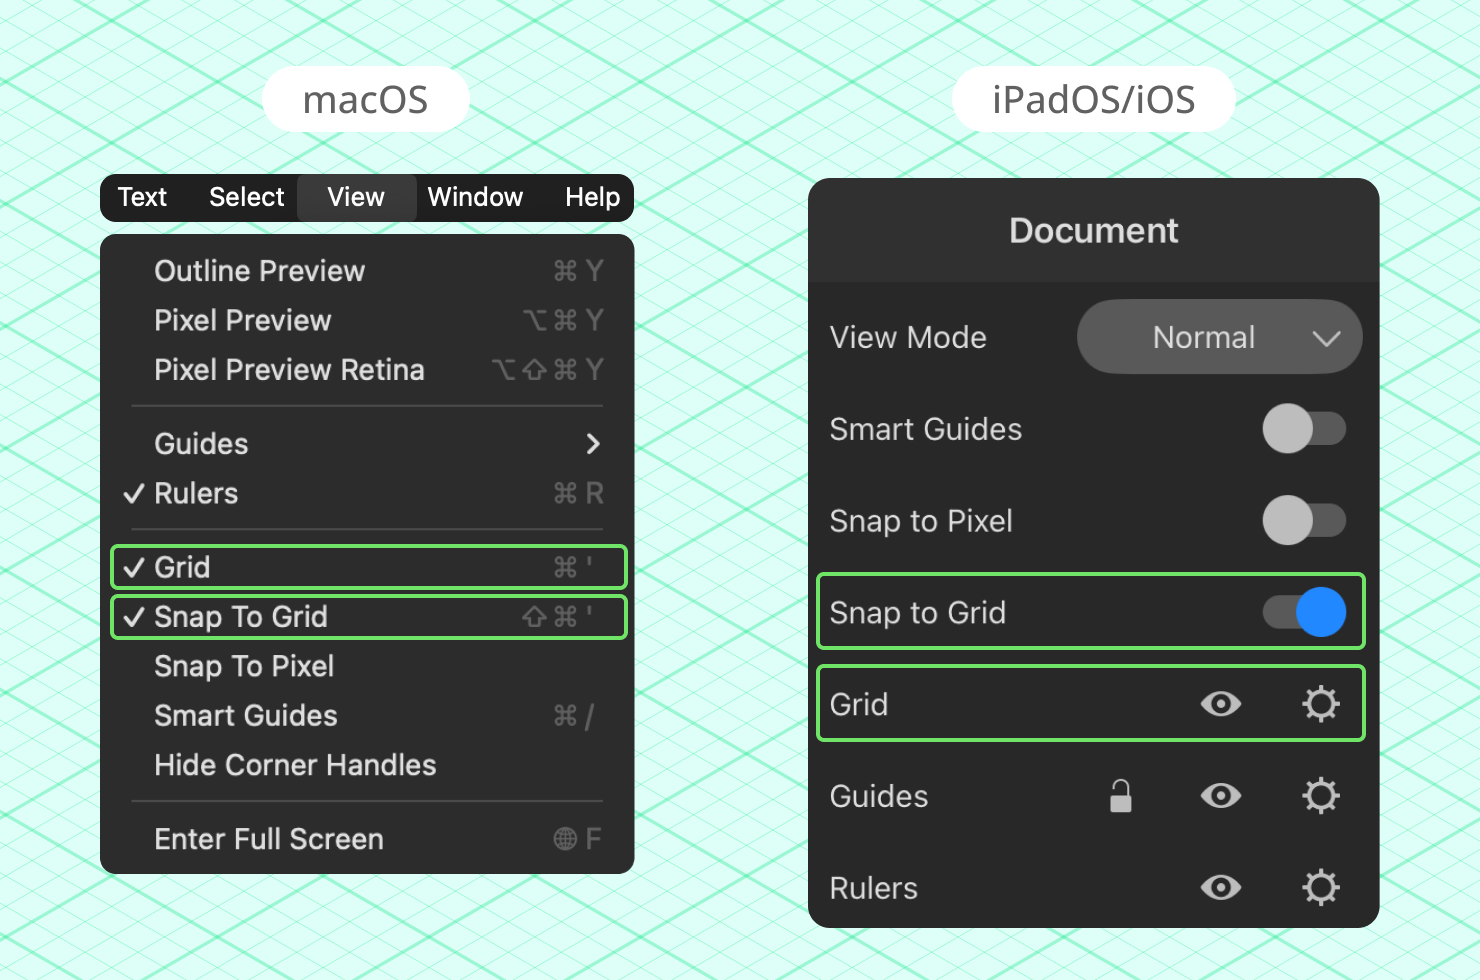
In the Amadine app, grids are customizable and snapping can be turned on anytime. Simply click the eye icon by the “Grid” menu item to view the grid, and toggle the “Snap to Grid” option to enable objects to align automatically.
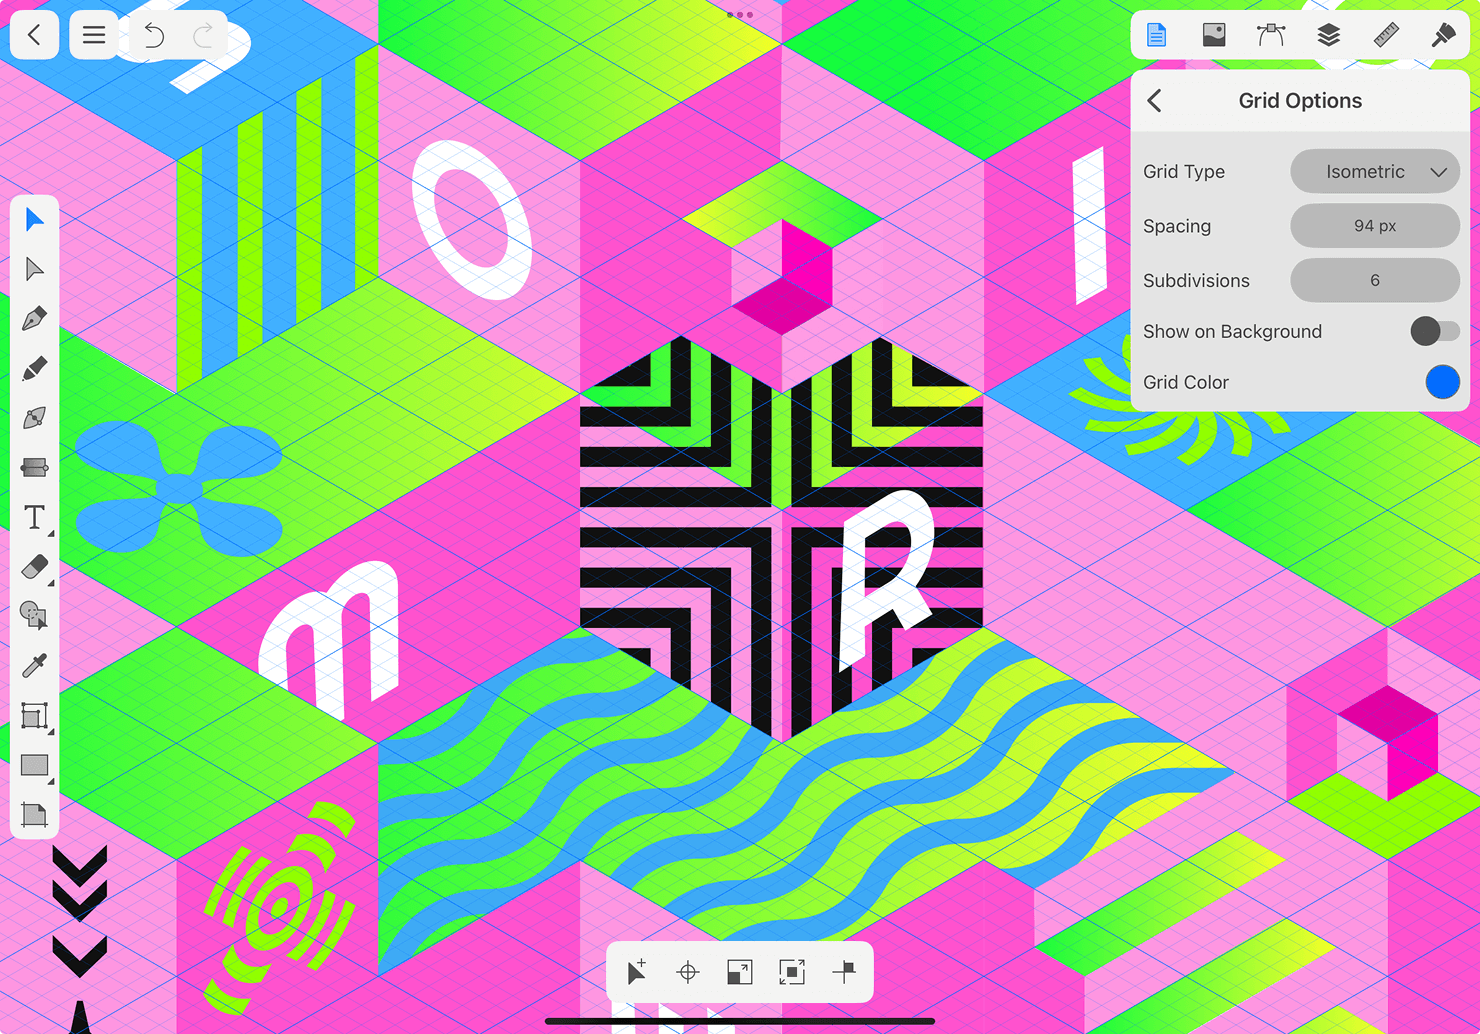
Types of Grids Available in Amadine
In Amadine, there are seven types of grids to choose from. We’ll give a brief description of each grid and what it’s used for.
Be assured, you don’t have to be a professional graphic designer to understand grids, you just need to be curious and willing to try different options to find what works for you. First, to access the grid menu, in the Document menu, click the Gear icon next to the Grid option. Below is the list of grids supported by the Amadine app.
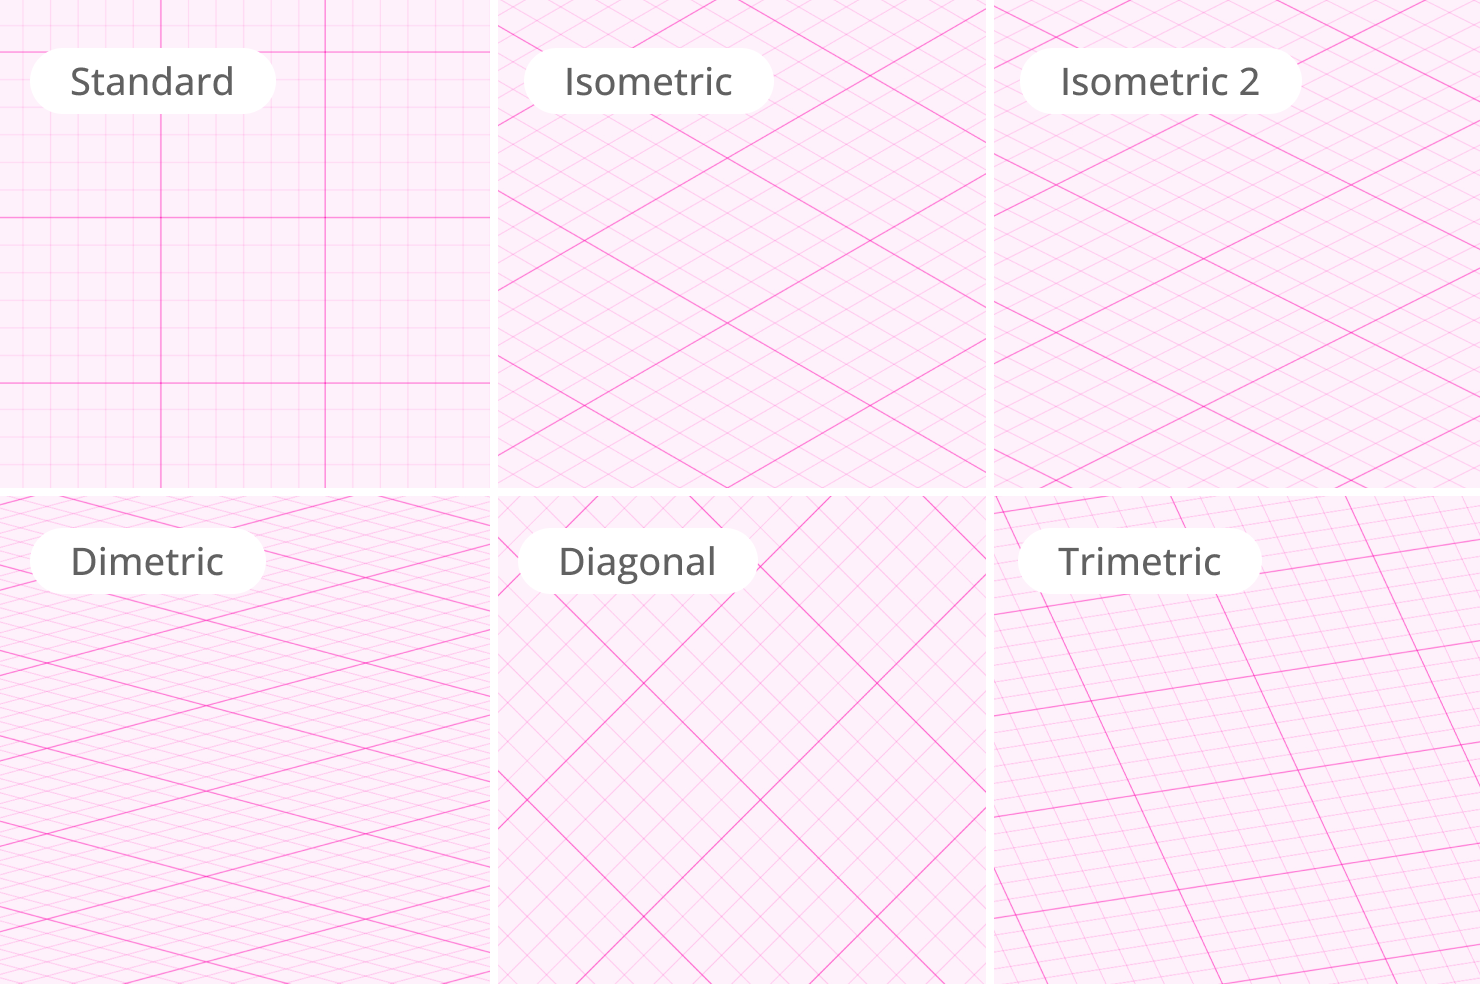
- Standard is a normal square grid and is perfect for general layouts, UI mockups, or anything that needs basic alignment.
- Isometric grid is made of vertical lines and intersecting 30° lines. When placed on an isometric grid, all the axes of an object come together at a 120° angle. This grid is ideal for any two-dimensional, or isometric, illustrations or in game design.
- Isometric 2 grid is a variation of the isometric grid. It’s used for alternative isometric drawing orientations, where the angles of lines may vary. This may be used to draw attention to a particular side or angle of an object, or for aesthetic purposes.
- In a Dimetric grid, two of the axes of an object share the same angle, while the third axis is a different angle. This type of grid is useful for technical illustrations where two of the axes are at equal angles.
- In a Diagonal grid, the lines are placed diagonally, and objects are aligned diagonally. This type of grid works well for angled visual elements, or any layout that aims for a bold look.
- Trimetric Left grid means that all three axes of an object are unequally shortened. This would be used to map a model onto a projection plane, and emphasize the left angle.
- Trimetric Right grid is a grid where three axes are unequally shortened. This kind of grid can also be used to map a model onto a projection plane, but emphasize the right angle.
How to Use Isometric Grids in Amadine
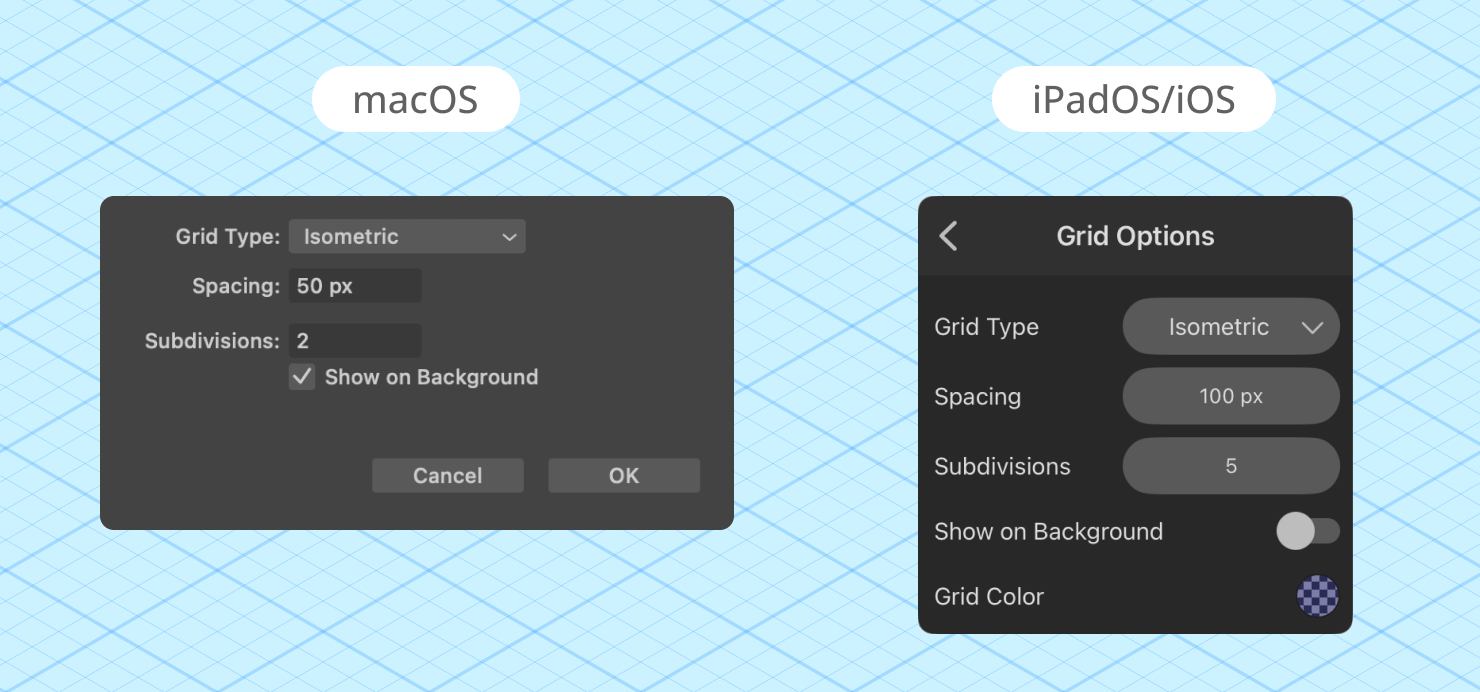
Now that you know about the different grids available to use, let’s review setting up an Isometric Grid in Amadine. For your convenience there’s both macOS and iOS/iPadOS version instructions.
- First, open the grid preferences. File > Document setup (on a Mac) or Inspector > Document (on iPad/iPhone).
- Make sure grid visibility is turned on. View > Grid (on a Mac), Inspector > Document > Eye icon next to grid (on iPad/iPhone).
- Select Isometric or Isometric 2.
- Set the Spacing interval and number of subdivisions.
- Enable the “Show Grid in Background” option by clicking the box, so you can see how to place objects aligned to the grid.
- To help align shapes perfectly to isometric angles, go Inspector > Document > toggle “Snap to Grid” for iPad/iPhone or use View > Snap to Grid for a Mac.
Please note that you can always adjust the color and transparency of the grid for the most comfortable work in the program’s preferences.
Each grid type is built into Amadine, and can be customized in the grid settings. Users can select the spacing of grid lines, as well as the number of subdivisions. Users are also able to decide whether to show the grid in the background by simply selecting this option.
After these steps, you’re ready to use the Isometric Grid to bring your 3-dimensional design to life!
When to Use Isometric and Other Grid Types in Design
Each grid has its purpose in graphic design work. For product mockups and stylized icons, Isometric and Isometric 2 grids are popular as these can help provide a highly customized graphic design look. If you’re working on a logo design or a UI wireframe, a standard grid will do the job. And if you’re designing an abstract pattern or a poster layout, try a diagonal grid for a fresh look.
In contemporary design workflows, isometric grids extend far beyond illustration—they have become a staple in product communication. This approach is particularly valuable for creating SaaS visuals, explainer graphics, architectural diagrams, and technical documentation, where clarity and spatial logic are critical. By maintaining consistent scale across axes and eliminating perspective distortion, isometric compositions allow complex systems to be presented in a clean, structured, and highly readable format, making them ideal for UI storytelling, onboarding visuals, and data-driven interfaces.
For technical schematics or engineering style visuals, dimetric and trimetric grids are ideal to give emphasis to particular portions or angles of a 3-D object.
No matter what you’re designing, Amadine lets users easily switch between grids, based on the project type.
Final Thoughts
Now knowing more about grids and how they enhance design, hopefully your creative juices are flowing. And, since you have access to grids in Amadine, you can start playing with them right away.
Selecting the right grid for your project will make your design work appear more balanced and professional. Rather than guessing where to place objects, grids provide a reliable structure to keep things aligned and proportional. This can streamline your workflow and free up your creativity, since you don’t have to waste time moving things around manually.
Take the chance to experiment with the seven grids offered in Amadine. The right grid depends on your artistic style, and what you need to convey in your project. Try out a simple column grid for a newsletter layout, and when you have the hang of it, try creating an isometric illustration using the isometric grid.
Pretty soon you will wonder how you ever designed without grids, and you’ll find that using grids in Amadine helps you produce your best work.